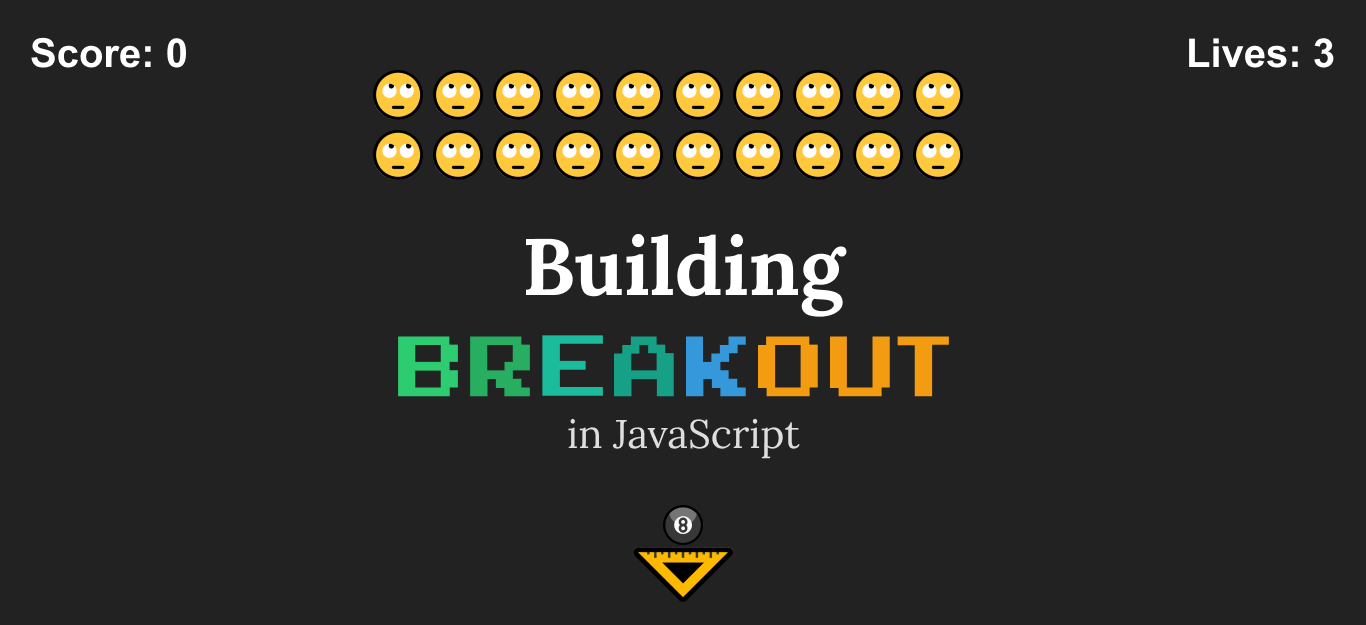
Recreate Breakout with Emojis in JavaScript
Ever since I started coding, I always dreamt about coding my own games. This hasn’t stopped since then and now I’m at a level where I can write simple arcade-style games such as the famous Breakout. It is interesting to see how we can implement the same using only JavaScript.
We are not going to start from zero though. Making even the simplest games can take up some time if you’re going with vanilla JavaScript. You don't just have to take care of assets like images, sounds, or animations but you also have to think about rendering, physics, or user input. To make things a little bit more simple we are going to make use of a game framework written in Javascript called Phaser. That way, we can focus on creating game features rather than dealing with core functionalities like handling user input.

Setting Up The Project
Before diving into coding, we are going to need a couple of things at our disposal. To make things even work, a web server will be needed. To serve files, I’m using http-server installed globally. That way, you can type http-server into the command line to start a web server in your directory. To install it globally, you can run npm i http-server -g.
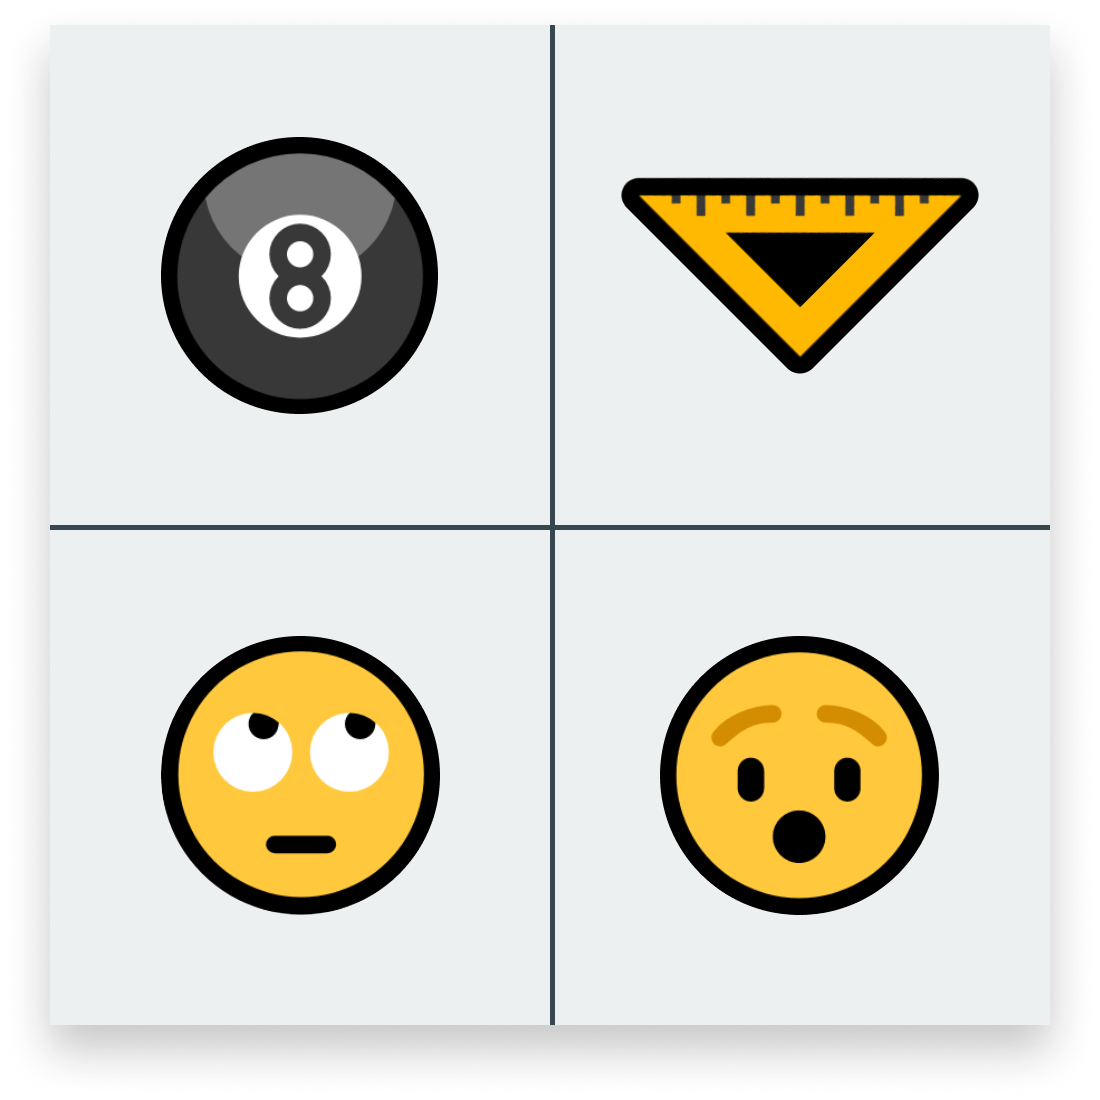
Next, we are going to need some images for the game elements. I went to emojipedia to create screenshots from different emojis, namely:
- 📐 triangular ruler for the paddle
- 🎱 pool 8 ball for the ball
- 🙄 rolling eyes for the bricks
- 😯 hushed face for the destroyed state of the bricks
I’ve rotated the paddle by 45° and made it to 100 x 55 px. I resized the ball to be 40 by 40 and I made the bricks 50 x 50 px. In the end, we are left with these four assets:
Now that we have every asset in place, we can create the project structure. Create an index file that holds references to the Phaser library and our JavaScript file where we will write our game:
<!DOCTYPE html>
<html lang="en">
    <head>
        <meta charset="UTF-8" />
        <meta name="viewport" content="width=device-width, initial-scale=1.0" />
        <meta http-equiv="X-UA-Compatible" content="ie=edge" />
        <title>Breakout</title>
        <style>* { margin: 0; overflow: hidden; }</style>
    </head>
    <body>
        <script src="https://cdn.jsdelivr.net/npm/[email protected]/dist/phaser.min.js"></script>
        <script src="breakout.js"></script>
    </body>
</html>We don’t need to worry about adding any additional elements as Phaser will create a canvas for us. Everything we have for the game will be drawn on that. You can pull in the latest version of Phaser from CDN and apply some styles to remove margins and scrollbars. We can also create a folder for the assets and of course breakout.js. This leaves us with the following project structure:

Configuring Phaser
Every Phaser game starts with a configuration object. It will hold some very basic information about our canvas. It’s also a good time to define variables for each game object that we will use throughout the game.
let ball;           // Game object for the ball
let paddle;         // Game object for the paddle
let bricks;         // Game object for the bricks
let scoreText;      // Game object for showing score
let livesText;      // Game object for showing lives
let startButton;    // Game object for the start button
let gameOverText;   // Game object for showing "Game Over!"
let wonTheGameText; // Game object for showing "You won the game!"
let rotation;       // Flag will be used to define which direction the ball should rotate

let score = 0;      // Variable holding the number of scores
let lives = 3;      // Variable holding the remaining lives

// We are going to use these styles for texts
const textStyle = {
    font: 'bold 18px Arial',
    fill: '#FFF'
};

const config = {
    type: Phaser.AUTO,
    width: window.innerWidth,
    height: window.innerHeight,
    backgroundColor: '#222',
    physics: {
        default: 'arcade',
        arcade: {
            // debug: true - Set debug: true if you want collision boxes to be drawn
            checkCollision: {
                up: true,
                down: false,
                left: true,
                right: true
            }
        }
    },
    scene: {
        preload,
        create,
        update
    }
};

const game = new Phaser.Game(config);Apart from the individual game objects, we can also create a constant for the text styles. Lastly, the config object will be passed to Phaser.Game to initialize the game. This configuration object takes in the following properties:
typewill be used to tell Phaser which renderer to use. UsingPhaser.AUTOwill choose WebGL if available. Otherwise, it will fall back to canvas.- The
widthandheightproperties alongside withbackgroundColorare used to set the corresponding styles for the canvas element. - The
physicsobject is used to tell which physics system to use. It can be eitherarcade,impactormatter. Based on the type of game we are creating, we’re going to usearcade. Here you can also pass another object with the name of the physics system to further configure it. By settingdebugtotrue, you can enable collision boxes to be drawn for the sprites. checkCollisionwill be responsible for checking collisions on the world boundaries. We want to check for every side except for the bottom. This means the ball can fall through the screen to the bottom but not through the top or left and right side.
A Phaser game is made out of scenes. You can think of scenes as different phases of a game. You can have a scene for the loading screen, you can have one for the main menu or for the game itself. This is what the scene object is used for. We can define here multiple scenes inside an array, but since we only have the game itself, we can also pass in a single object. Each scene is controlled by a different set of functions:
preloadis used for loading in assets such as images or soundscreateis used for adding game objects to the sceneupdateis called indefinitely and is used for animations or checks for conditions that can happen in any frame, such as the ball falling down
We used ES6 method shorthand which means we will need to define the corresponding functions for each property; one for preload one for create, and one for update. If your fire up your server and open your localhost, you will have an empty full-screen canvas.

Preloading Assets
To load in our assets we can use the Phaser Loader plugin’s image method:
function preload() {
    this.load.image('paddle', 'img/paddle.png');
    this.load.image('brick', 'img/brick.png');
    this.load.image('destroyed', 'img/destroyed.png');
    this.load.image('ball', 'img/ball.png');
}This is all it takes to load in every asset. this references the current scene. Inside image, we pass a key that we can later use to reference an asset, then we define the path for it.
Creating The World
To create the world we need to add a create function that will add all game objects to our scene. Implementing it will probably be the longest step but once in place, adding the game functionality will be a breeze. Let’s start with the paddle:
function create() {
    paddle = this.physics.add.image(this.cameras.main.centerX, this.game.config.height - 50, 'paddle')
        .setImmovable();
}We can add image objects by calling this.physics.add.image, passing in the x and y position and the key we created inside the preload function. We assign this to the paddle variable we defined at the beginning, since we are going to make use of it later.
To center it horizontally, we can get the middle of the screen with cameras.main.centerX. To display it at the bottom, we get the height of the canvas – 50px. We also call setImmovable to tell Phaser this body can’t be moved by collisions. Now we can move onto the ball:
ball = this.physics.add.image(this.cameras.main.centerX, this.game.config.height - 100, 'ball')
    .setCollideWorldBounds(true)
.setBounce(1);Same as with the paddle, we center it horizontally and we position it just above the paddle on the vertical axis. We also want the ball to collide with the world boundaries and bounce back from them, this is what we achieve with the function chaining. We’ve left with the bricks:
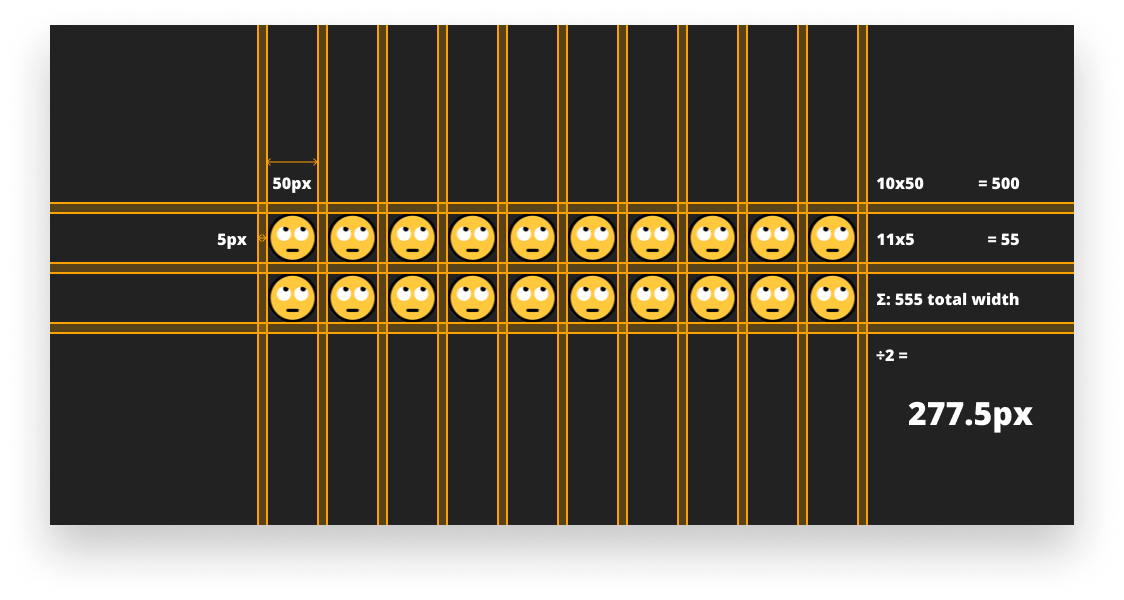
bricks = this.physics.add.staticGroup({
    key: 'brick',
    frameQuantity: 20,
    gridAlign: { width: 10, cellWidth: 60, cellHeight: 60, x: this.cameras.main.centerX - 277.5, y: 100 }
});For them, we are using a staticGroup. The key references our asset’s name. frameQuantity is used for the number of times the image will be displayed and gridAlign is used for alignments:
widthis used for the number of items displayed on one line. Since we want to display 20 items on two lines, we can use a 10×2 grid.cellWidthandcellHeightis for each individual item. The image itself is 50x50px and we want 5px paddings on each side so we can go with a value of60. To center it horizontally, we getcenterX– (half of the width of the group). Lastly I also positioned it 100px from the top.
Displaying texts
Displaying the user interface can be done in 1–1 line:
scoreText = this.add.text(20, 20, 'Score: 0', textStyle);
livesText = this.add.text(this.game.config.width - 20, 20, `Lives: ${lives}`, textStyle).setOrigin(1, 0);We can create texts using the this.add.text method. It takes four parameters: the x and y position, the text itself, and an optional styles object. Score will be displayed on the top left corner while “lives” will be on the top right.
The anchor point for the texts is on the top left corner by default, so to correctly position “lives”, we need to move the anchor to the top right corner. This is what setOrigin is supposed to do. While here, let’s also add the game over and winning texts:
gameOverText = this.add.text(this.cameras.main.centerX, this.cameras.main.centerY, 'Game over!', textStyle)
    .setOrigin(0.5)
    .setPadding(10)
    .setStyle({ backgroundColor: '#111', fill: '#e74c3c' })
    .setVisible(false);

wonTheGameText = this.add.text(this.cameras.main.centerX, this.cameras.main.centerY, 'You won the game!', textStyle)
    .setOrigin(0.5)
    .setPadding(10)
    .setStyle({ backgroundColor: '#111', fill: '#27ae60' })
.setVisible(false);We want to center them on the world. Since we have the anchor positioned on the top left corner again, we need to move it to the middle with setOrigin(0.5). I also added some padding and overrides for the default styles with setStyle. And as we don’t want them to be displayed at the start of the game, we can hide them with the setVisible method.

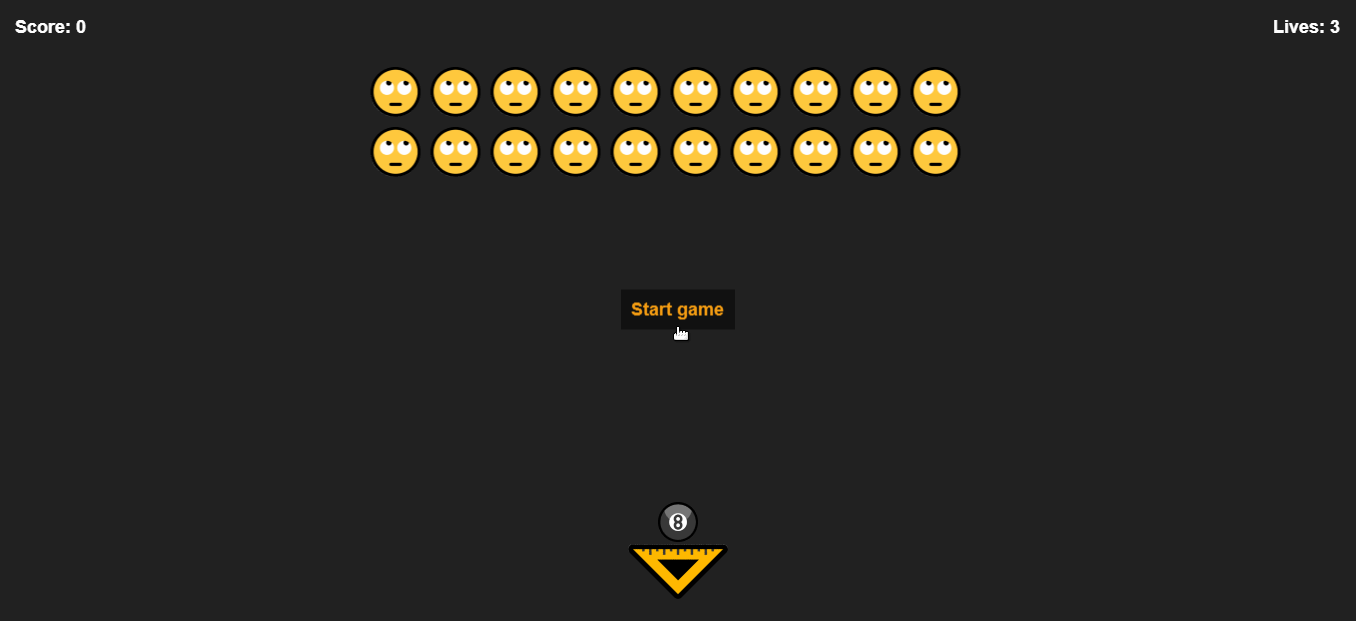
We are left with the start button. Just like for the previous two, we want to set some styles to it:
startButton = this.add.text(this.cameras.main.centerX, this.cameras.main.centerY, 'Start game', textStyle)
    .setOrigin(0.5)
    .setPadding(10)
    .setStyle({ backgroundColor: '#111' })
    .setInteractive({ useHandCursor: true })
    .on('pointerdown', () => startGame.call(this))
    .on('pointerover', () => startButton.setStyle({ fill: '#f39c12' }))
.on('pointerout', () => startButton.setStyle({ fill: '#FFF' }));To make it act like a button we can register inputs by calling setInteractive. Adding useHandCursor will show a pointer when hovered instead of the default cursor. We can also define different event listeners on it using the on method. For hover, we can set a different fill color. pointerout will be the blur event where we set back the style. On click — which is handled by pointerdown — we call the startGame function.

Starting The Game
Now that we have everything on screen we can start implementing the gameplay logic. When we hit start, we want the following things to happen:
- Remove the start button
- Shoot out the ball
- Move the paddle to the position where the cursor is
function startGame() {
    startButton.destroy();
    ball.setVelocity(-300, -150);
    rotation = 'left';

    this.input.on('pointermove', pointer => {
        paddle.x = Phaser.Math.Clamp(pointer.x, paddle.width / 2, this.game.config.width - paddle.width / 2);
    });
}We can remove the start button by calling destroy on it. To shoot out the ball we can apply a force using setVelocity. It takes in two forces, one on the x and one on the y axis. We also set the rotation to left which we will later use to rotate the ball as it flies.
Finally, to move the paddle we can add an event listener on the whole scene with input.on. Inside the callback, we set the paddle’s x position to the mouse x position. To avoid moving it outside of the screen, we force pointer.x to be between a min and a max value. This is done using the Math.Clamp method.
Adding Collision Detection
Since there’s no collision, the ball just flies around without any purpose. We want two collisions to happen: one between the ball and the bricks and one between the ball and the paddle. To create these collisions, add the following two lines as the last thing in your create function:
this.physics.add.collider(ball, bricks, brickHit, null, this);
this.physics.add.collider(ball, paddle, paddleHit, null, this);add.collider expects 5 params:
- The two objects which between the collision happens
- A callback function that will run whenever the two objects collide
- A process callback, which will fire when the two objects intersect. It is similar to the callback function, but it must return a boolean. We can leave it
null. - The context of the callback function
When the ball collides with a brick, we run the brickHit function, when it collides with the paddle, we run the paddleHit function. Let’s see first what happens when we hit a brick:
Hitting the bricks
When a brick is hit, we want to create the following animation:

We change the brick’s texture and after a short time, we shrink it till it disappears. Of course, we also want to give some scores to the player so they don’t leave right away. Once no more bricks are left, we can display the “You won!” message.
function brickHit(ball, brick) {
    brick.setTexture('destroyed');

    score += 5;
    scoreText.setText(`Score: ${score}`);

    this.tweens.add({
        targets: brick,
        ease: 'Power1',
        scaleX: 0,
        scaleY: 0,
        angle: 180,
        duration: 500,
        delay: 250,
        onComplete: () => {
            brick.destroy();

            if (bricks.countActive() === 0) {
                ball.destroy();

                wonTheGameText.setVisible(true);
            }
        }
    });
}To switch between textures we can use the setTexture method where we pass in the key of the preloaded asset. After increasing the score, we simply re-set the text to be updated. To create the animation, we can use tween.add.
As you can see, we have a bunch of configuration options to set. targets will determine which game object will be animated. We can add easings for the animation and a duration. By setting scaleX and scaleY to 0, we can shrink it down and by using angle: 180 it will rotate it by 180° in the meantime. To stop the animation from starting as soon as the collision happens, we can also specify a delay.
Once the animation completes, we can get rid of the brick and also do a check. If there are no more bricks on the screen, we can remove the ball and display the “You won!” message.
Hitting the paddle
We could actually get away without adding any functionality for hitting the paddle as the ball will bounce off of it, since we already add.collider defined and bounce set to 1. With just a couple of lines however we can create some randomness in the game:
function paddleHit(ball, paddle) {
    let diff = 0;

    if (ball.x < paddle.x) {
        diff = paddle.x - ball.x;
        ball.setVelocityX(-20 * diff);
        rotation = 'left';
    } else if (ball.x > paddle.x) {
        diff = ball.x - paddle.x;
        ball.setVelocityX(20 * diff);
        rotation = 'right';
    } else {
        ball.setVelocityX(2 + Math.random() * 10);
    }
}If the ball’s x position is less than the paddle’s x position, it means that the ball hit the left side of the paddle. In this case, we want to apply a negative x force to shoot it to the left side. Otherwise, it hit the right-hand side in which case, we shoot it to the right. If it falls completely perpendicular to the paddle, we still want to add some x velocity to avoid shooting it straight up. We will also switch directions between the rotation based on which side of the paddle the ball falls.
Game Over
The only missing part is the update function that will handle the ball’s rotation as well as our lives to see if we’re about to lose.
function update() {
    if (rotation) {
        ball.rotation = rotation === 'left' ?  ball.rotation - .05 : ball.rotation + .05;
    }

    if (ball.y > paddle.y) {
        lives--;

        if (lives > 0) {
            livesText.setText(`Lives: ${lives}`);

            ball.setPosition(this.cameras.main.centerX, this.game.config.height - 100)
                .setVelocity(300, -150);
        } else {
            ball.destroy();

            gameOverText.setVisible(true);
        }
    }
}We can add a rotation to our ball by setting ball.rotation, based on the value of our rotation flag. The higher the value, the faster the rotation will be.

To check whether we are about to lose a life or not, we can simply check if the ball is below the paddle. If it is, we decrease the number of lives and reset the ball’s position. If we are unlucky and there’s no more life left, we are presented with the game over message.
And that’s it, we are done. If you’ve made it this far, congratulations, you’ve just made your first game in JavaScript! 🎉 If you would like to check out the whole source code, you can clone it from this GitHub repository.
Do you have experience with Phaser? What are your thoughts on the framework? Let us know in the comments! Thank you for reading through, happy gaming!


Rocket Launch Your Career
Speed up your learning progress with our mentorship program. Join as a mentee to unlock the full potential of Webtips and get a personalized learning experience by experts to master the following frontend technologies:
Courses

Game Development in JS/TS - The Complete Guide

HTML5 Game Development

Create a Survival Game in Javascript with Phaser 3
Recommended
Writing a Server Starter CLI for CS:GO With JavaScript
