Zero Configure your React-Typescript App With Parcel
When setting up a new project from scratch, making all the necessary configuration before you can start shipping features can take days if not weeks.
Setting up transpilers, compilers, preprocessors, and whatnot is a long step before you can implement something the end-user will actually get to see. To speed up repetitive tasks and processes, we were introduced to a handful of tools.
In the early days, we had task runners. First, we had Grunt, then Gulp came along. Now we have bundlers like Webpack and Rollup. They have their own place and are great tools if we want to configure every step on our way in our application. But what if we don’t? What if we are making a POC or working on a small project that we want to bootstrap as fast as we can?
Luckily, there is a solution. Parcel offers us a zero-configuration setup. That means, there is no configuration file for Parcel, unlike we have a webpack.config for Webpack or a gulpfile for Gulp. That also means that the amount of customization we can do is limited. But after all, this is what we are after, so let’s dive into setting up a React project with Typescript support. With the need for completeness, let’s also add Sass as it won’t take any additional effort.
Defining the Dependencies
First, let’s start off by pulling in parcel with npm i parcel-bundler, and have a look at our package.json file. Right at this stage, this is what my project setup looks like:

All we have at this stage is the package.json file, with only a single dependency — parcel itself. We don’t have to worry about other packages as Parcel will handle pulling in the dependencies for us.
As you can see from the explorer, I created a public folder and placed the index.html file there. I also added a start script that uses the parcel command to start a development server using our index file. The --open flag tells Parcel to open it in the browser once the server is live.
Creating the Entry Files
For index.html, we only need to include the bare minimum:
<!DOCTYPE html>
<html lang="en">
    <head>
        <meta charset="utf-8" />
        <meta name="viewport" content="width=device-width, initial-scale=1, shrink-to-fit=no" />
        <title>📦 Parcel</title>
    </head>
    <body>
        <noscript>You need to enable JavaScript to run this application 😰</noscript>
        <div id="app"></div>

        <script src="../src/index.tsx"></script>
    </body>
</html>
Since we are using React and the whole application will be rendered on the client-side, we can get away with a single container and a message for the user in case JavaScript is disabled for them.
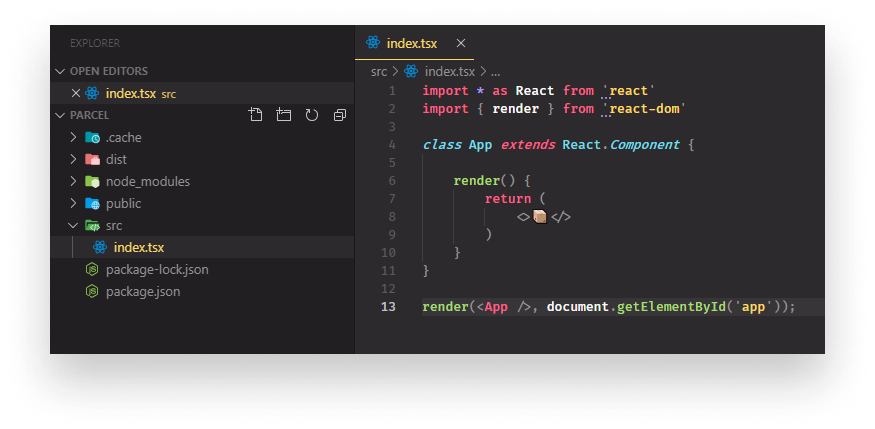
Furthermore, I added a script tag, pointing to the entry file, in a separate directory outside of the public folder. This will be responsible for rendering the application. Make sure to give it an extension of tsx to tell Parcel we would like to use TypeScript. For the sake of simplicity, the content of this file is made up of only 13 lines of code:
import * as React from 'react'
import { render } from 'react-dom'

class App extends React.Component {

    render() {
        return (
            <>📦</>
        )
    }
}

render(<App />, document.getElementById('app'));After everything in place, try running the start script with npm run start, which we defined inside our package.json file. Parcel will start reading your index.html file and will see that we have a reference to index.tsx, so it will start downloading TypeScript automatically.

Once that’s done, it will start reading the index.tsx file and will see that we have imported React and React-dom. Detecting that there are missing dependencies, it will also start an installation process for them. Once everything is installed, you should see your server up and running. In case you get any errors after building, try to rerun npm run start.
Parcel will also create some additional folders, after starting the server: dist and .cache, which means your folder structure should look something like this:

Right now, there are no types in our project for TypeScript to check and we are also missing the related configuration files. To bootstrap your app, you can use these templates for tsconfig.json and tslint.json, and modify them to your own taste:
{
    "compilerOptions": {
        "module": "esnext",
        "target": "es5",
        "lib": ["es6", "dom", "es2017"],
        "sourceMap": true,
        "allowJs": true,
        "jsx": "react",
        "moduleResolution": "node",
        "rootDir": "src",
        "forceConsistentCasingInFileNames": true,
        "noImplicitReturns": true,
        "noImplicitThis": true,
        "noImplicitAny": false,
        "strictNullChecks": true,
        "suppressImplicitAnyIndexErrors": true,
        "noUnusedLocals": true,
        "allowSyntheticDefaultImports": true,
        "experimentalDecorators": true,
        "baseUrl": "./src/",
        "skipLibCheck": true
    },
    "include": [
        "./src/**/*"
    ]
}{
"extends": ["tslint:recommended", "tslint-react", "tslint-config-prettier"],
"rules": {
"interface-name": [false],
"object-literal-sort-keys": false,
"ordered-imports": false
}
}If you would like to learn more about the options you can use, you can refer to the documentation which is pretty extensive.

Setting Up Sass
To pull in Sass for the project, all we have to do is to create an .scss file and import it into our App component:

As soon as we start modifying index.scss, Parcel will detect that we are missing the sass package so it will pull it down for us. With some magic of css animation, opening the browser you will see your app being rendered:

Building the Project
All that’s left to do, is to build the project so we can deploy it. For that, we can extend the package.json file with an additional script, which leaves us with the following:
{
    "name": "parcel",
    "version": "1.0.0",
    "scripts": {
        "start": "parcel public/index.html --open",
        "build": "parcel build public/index.html --no-source-maps"
    },
    "dependencies": {
        "parcel-bundler": "1.12.4",
        "react": "16.10.2",
        "react-dom": "16.10.2",
        "sass": "1.23.0",
        "typescript": "3.6.4"
    }
}Building the project is as simple as calling parcel build on our entry file. We can also pass in optional flags. For this setup, I want to skip source maps so I passed in the --no-source-maps flag.
For a full list of CLI flag options, please refer to their CLI documentation.
You may have also noticed that I removed the caret from the front of version numbers for each dependency. This will ensure that every time our project is pulled down and we run npm i to set everything up, we will always have the same exact versions. This way if a dependency is updated, it won’t break our codebase.
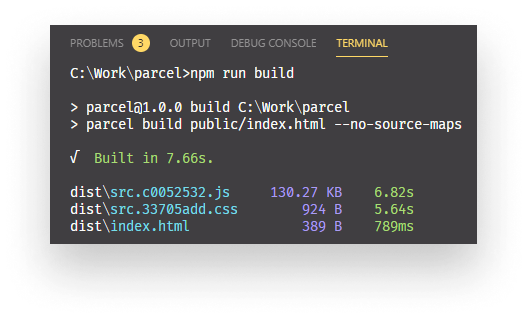
If you now run npm run build, it will build the project and populate the dist folder.

Takeaways
No configuration file, still we have a project set up with a proper tech stack. Parcel automatically pulled in the required dependencies for us and handles module bundling, transpiling, and preprocessing out of the box in its core, without exposing any configuration file to the developer. Since there are not many configuration options going on, the documentation is digestible so if you happen to have an error anyway, you most probably find the solution for it.
As advantageous this is to other bundlers, each coin has two sides and Parcel is no exception. If you need to customize your bundling and build process to your needs, then Parcel won’t be the best choice. Handling all of this on its own also means it will often do guesses. When working with Parcel, keep an eye on the packages it pulls in. If you are using your own custom i18n implementation and it finds references for it in your files, it might want to pull down an i18n package from npm that is otherwise unnecessary for your project.
Parcel is a wonderful tool for those who are looking to cut to the chase and start delivering right away. If you keep in mind what to look after when working with it, it will serve you well. 🥂

Rocket Launch Your Career
Speed up your learning progress with our mentorship program. Join as a mentee to unlock the full potential of Webtips and get a personalized learning experience by experts to master the following frontend technologies:


