What is the DOM, Actually?
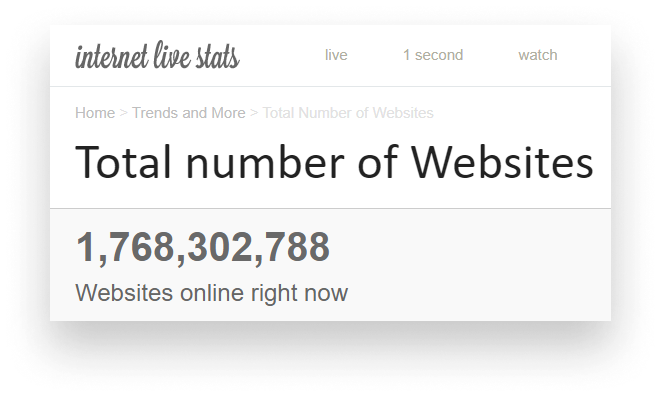
At the writing of this tutorial, there are more than 1.5 billion active websites on the internet with new sites popping up every second. They're all made up of the same model; the Document Object Model or DOM for short.
One of the core steps that is responsible for rendering a website to your screen. To better understand the DOM, however, we first need to understand how websites are rendered.

How Websites are Rendered
To give you a brief overview, the steps it takes to turn HTML, CSS, and JavaScript into Facebook, X, Medium, or this very page is called the “Critical Rendering Path”, or CRP for short. It's made up of 5 different steps, each one building on top of the previous one.

The very first step of the CRP is about constructing the DOM from the HTML markup we write. So does that mean that HTML and the DOM are not the same? Is there a difference at all?
What is the Difference Between HTML and the DOM
You might be thinking that the DOM is the HTML we write or we see when we inspect the source of a website. This is however not the case. You may also be tempted to say that it then must be the “Elements” panel in DevTools. But this is only partially true.

While DevTools certainly provides a great way to visualize the DOM, it actually does more than that. It also provides additional information on pseudo-elements that are technically not part of the DOM.
Pseudo-elements are added through CSS. Since they're not part of the DOM, this also means we can’t modify them directly through JavaScript. However, there is a workaround to read values from pseudo-elements. For example, we can use the code below to get the content of a ::before element on the .pseudo element:
// Get the content of the :before element on .pseudo
window.getComputedStyle(document.querySelector('.pseudo'), ':before')
.getPropertyValue('content')Here we used two global objects that can be used anywhere in JavaScript. window references the actual browser window, while document references the DOM. We can access the DOM by referencing the global document object. For example, to get an element with a class name of .pseudo, we can use the querySelector method:
<span class="pseudo">
    This element has a pseudo class
</span>
<script>
    const pseudoElement = document.querySelector('.pseudo')

    // Logs the properties of the DOM element to the console
    console.log(pseudoElement)
    console.log(pseudoElement.innerText)
</script>The element above has a class name of pseudo. There is also an innerText property that returns the text contained within this element.
Notice that since we're inside an HTML file, we need to wrap our JavaScript code between script tags.
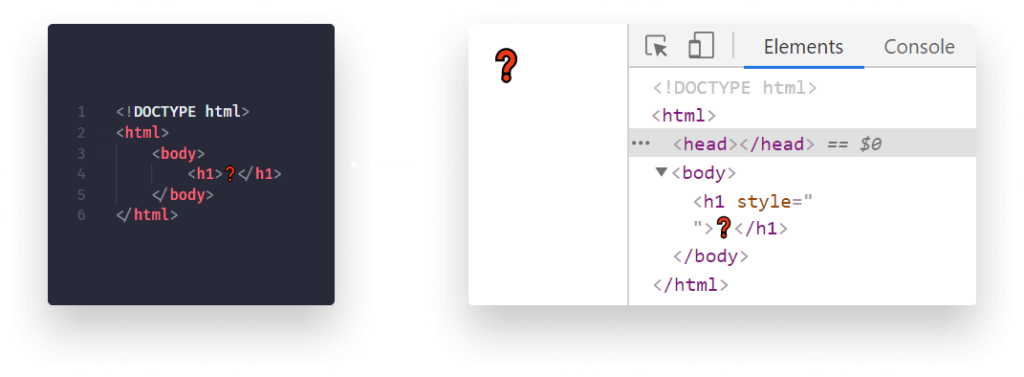
So even though the DOM looks exactly like the HTML we write, it's more than that. Imagine we forgot to close one of our tags in our HTML markup, or we completely omit a required tag, such as our <head>. If we take a look at this document in DevTools, we'll notice the tag has been automatically inserted for us. The browser corrected the invalid HTML during DOM creation.

How the DOM is Created
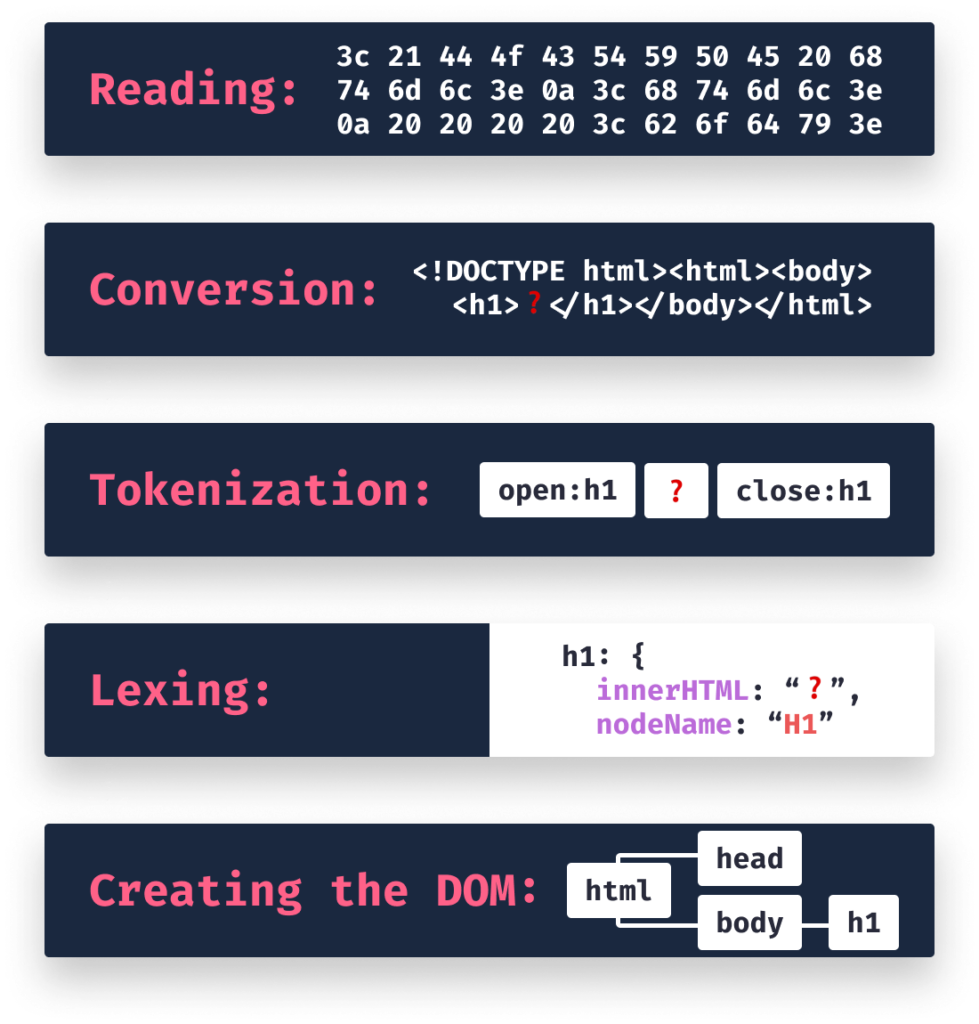
When the browser constructs the Document Object Model, it goes through five different steps. This is called the critical rendering path that we have talked about before. At the end of the fifth step, we get the DOM. Let’s see the responsibilities of each step:
First, the browser reads the HTML file that it receives from a server or from a local machine. At this stage, the file is nothing more than a string of bytes. This step is called reading.
Next, the bytes are converted into characters based on a specified encoding we provide in our <meta charset="..." /> attribute. This is usually set to UTF-8. At the end of this step, we get back the same version of the file we have just created.
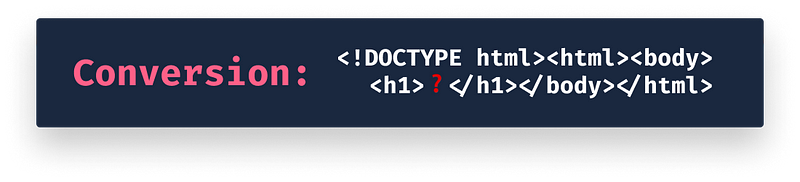
After conversion, the browser can start creating tokens for valid HTML elements — that are specified in the HTML standard — such as our <head> or our <body>. Each of these tokens will have its own set of rules. This step is called tokenization.

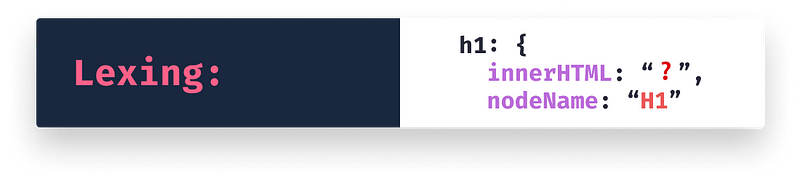
At the last (lexing) stage, the tokens are converted into objects that define their set of properties.
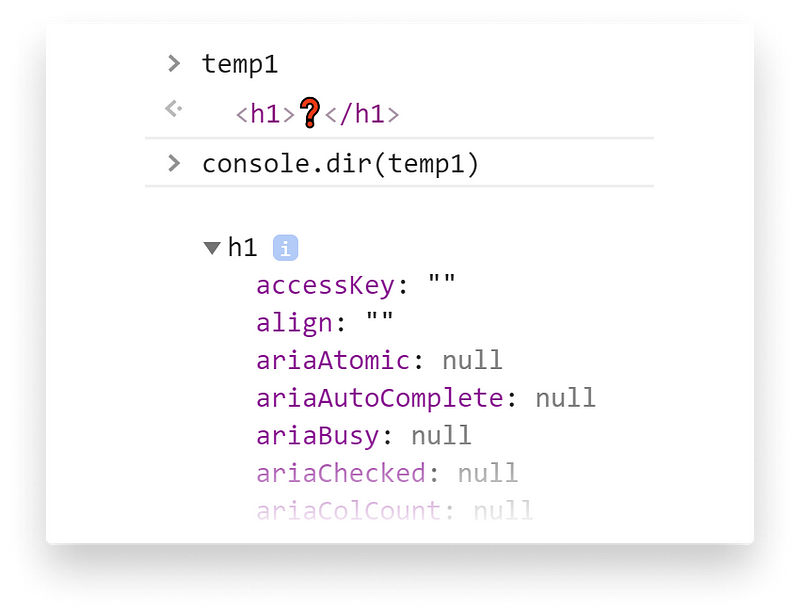
After this step, If we use console.dir, we can log out the properties of a DOM element to the console. Make sure you pass a DOM element to it (for example by using document.querySelector).
console.dirLastly, the different objects are linked together into a tree structure that defines the relationship between each of the elements. Now we also know the parent-child relationship of each element. The output of this final step is the Document Object Model:
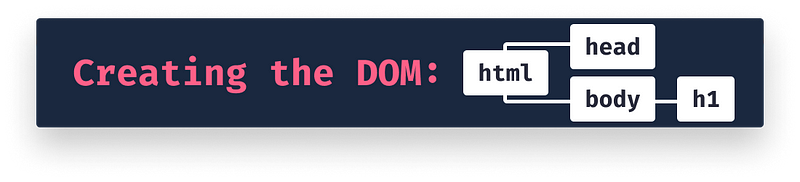
Putting everything together, these are the steps required for the browser to construct the DOM:
What DOM Can Be Used For
So what is the use of the DOM? What can we use it for? As mentioned before, when the browser constructs the DOM, it does a great job of validating invalid elements. However, this is not an encouragement to write invalid HTML. More importantly, the DOM functions as an API that can be used to manipulate HTML.
Manipulating the DOM through JavaScript
When we modify an element inside the HTML, we do not directly make changes to the HTML file. Instead, we're interacting with the DOM that in return changes our elements.
 index.js
 index.html
In the above example, we change the text and its style and also add some data attributes. To know what kind of properties are available on a DOM element, it's recommended to log them to the console, as we did in the previous example. We can see that style-related attributes are all located under the style object (using camelCase), while data attributes are all located under the dataset object. Try changing the backgroundColor property to #F0F to see how it affects the element.
If you select a DOM element in the “Elements” panel, you can also reference it inside the console with $0. You can also do right-click → “Store as global variable”.
We can also use JavaScript to dynamically create new HTML elements and attach them to the DOM that has already been created by the browser:
<div class="html-container">
    <div>DOM element will be inserted below:</div>
</div>
<script>
    const span = document.createElement('span');
    const container = document.querySelector('.html-container');

    span.innerText = '👋';

    container.appendChild(span);
</script>Copy and paste the div element into index.html in the editor to test the code, then paste the script without the script tags into index.js to add the JavaScript. We can do the opposite and remove elements by calling remove on the DOM element. Try to remove the span by calling span.remove().
Interacting with the DOM through JavaScript
Interaction is everywhere in applications. The DOM can also be used to attach event listeners in JavaScript to respond to certain user actions. For example, if someone clicks on an element or an input changes.
To achieve this, we can use the addEventListener method on a DOM element, with a type of listener and a callback function. In the below example, it'll attach an event listener to the button below. Click on the button to see the alert triggered.
- index.js
- index.html
Here we used thegetElementById method that gets an element by its ID attribute. The button above has the ID of #click-me. JavaScript has a couple of other event types, such as change or keyup:
<input type="text" id="text-input" />
Input's value: <span id="input-value"></span>

<script>
    const textInput = document.getElementById('text-input')
    const inputValue = document.getElementById('input-value')

    textInput.addEventListener('keyup', event => {
        // We can access the value of the input
        // using event.target.value
        inputValue.innerText = event.target.value
    })
</script>- Lines 5-6: We select the DOM elements using
document.getElementByIdwhich expects the ID attribute of a DOM element. - Lines 8-12: We attach a
keyupevent listener to the input element using theaddEventListenermethod. - Line 11: Inside the callback of the
addEventListener, we change the text of thespanelement by setting itsinnerTextproperty toevent.target.value, which is the value of the input field.
Try to copy and paste the code example in the editor above to test the code, similar to the previous example. If you enter a value into the input, it'll be instantly reflected next to the input.
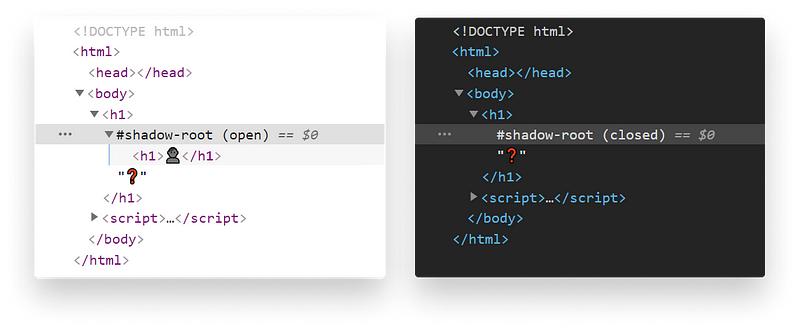
Lastly, we can not only create individual elements through JavaScript and add interactions, but we can also create an entire DOM inside our document. This is called shadow DOM.
What is the Shadow DOM
The shadow DOM is used for encapsulation. It's an important part of web components. We can use it to keep our structure, our styles, and the behavior associated with it separate from our main document.
In order to create a shadow DOM, all we have to do is call attachShadow on a DOM element:
document.querySelector('h1').attachShadow({ mode: 'open' });The mode can be either open or closed. If we choose
open: We can access the shadow DOM with JavaScript in the context of our main document.closed: We won’t be able to access the shadow DOM from the outside.
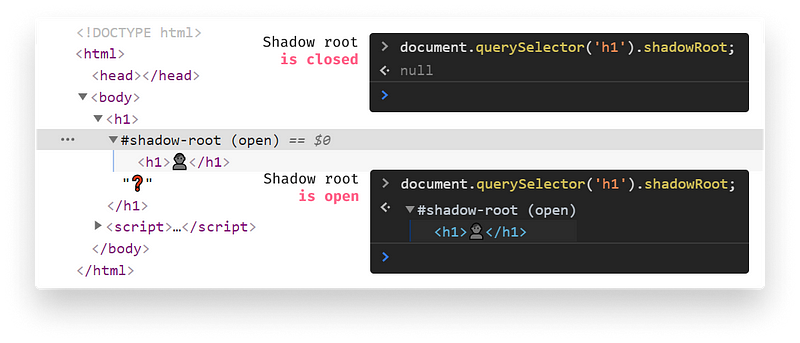
As we can see, this is not the actual DOM our browser renders, but only a part of it. It's always attached to a regular DOM node. Also, note that if we specify the mode to be “closed”, then we won’t be able to access it via JavaScript.
So What is the DOM, Actually?
To summarize, the Document Object Model — or DOM for short — is an interface to the HTML documents we write. It's a tree-structured model that is made up of nodes. Each node in the tree is an object, representing each of our HTML elements.
Essentially, it's an API for our document that we and other programs can use to read and write every aspect of it. If you'd like to learn more about HTML, be sure to check out the following roadmap:


Rocket Launch Your Career
Speed up your learning progress with our mentorship program. Join as a mentee to unlock the full potential of Webtips and get a personalized learning experience by experts to master the following frontend technologies:
Courses


Recommended
What is the Difference Between A URL And A URI?

How to Make an Effective Exit-Intent Popup in JavaScript
