How to Remake Mario in PhaserJS: Part III.
Ferenc Almasi •The is the third and last part of the Remake Mario in PhaserJS tutorial. If you missed out on the previous part, you can reach it here, and for part I., click here.
We've left off the tutorial, by generating collectible coins and goombas that can be destroyed. We've also added some motivation for the player by making them able to get scores for collecting coins and killing goombas.
In this tutorial, we're going to finish off the level by first implementing the game over functionality, and then making the player actually win the game if they reach the flag at the end of the map. If you would like to get the full source code, you can get it from the GitHub repository. And with that being said, let's jump into coding!

Table of Contents
Game Over
Right now, there's no way to lose the game, which greatly reduces the challenge. Let's look into how can we make Mario die when he hits a goomba from the side. Inside Goomba.js we had the following method:
gameOver() {
    // PHEW
    if (this.scene.player.sprite.body.touching.down) {
        this.die();

        return;
    }
}This did a check if the goomba was hit from the top. Essentially this is checking if Mario stepped on one. But what happens if it's not the case? Let's see what we want to happen:
We want Mario to jump up, play the die animation and then fly off the scene. Then we want to show the "Game Over" text on a blank canvas. To do that, extend the method with the following lines of code after the if statement:
this.scene.player.die();
this.scene.input.keyboard.shutdown();

this.scene.physics.world.removeCollider(this.scene.player.collider);
this.scene.physics.world.removeCollider(this.collider);

setTimeout(() => {
    this.scene.scene.start('GameOver');
}, 1500);First, we want to call the die method on our Player class. We haven't defined this yet, so that will be our next step after examining this method. We also want to disable the keyboard input with keyboard.shutdown. This way, the player won't be able to control Mario anymore after he dies. To make Mario completely leave the scene, you also need to remove the colliders from the world with the removeCollider method. This is why we needed to assign the collider to a property in our Player class. After 1500 milliseconds, we then show the GameOver scene. Now let's see what Player.die does.
Making Mario die
In your Player class, under your constructor, first introduce a new flag to determine if the player is already dead:
constructor(scene, x, y) {
    this.scene = scene;
    this.sprite = scene.physics.add.sprite(x, y, 'atlas')
        .setScale(2);

    this.sprite.setCollideWorldBounds(true);
    this.sprite.isDed = false;

    ...
}By default, this will take the value of false. Then in your update method, make sure you check the value of this flag, before playing any animation:
this.sprite.body.onFloor() && !this.sprite.isDed && this.sprite.play('run', true);
this.sprite.body.onFloor() && !this.sprite.isDed && this.sprite.play('idle', true);This prevents playing the running or idle animations while Mario is dead. Underneath your update method, create a new method called die. This is what we will call from the Goomba class, once Mario hits one.
die() {
    this.sprite.isDed = true;
    this.sprite.setVelocity(0, -350);
    this.sprite.play('die', true);
    this.sprite.setCollideWorldBounds(false);
}It will simply make Mario jump into the air, and then make the sprite play the die animation. Make sure you remove the world bounds collider, otherwise, Mario won't be able to leave the screen. Going back to our Goomba class, we had a reference to a GameOver scene that we haven't defined yet, so create a new file called GameOver under your scene folder, and add the following to it:
class GameOver extends Phaser.Scene {

    constructor () {
        super('GameOver');
    }

    create() {
        this.cameras.main.setBackgroundColor('#000');

        document.getElementsByClassName('game-over')[0].classList.add('visible');
    }
}

export default GameOver;All this class does is:
- It sets the background color to black
- It adds a
visibleclass to thegame-overdivthat we've created in theindex.htmlfile at the very first tutorial. Remember, this is hidden initially, and is displayed with avisibleclass.
Don't forget to import this scene into your index file and reference it in your scene array, otherwise, Phaser will not have access to it.

Winning the Game
And with that being said, all that's left to do is giving a way for the player to actually win the game. We will end the game by adding some animations to the flag at the end of the map:
We will make the flag descend and fire particles. This time, however, we don't have any animation for the flag in our atlas. Instead, we will use a tileSprite for it using our tileset. This way you can see how to use sprites directly from your tileset for inanimate objects, instead of having to use an atlas like we did for every other game object so far. First, create a new Flag class in your gameObjects folder, and import it into your Game scene:
class Flag {
    constructor(scene) {
        this.scene = scene;
    }
}

// In your Game.js create method:
this.flag = new Flag(this);In your constructor, you want to define a couple of variables:
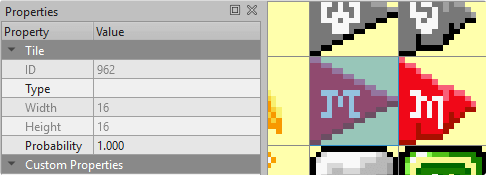
const flagObject = scene.map.getObjectLayer('flag').objects[0];
const flagCoordinates = scene.tileset.texCoordinates[962];
const flagRoot = scene.platform.getTileAt(75, 23);Just like we did for every other game object, we want to retrieve it from Tiled using the getObjectLayer method of our map. To get the sprite for the flag, we can use the texCoordinates array on our tileset. It is at the 962 index position. You can get this information from your tileset in Tiled.
To make it easier to keep track of things, you can store these index values in an object, or even create a custom function for retrieving the coordinates.
const objects = {
    flag: 962
};

scene.tileset.texCoordinates[objects.flag];

// Or you can define a custom function for improving readability
const getObjectCoordinates = object => scene.tileset.texCoordinates[objects[object]];

getObjectCoordinates('flag');The third variable is used for getting the tile at a given tile position on the world with getTileAt. We will use this variable to add a collision for a specific tile (The root of the flag). But before doing that, let's create the flag sprite using a tileSprite:
this.sprite = scene.add.tileSprite(flagObject.x, flagObject.y, 16, 16, 'tiles')
    .setOrigin(0, 1)
.setTilePosition(flagCoordinates.x, flagCoordinates.y);Using the setTilePosition method, we can make the tileSprite use the sprite of the flag. Also note that you want to pass tiles to the tileSprite function rather than the atlas this time. After creating the sprite, you want to add a collision between Mario and the root of the flag. To add a collision to a specific tile, you can use the setCollisionCallback function on it:
flagRoot.setCollisionCallback(() => {
    flagRoot.collisionCallback = null;
});For now, if you try things out, you may notice you are unable to jump on top of the box.
This is because the collision boxes are preventing us from doing so. If you remember from the first tutorial, we've defined for the platform which tiles should have collisions with setCollisionByExclusion. This function also accepts an array of tile indexes, so we can remove the left side of the flag. In Game.js, change the platform collision to the following:
- this.platform.setCollisionByExclusion(-1, true);
+ this.platform.setCollisionByExclusion([-1, 450], true);Again, to make things easier to remember, you can create a custom object for these indexes with more meaningful names, and reference those instead:
const tiles = {
    EMPTY: -1,
    FLAG_LEFT: 450,
    ...
};

const noCollisionTiles = [
    tiles.EMPTY,
    tiles.FLAG_LEFT
];

this.platform.setCollisionByExclusion(noCollisionTiles, true);Now if you go back to the game and enable collision boxes, you can see you will be able to jump on top of the big box because the collision has been removed.
Creating Particle Effects
Lastly, let's add an animation and some particle effects to the flag. Inside your setCollisionCallback function, add the following lines:
const particles = scene.add.particles('atlas', 'mario-atlas_13');
const emitter = particles.createEmitter({
    x: flagObject.x,
    y: flagObject.y - flagObject.height,
    scale:  { start: 1, end: 0 },
    speed:  { min: 50, max: 100 },
    angle:  { min: 0, max: -180 },
    rotate: { min: 0, max: 360 },
    alpha: .5
});You can create new particles by calling add.particles on your scene, with a key and a frame. We're using the last frame from our atlas. It also needs an emitter, that you can create with the createEmitter function. You can find all available options for the configuration on their official documentation. As you can see from the code example above, you have a ton of options you can tweak, all capable of taking even intervals. Below your emitter, let's also add a tween that will make the flag descend and stop the particle effect after the animation has completed:
scene.tweens.add({
    targets: this.sprite,
    ease: 'Linear',
    y: '+=60',
    duration: 800,
    onComplete: () => emitter.stop()
});

this.scene.input.keyboard.shutdown();Just like the built-in particle system, this has just as many configuration options. Make sure you set the flag's sprite as the target and call emitter.stop once the tween has completed. One cool thing you can do with tweens is specifying a string with += operations that will start the tween from the current value and adds 60 to it in our case. Again, you can disabled movements by removing keyboard inputs, and you can also call a new scene that congratulates the player for winning the game. 🎉
Conclusion
And with that, you've just finished your very first game in Phaser! You've successfully created the base gameplay mechanics of Mario! If you've reached this far, congratulations! You've learned how to create tilemaps in Tiled with various game objects, how to load them into Phaser, and make these objects interactive.
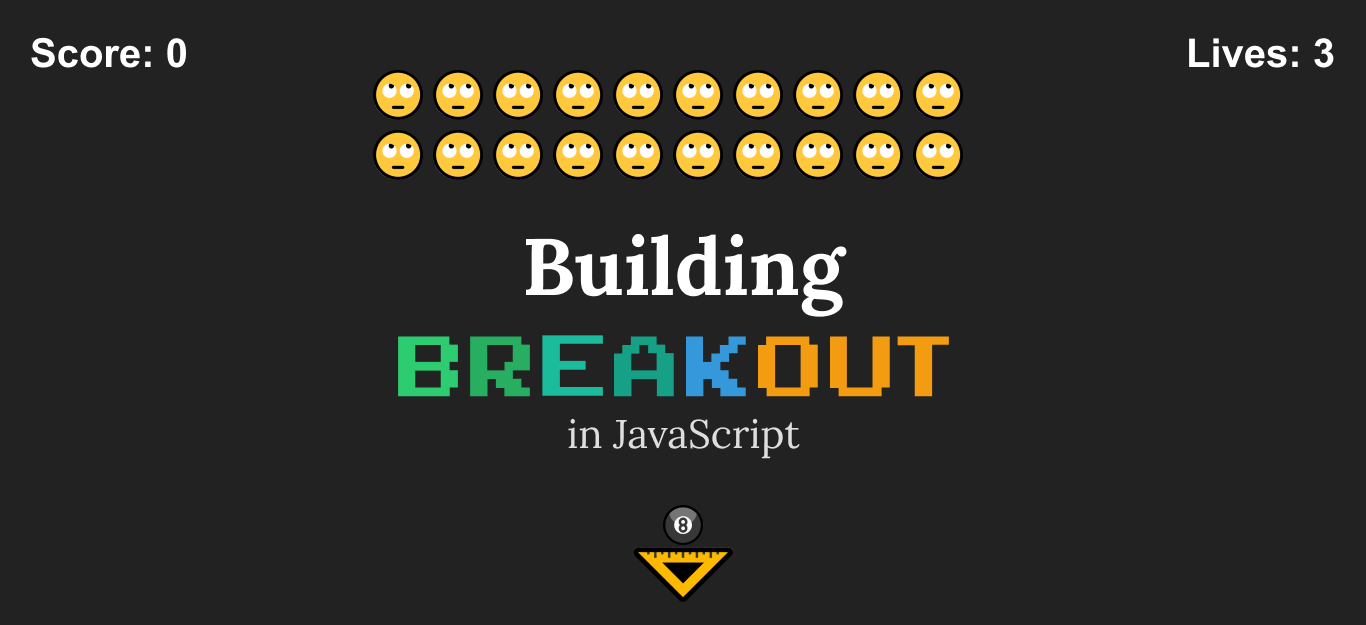
How to add a player that you can control with keyboard input, and how you can animate these sprites to bring them to life. And lastly, you now also know about tweens and particles. If you would like to continue your journey in game development, check out how you can recreate the famous Atari Breakout using Phaser:
Do you have experience building platform games in PhaserJS? Let us know your thoughts and opinions about it in the comments below! Thank you for reading through, happy coding! 🎮

Rocket Launch Your Career
Speed up your learning progress with our mentorship program. Join as a mentee to unlock the full potential of Webtips and get a personalized learning experience by experts to master the following frontend technologies:
Courses

Game Development in JS/TS - The Complete Guide

HTML5 Game Development