How to Remake Chrome's Dino Game in PhaserJS: Part II.
Ferenc Almasi •This is the second part of the Remake Dino in PhaserJS. If you missed out on the first part, you can reach it here. We've left off the previous part with managing to draw the dinosaur onto the scene and making it run, using the generated animations. If you're looking for the full project in one piece, you can get the code from the GitHub repository. In this tutorial, we are going to cover the following topics:

Table of Contents
- Making Dino Move
- Setting a State for the Game
- Spawning Stars
- Spawning Cactuses
- Updating the Score
- Summary
Making Dino Move
Let's start by giving dino the ability to jump when we press the spacebar. Create a new method in our Player class called update and add the following:
constructor(scene, x, y) {
    ...
    this.isDead = false;
    return this;
}

update(input) {
    if (!this.isDead && this.sprite.body.onFloor()) {
        this.sprite.play('run', true);
    }

    if ((input.space.isDown && this.sprite.body.onFloor())) {
        this.sprite.setVelocityY(-500);
        this.sprite.play('idle', true);
    }
}Note that I've defined another property for the class in the constructor called isDead. This will check if the player has died. We only want to allow movements if the player is still alive, so we need to include it in our if checks. This update method does two things:
- Checks if the player is alive, and is on the floor, using
body.onFloor, and if so, it plays therunanimation. - It also checks if we are pressing the space bar, and if the player is on the floor, it sets its
yvelocity to -500, essentially making the sprite jump up, and also plays theidleanimation.
Make sure you check if the body is on the floor for the jump as well, otherwise you can press jump again mid-air.
So where is our input coming from? We can set it up in the create method of our dino scene:
create() {
    this.player = new Player(this, 25, 460);
    this.inputs = this.input.keyboard.createCursorKeys();
}This will return a key state object, that we can use in the update method of our Player class. At the end of the previous part, we've made the dinosaur run using the update method of our scene. Replace that code with the following now:
update() {
- this.player.sprite.play('run', true);
+ this.player.update(this.inputs);
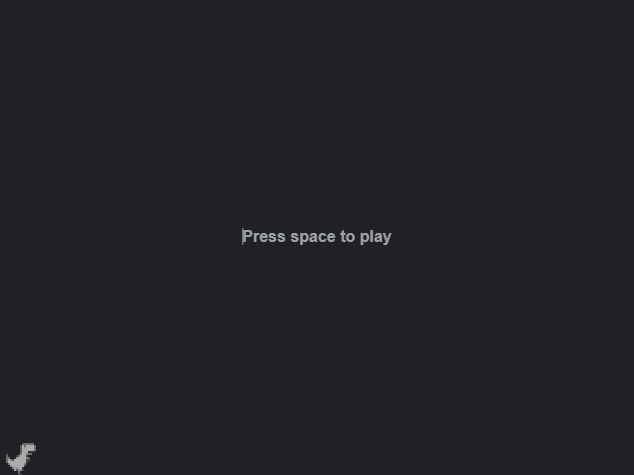
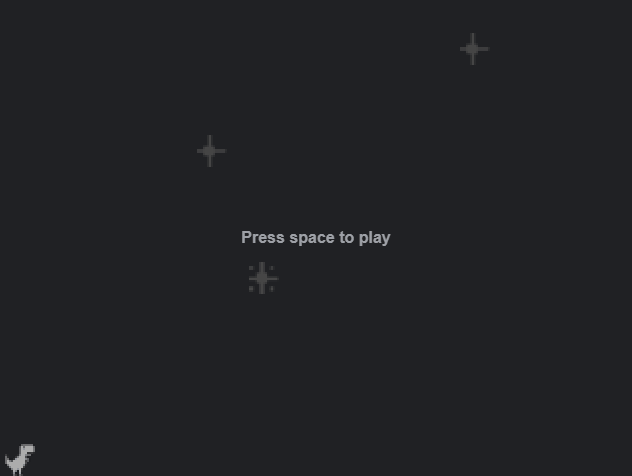
}Now you should be able to press space to make the dinosaur jump. There's only one problem. The "Press space to play" text is still showing, so let's fix that by setting up the game state.

Setting a State for the Game
To keep track of the different states in the game, let's create a new state object in the constructor of our Dino scene:
constructor() {
    super('Dino');

    this.state = {
        started: false
        gameOver: false
    };
}For now, all we need are two flags to check if the game has been started, or if the game is over. Both of them will be false initially. We can use these flags in the update method to decide if we want to start updating the player or not:
update() {
    if (this.inputs.space.isDown && !this.state.started && !this.state.gameOver) {
        this.state.started = true;
    }

    if (this.state.started) {
        this.player.update(this.inputs);
    }
}This will ensure that the dinosaur will start in a standing position and will only start running once the game has been started, which we can do by pressing the space bar. But the "Press space to play" is still there, so let's introduce another flag to our state and get rid of it.
Inside our update method, we can check if the UI has already been updated or not. The reason we need this flag is because the update method runs constantly, and we want to avoid keep updating the UI once it has already been updated.
if (this.state.started) {
    this.player.update(this.inputs, delta);

    if (!this.state.UIUpdated) {
        this.updateUI();
    }
}#Upda
Updating the UI
As you can see, I've outsourced the functionality to a method called updateUI, so let's see what is inside of it:
updateUI() {
    hidePressToPlay();
    hideGameOver();

    showScore();

    this.state.UIUpdated = true;
}We want a couple of elements to be updated. Namely, we want to hide the "Press space to play" text, and the "Game Over" as well in case the player has died. Then we want to show the score and set the UIUpdated flag to true to avoid keep updating the UI. To make updating the UI elements easier, we can outsource these functionalities as well to separate files. Inside the top of your imports, add the following two lines:
import { showScore } from './ui/score'
import { hidePressToPlay, hideGameOver } from './ui/gameState'And let's create the appropriate files for them. We will need a ui folder with a score.js and gameState.js. For the scoring mechanism, we can create methods for showing/hiding the score and the highscore:
const score = {
    container: document.querySelector('.score'),
    current: document.querySelector('.current-score'),
    best: document.querySelector('.highscore')
}

export const showScore = () => score.container.classList.remove('hidden');
export const hideScore = () => score.container.classList.add('hidden');
export const showHighScore = () => score.best.classList.remove('hidden');Note that I've created a score object at the top of the file to hold references to DOM elements. This way if anything changes, we only need to update the selector in one place.
As for the gameState, we can take a similar approach; outsource the selectors into one place, and create separate functions for showing/hiding the elements:
const state = {
    pressToPlay: document.querySelector('.press-to-play'),
    gameOver: document.querySelector('.game-over')
}

export const showPressToPlay = () => state.pressToPlay.classList.remove('hidden');
export const hidePressToPlay = () => state.pressToPlay.classList.add('hidden');

export const showGameOver = () => state.gameOver.classList.remove('hidden');
export const hideGameOver = () => state.gameOver.classList.add('hidden');Spawning Stars
To make the scene more alive let's also add a couple of stars. For this, we already have them loaded inside of a spritesheet. To keep the logic of spawning stars separated from the rest of the game, let's create a new class for this, just as we did for the Player class:
class Star {
    constructor(scene) {
        const randomSprite = Math.floor(Math.random() * 2);
        const randomXPosition = Math.floor(Math.random() * 620) + 20;
        const randomYPosition = Math.floor(Math.random() * 400) + 20;

        this.sprite = scene.physics.add.staticSprite(randomXPosition, randomYPosition, 'tiles', randomSprite)
            .setScale(2);
    }
}

export default Star;All we need this time is a constructor, that again, receives the scene and adds a staticSprite at a random x and y position. The reason we want a staticSprite is to make the stars immovable, and unaffected by gravity.
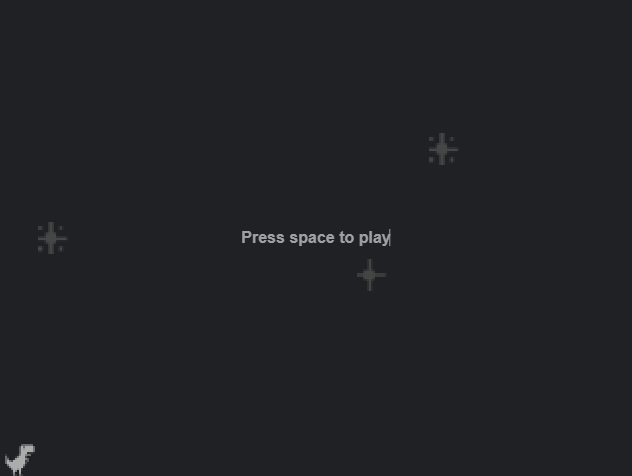
Note that using Math.random, we can also select a random sprite to alternate between the two types of stars we have. Also, to keep the stars in the scene, we want to use smaller numbers for Math.random, than the width and height of the canvas. Let's go back to our dino Scene and add a couple of them inside our create method:
import Star from './objects/Star'

class Dino extends Phaser.Scene {
    constructor() {
        super('Dino');

        this.state = {
            ...
            numberOfStars: 3
        };
    }

    create() {
        this.player = new Player(this, 25, 460);

        for (let index = 0; index < this.state.numberOfStars; index++) {
            new Star(this);
        }

        this.inputs = this.input.keyboard.createCursorKeys();
    }
}For this, we can introduce another state to define the number of stars as a config. If we take a look at our scene now, every time the game is refreshed, we should have 3 different stars drawn to the canvas at random locations:
Spawning Cactuses
The main elements are still missing from the scene: cactuses. Just as for the Player or the Star class, it's best to create one for the cactus as well:
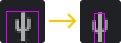
class Cactus {
    constructor(scene) {
        this.scene = scene;
        this.sprite = scene.physics.add.sprite(700, 470, 'tiles', 2)
            .setScale(2)
            .setSize(5, 15)
            .setCollideWorldBounds(true);

        this.sprite.body.customBoundsRectangle.left = -100;
        this.sprite.body.customBoundsRectangle.right = 740;
    }
}

export default Cactus;Unlike the stars, this should not be a staticSprite. We want it to be affected by gravity and collide with both the world bounds and the player. We also want to set a custom size using setSize to make the bounding box better fit the shape of the sprite.
Note that we also want it to be placed outside of the world, outside of the player's view. Because of this, we need to extend the left and right side of the world using a customBoundsRectangle, otherwise, the cactus would collide with the world's bounds. Now to actually spawn the cactuses, we want to go back to our scene and add a couple of new elements to our state, and also extend the update method:
// Don't forget to import the class at the top of your file
import Cactus from './objects/Cactus'

this.state = {
    ...
    cactuses: [],          // An array to hold the cactuses
    cactusDistance: 2000,  // The distance in seconds between two cactuses
    timer: {
        cactusSpawnLoop: 0 // A timer to keep track of the time of last spawn
    }
};

update(time, delta) {
    this.state.timer.cactusSpawnLoop += delta;

    ...

    if (this.state.started) {
        ...

        if (this.state.timer.cactusSpawnLoop > this.state.cactusDistance) {
            this.state.cactusDistance = Phaser.Math.Between(5000, 1000);
            this.state.cactuses.push(new Cactus(this));
            this.state.timer.cactusSpawnLoop = 0;
        }
    }
}Note that the update method accepts two arguments: the current time, and delta time in milliseconds, which calculates the time since the last frame.
To create frame-rate independent movement, we want to increase our timer loop with the value of delta. If this timer is greater than the distance we've set in the state, we can push a new cactus to state.cactuses. The reason we want to hold cactuses in an array is that we also want to reference all of them at once when we need to stop them from moving when the game is over.
We also need to reset the timer and notice that we can randomly increase/decrease the distance from the next cactus using Phaser.Math.Between. This will give back a random number between 5000 and 1000.
The only thing missing is animating them. We want to move them from the right, all the way to the left. We can achieve this with this one line:
constructor(scene) {
    ...
    this.update();
}

update() {
    this.sprite.setVelocityX(-150);
}
Updating the Score
To finish off this tutorial, let's also update the score so at least we know how far we've got. To do this, let's add a new property to our state to keep track of the current score:
this.state = {
    ...
    score: 0
};Then open our Player class, and add a new property there as well, called timer:
class Player {
    constructor(scene, x, y) {
        this.scene = scene;
        this.timer = 0;
        ...
    }
}Inside the update method of the class, we can increase this timer with delta, just like we did for the cactuses, and update the score based on that:
// Don't forget to import the helper function at the top of your class
import { updateScore } from '../ui/score'

// Don't forget to pass `delta` to the `update` method here, and inside the scene
update(input, delta) {
    this.timer += delta;

    ...

    if (this.timer > 100) {
        this.timer = 0;
        updateScore(this.scene.state);
    }
}This will call the updateScore method every 100 milliseconds. But we haven't defined this function yet, so let's open score.js and add this new function:
export const updateScore = state => {
    const currentScore = Number(score.current.innerText);

    state.score = currentScore + 1;
    score.current.innerText = (currentScore + 1).toString().padStart(6, '0');
};This function will take the current state as a parameter, and updates both the DOM and the state with +1 as well. Note that we want to always have six digits for the score. This is why we need to use padStart, to prefix the current score with the necessary number of zeroes.

Summary
And that is all for this tutorial. If you've reached this far, congratulations, you've learned a lot! 🎉 We've looked into how to take user input, how to set state and update the UI of the game, and how to spawn different game objects.
This tutorial is broken down into three sections. Make sure you continue your journey with part III:
If you missed the first part, you can reach it here.
Do you have experience building platform games in PhaserJS? Let us know your thoughts and opinions about it in the comments below! Thank you for reading through, happy coding! 🎮

Rocket Launch Your Career
Speed up your learning progress with our mentorship program. Join as a mentee to unlock the full potential of Webtips and get a personalized learning experience by experts to master the following frontend technologies:
Courses

Game Development in JS/TS - The Complete Guide

HTML5 Game Development

