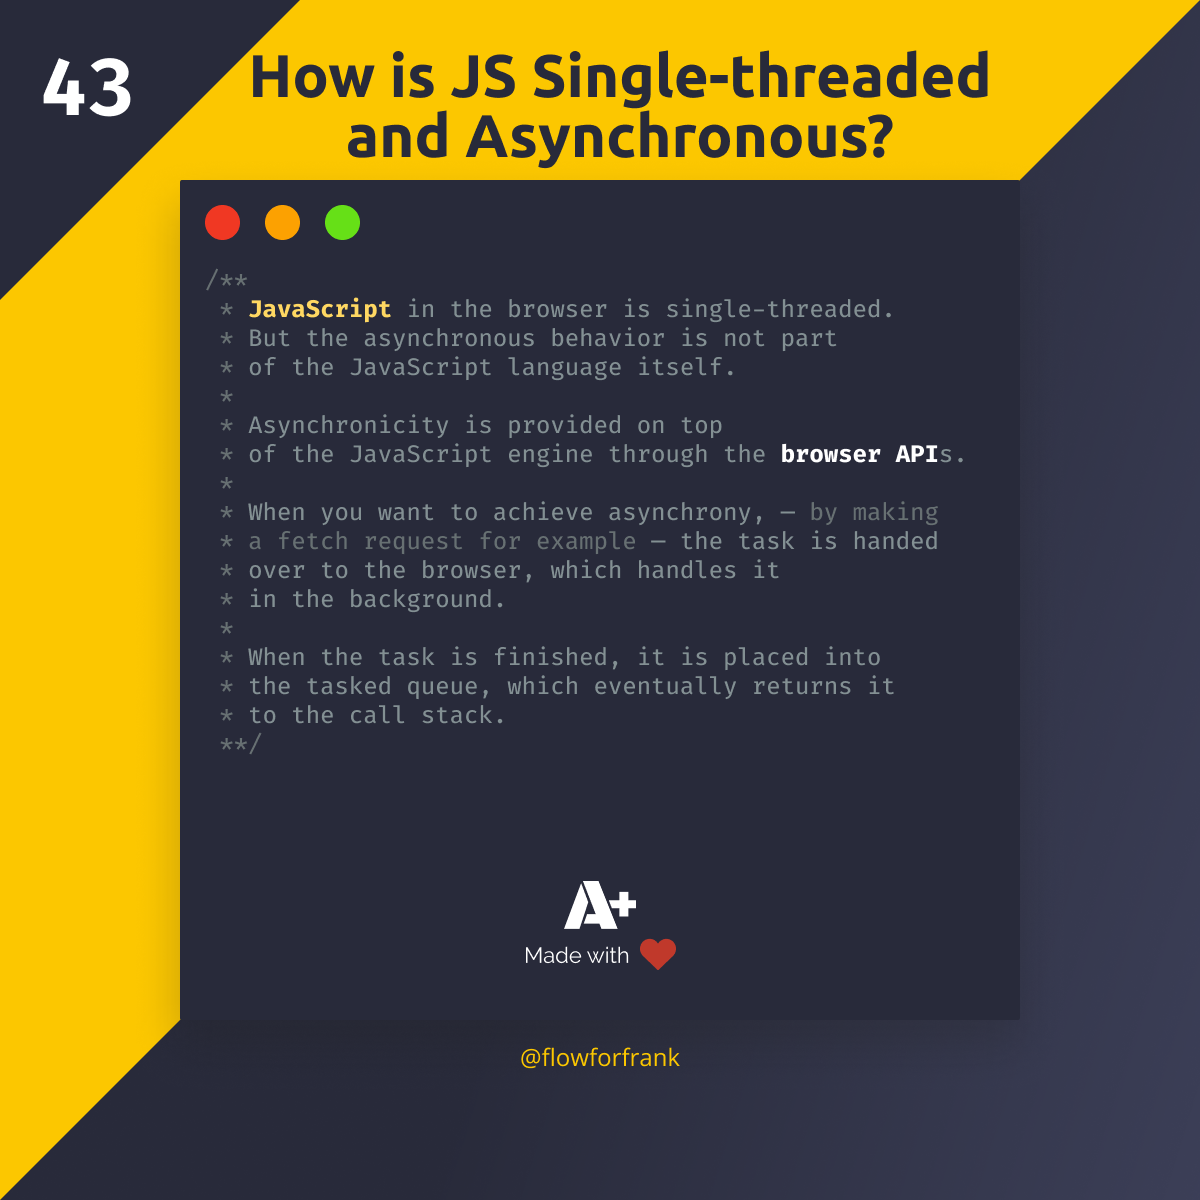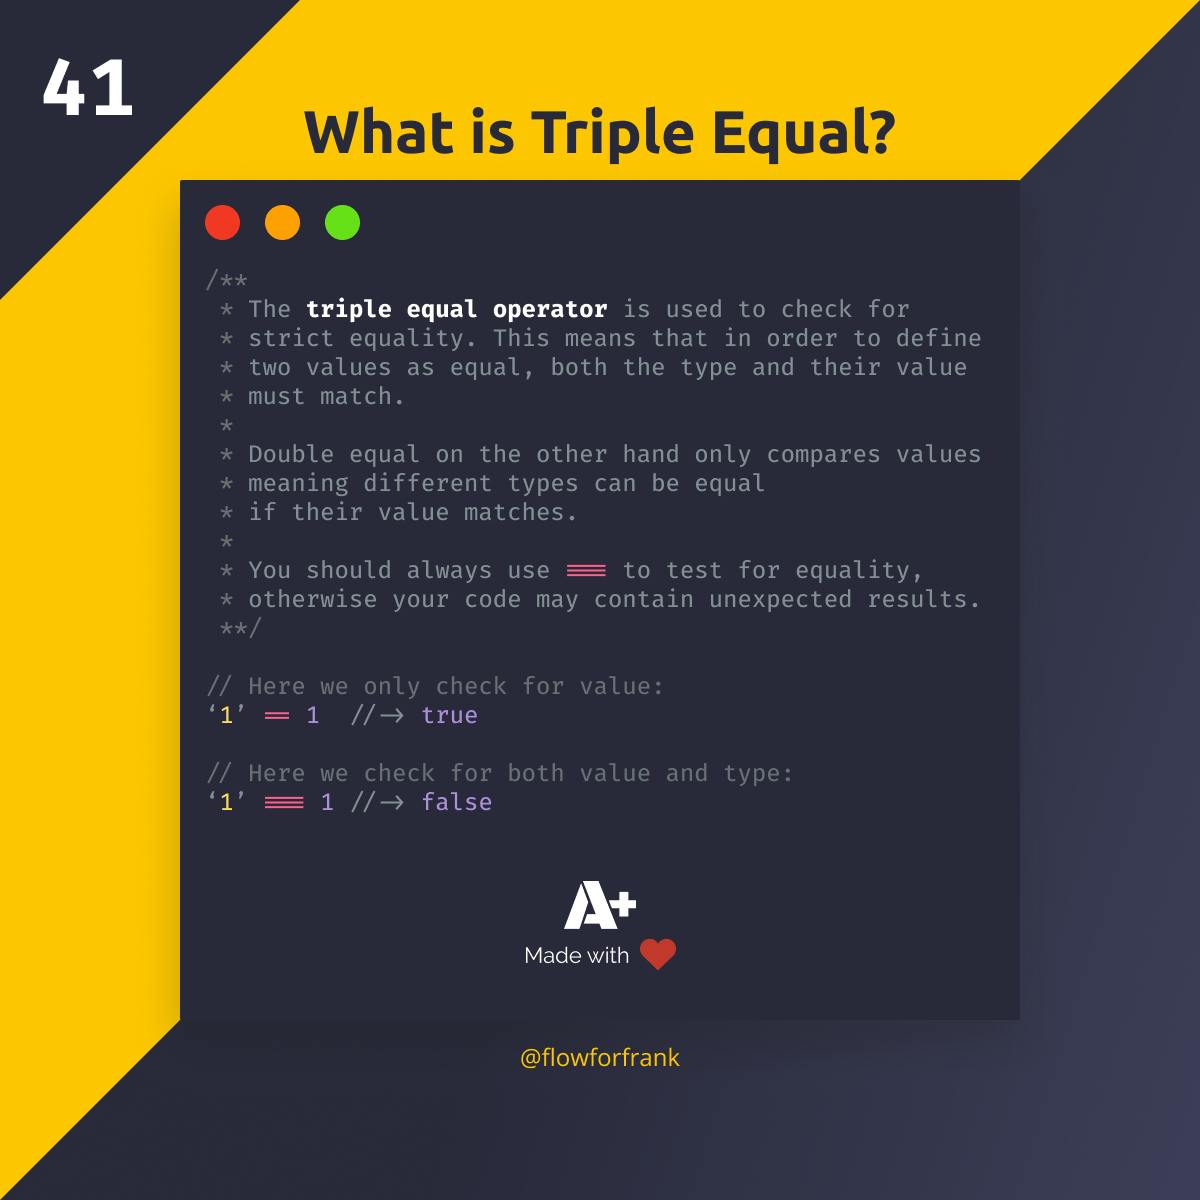
How to Make Interactive Buttons in Phaser 3
Ferenc Almasi •Adding buttons in Phaser3 can be done a little bit differently than we used to do in Phaser 2, as we don't have a built-in Button class. Instead, you need to add a text to your scene, style it as a button, and make it interactive. For example, to add a button to the center of your scene, you can do the following:
startButton = scene.add.text(scene.cameras.main.centerX, scene.cameras.main.centerY, 'Start game', textStyle)
    .setOrigin(0.5)
    .setPadding(10)
    .setStyle({ backgroundColor: '#111' })
    .setInteractive({ useHandCursor: true })
    .on('pointerdown', startGame)
    .on('pointerover', () => startButton.setStyle({ fill: '#f39c12' }))
.on('pointerout', () => startButton.setStyle({ fill: '#FFF' }))scene.add.text expect at least three mandatory parameters: an x and y position, as well as a label to write out. In this case "Start game". Optionally, you can also add styles as an object passed as the fourth parameter. For the list of available styles, you can refer to the documentation of the Text game object.
To make the button interactive, call setInteractive. You can also pass the useHandCursor flag to turn the pointer into hand when the button is being hovered. To add hover effects, you can use the pointerover and pointerout events:
pointeroveris triggered when the mouse is being hovered on the buttonpointeroutis triggered when the mouse leaves the button
To also add a callback, you can use the pointerdown event, which in the above example, calls a function called startGame. The above code example will generate the following button:

To make the code reusable, you can make a custom button class or function:
class Button {
    constructor(x, y, label, scene, callback) {
        const button = scene.add.text(x, y, label)
            .setOrigin(0.5)
            .setPadding(10)
            .setStyle({ backgroundColor: '#111' })
            .setInteractive({ useHandCursor: true })
            .on('pointerdown', () => callback())
            .on('pointerover', () => button.setStyle({ fill: '#f39c12' }))
            .on('pointerout', () => button.setStyle({ fill: '#FFF' }));
    }
}

// Then later in one of your scenes, create a new button:
const button = new Button(0, 0, 'Start Game', this, () => console.log('game is started'));


Rocket Launch Your Career
Speed up your learning progress with our mentorship program. Join as a mentee to unlock the full potential of Webtips and get a personalized learning experience by experts to master the following frontend technologies:
Courses

Game Development in JS/TS - The Complete Guide

HTML5 Game Development