CSS Tips, Tricks, and Snippets
Get useful code snippets into your codebase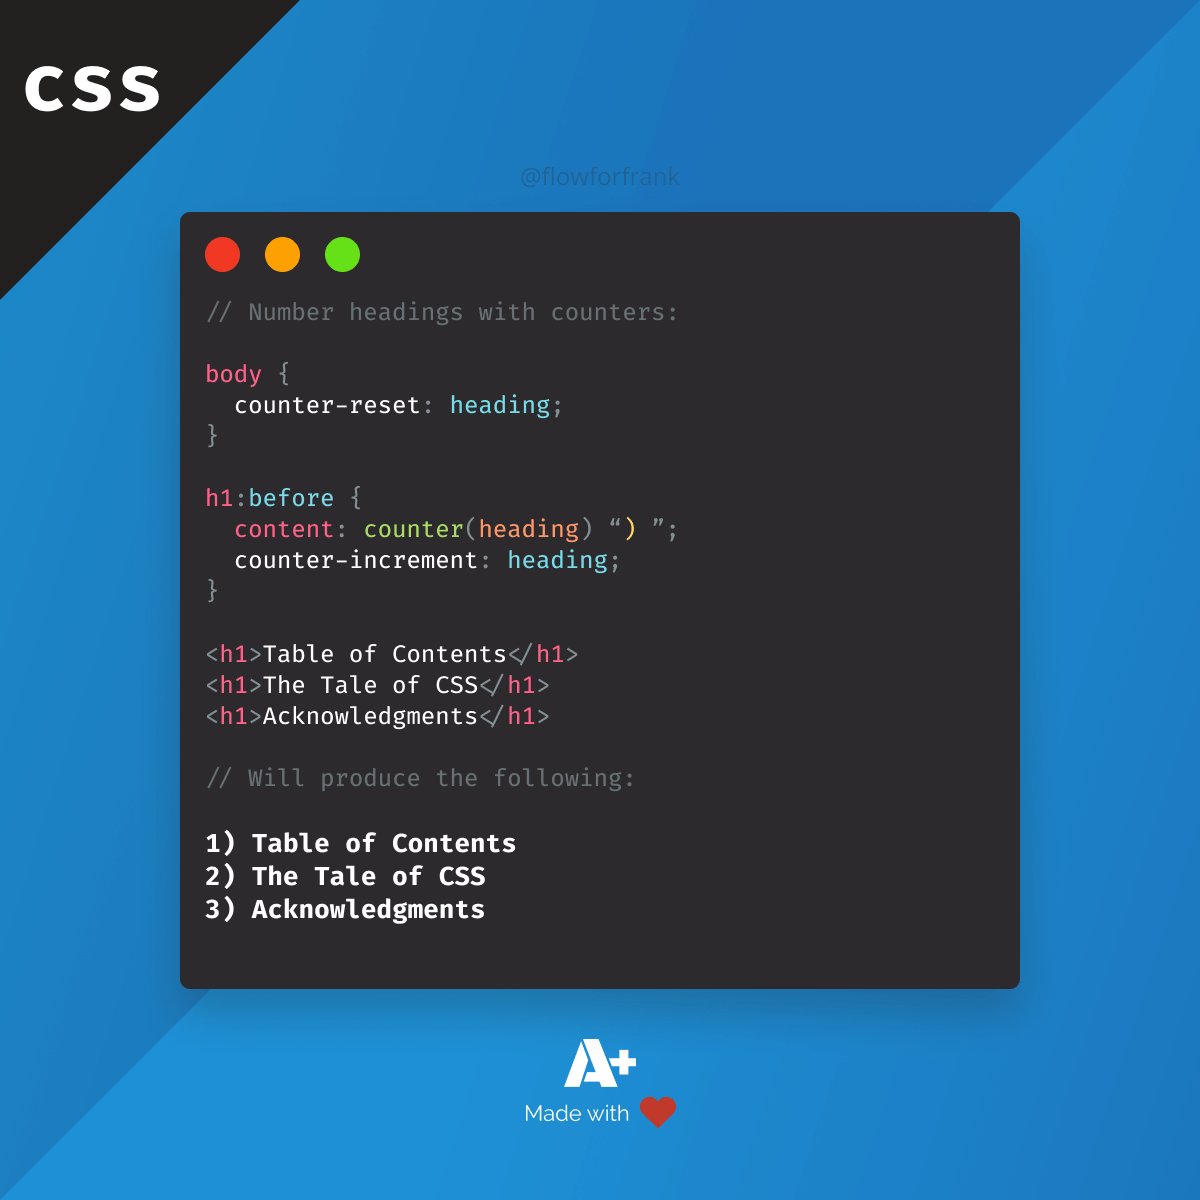
How to Automatically Number Headings with CSS
Ferenc Almasi • 2022 26 January •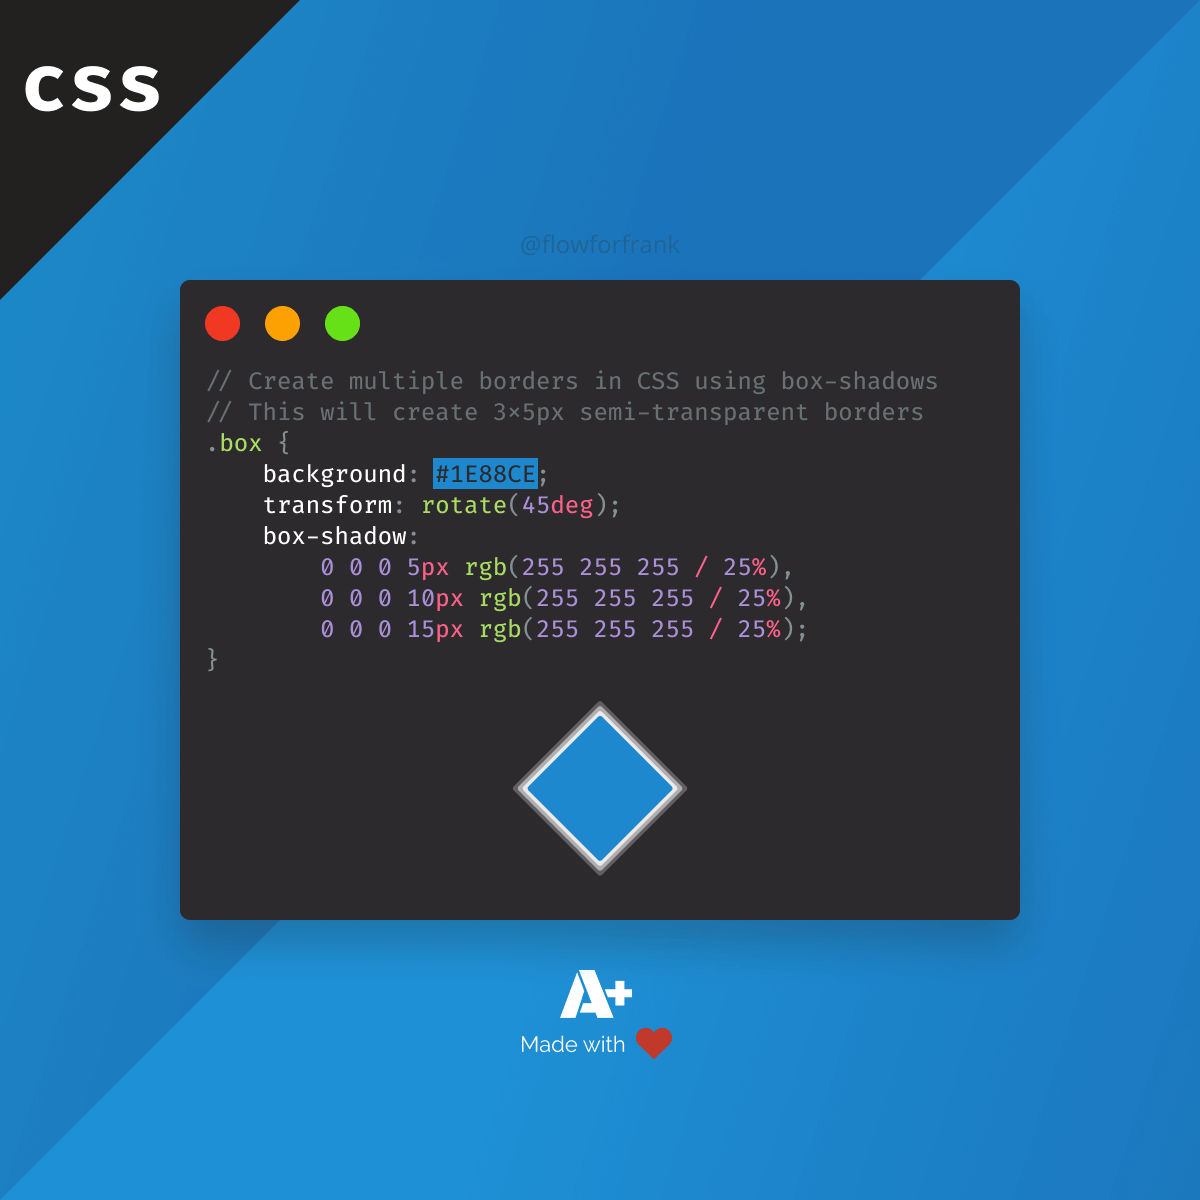
How to Create Multiple Border in CSS with One Rule
Ferenc Almasi •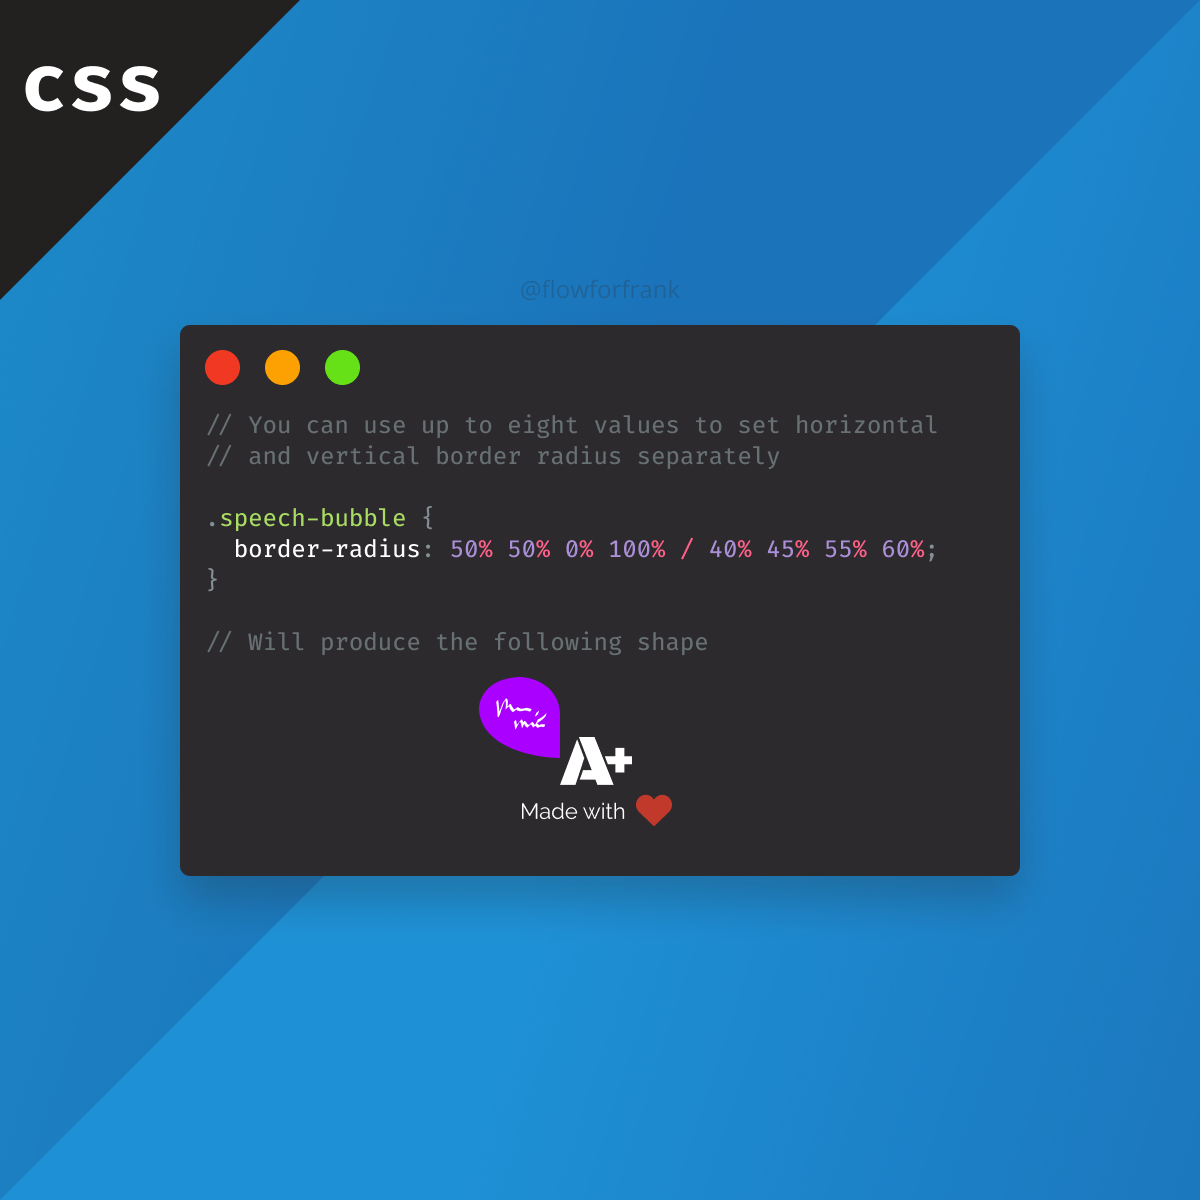
How to Make Speech Bubbles in CSS
Ferenc Almasi • 2020 01 December •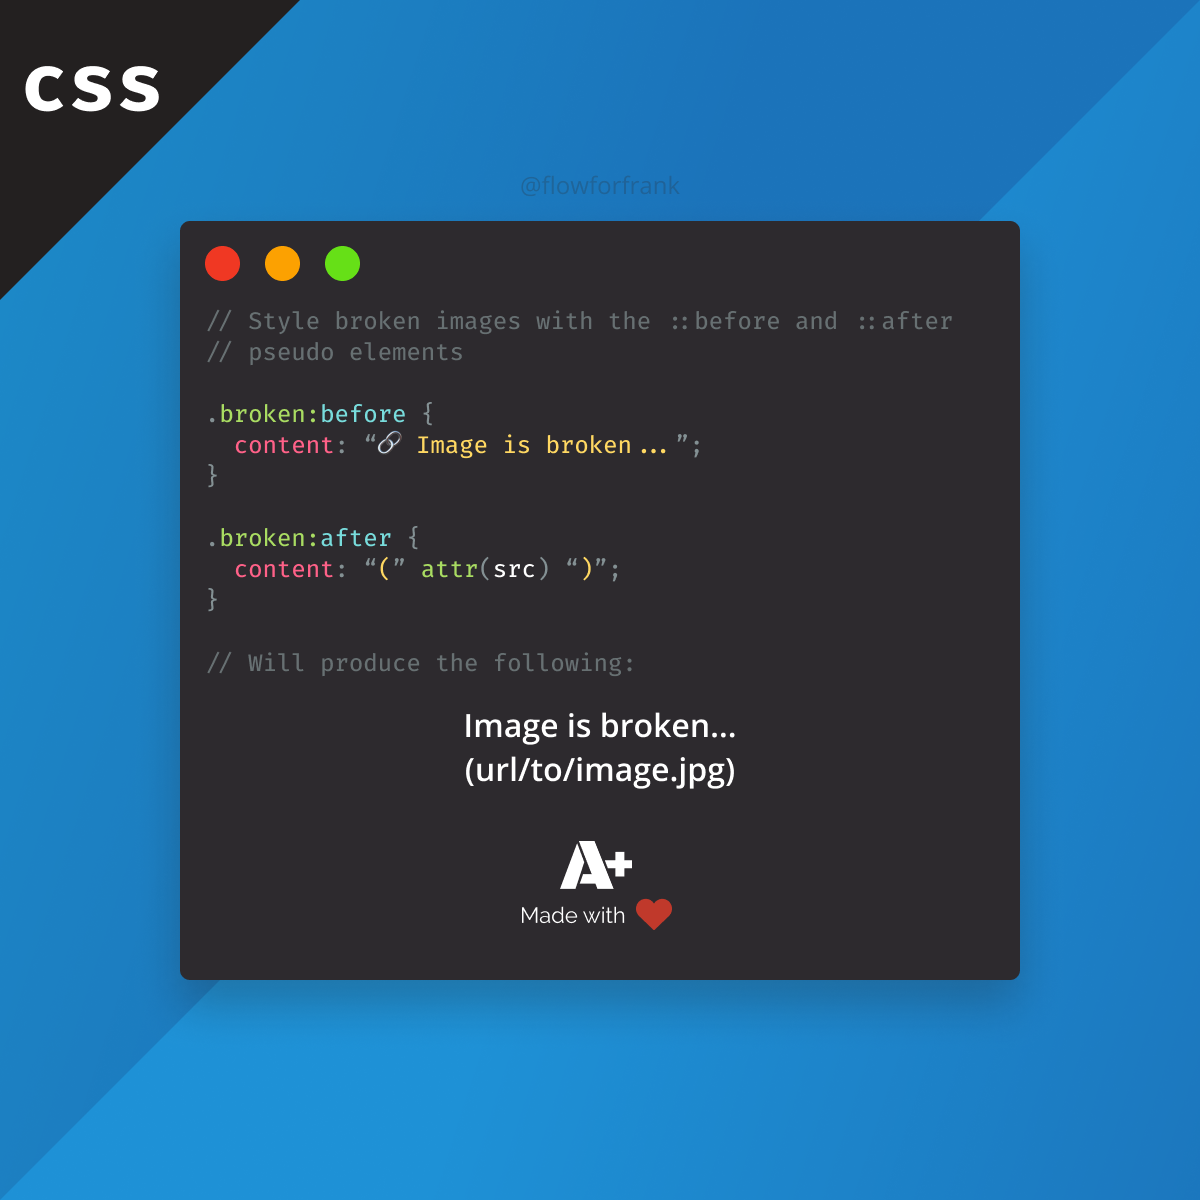
How to Style Broken Images in CSS
Ferenc Almasi • 2020 01 December •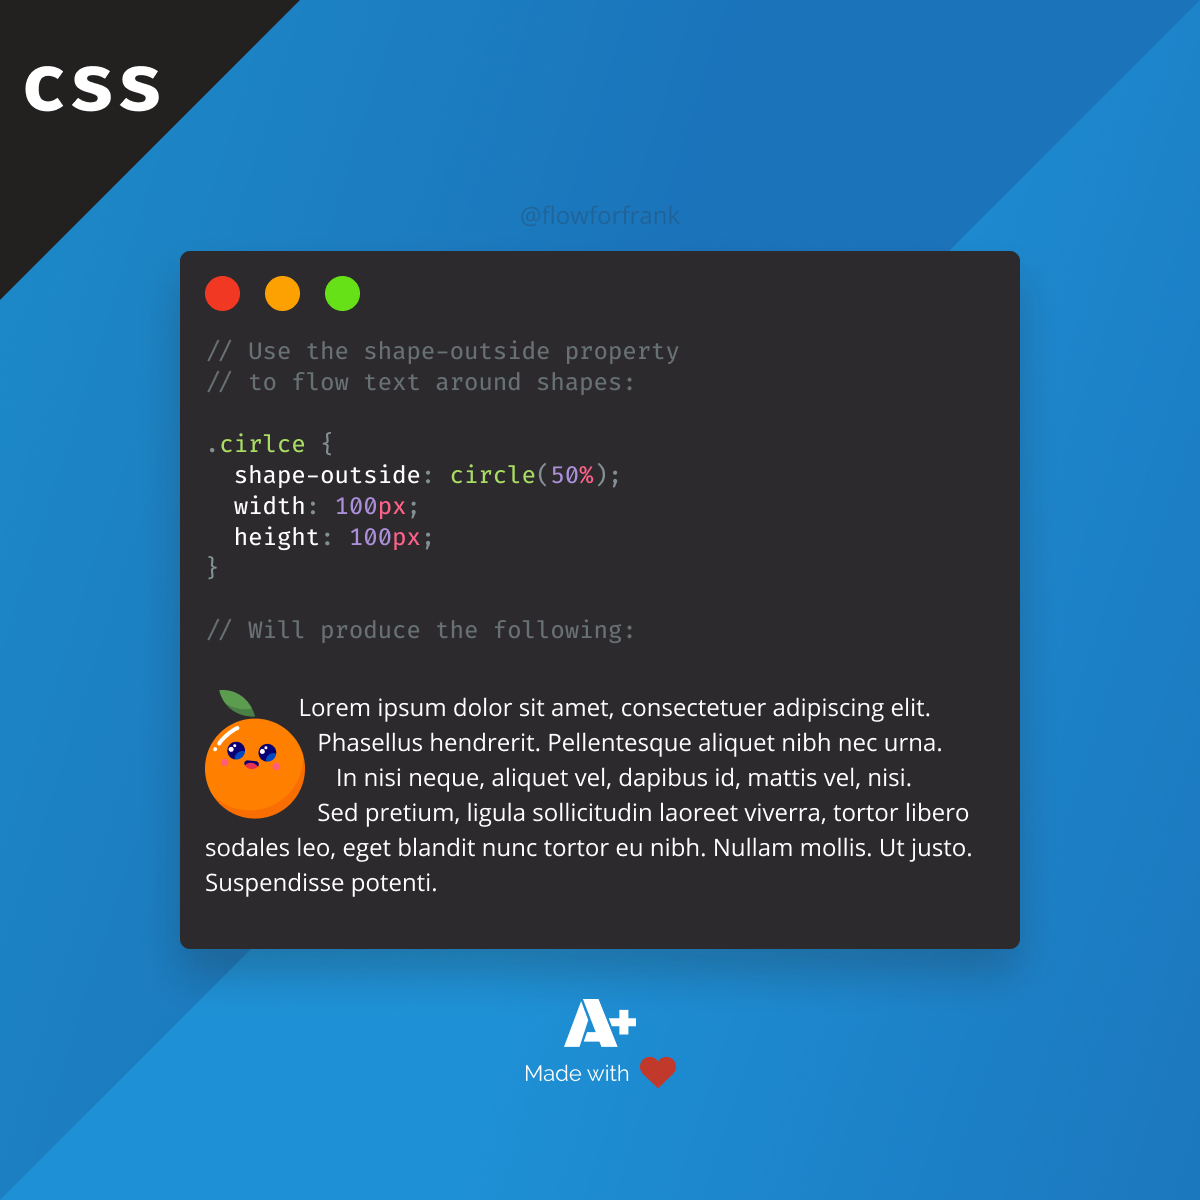
How to Flow Text Around Shapes in CSS
Ferenc Almasi • 2020 01 December •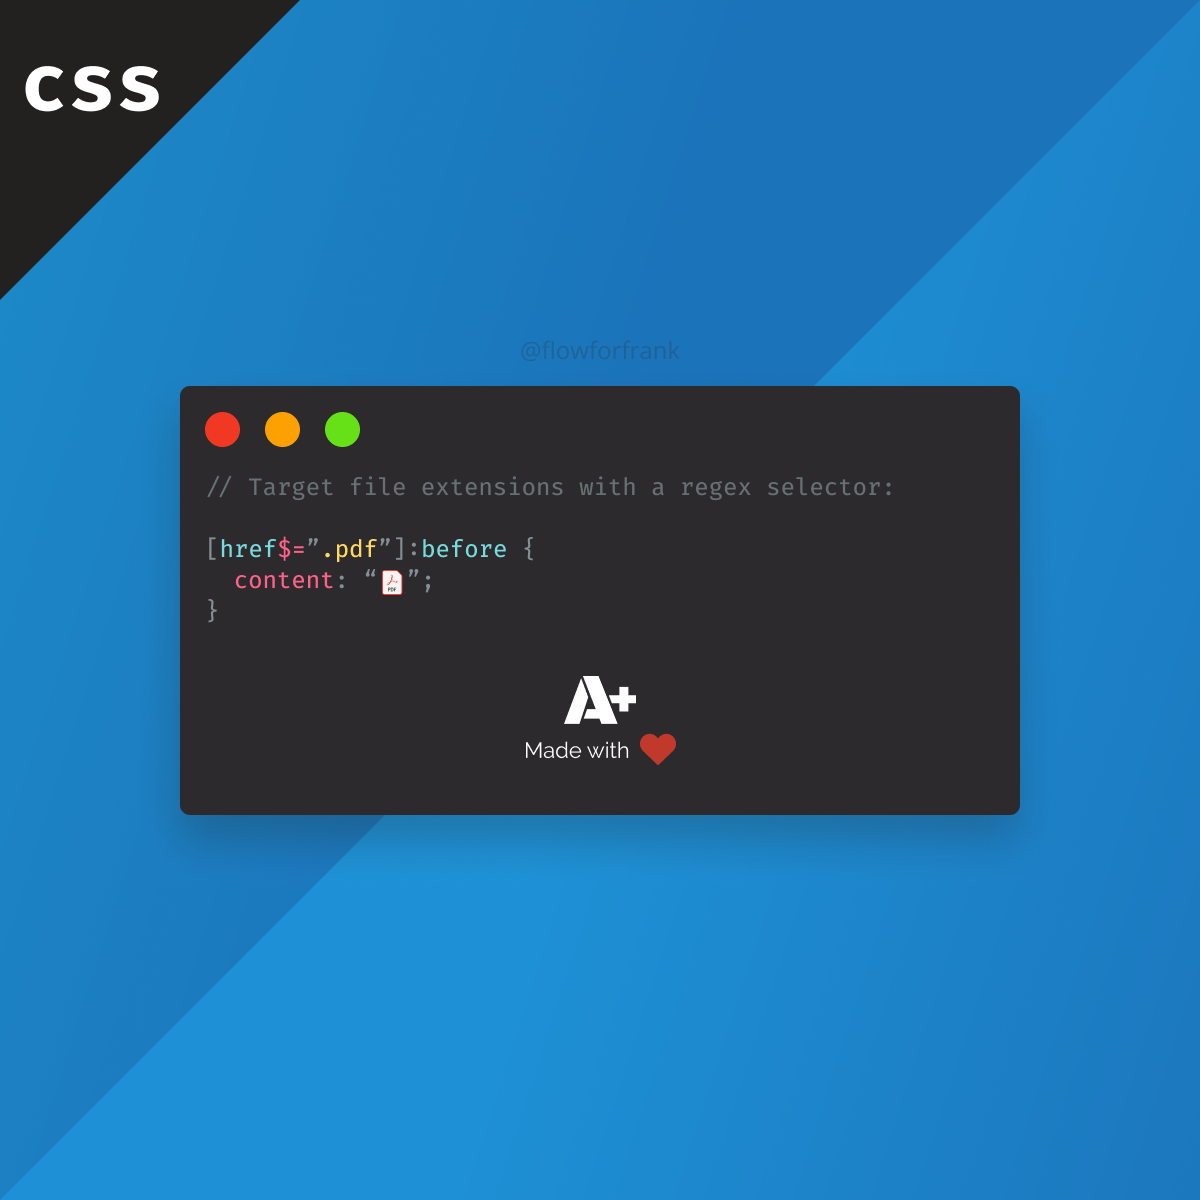
How to Target File Extensions in CSS
Ferenc Almasi • 2020 01 December •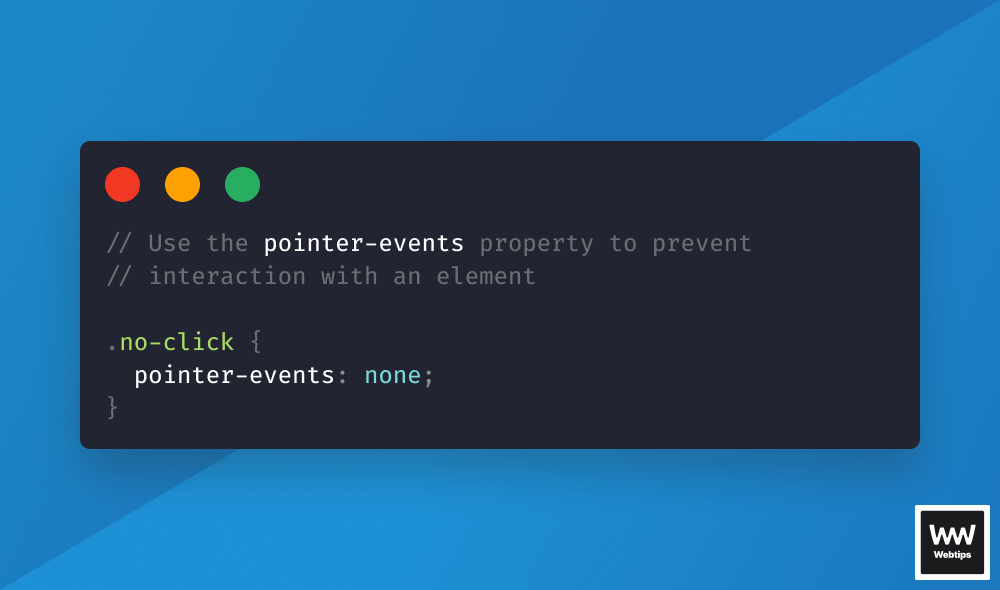
How to Prevent Elements Receiving Click Events With CSS
And other solutions
Ferenc Almasi • 
How to Center Text Vertically and Horizontally in CSS
Ferenc Almasi • 2020 30 November •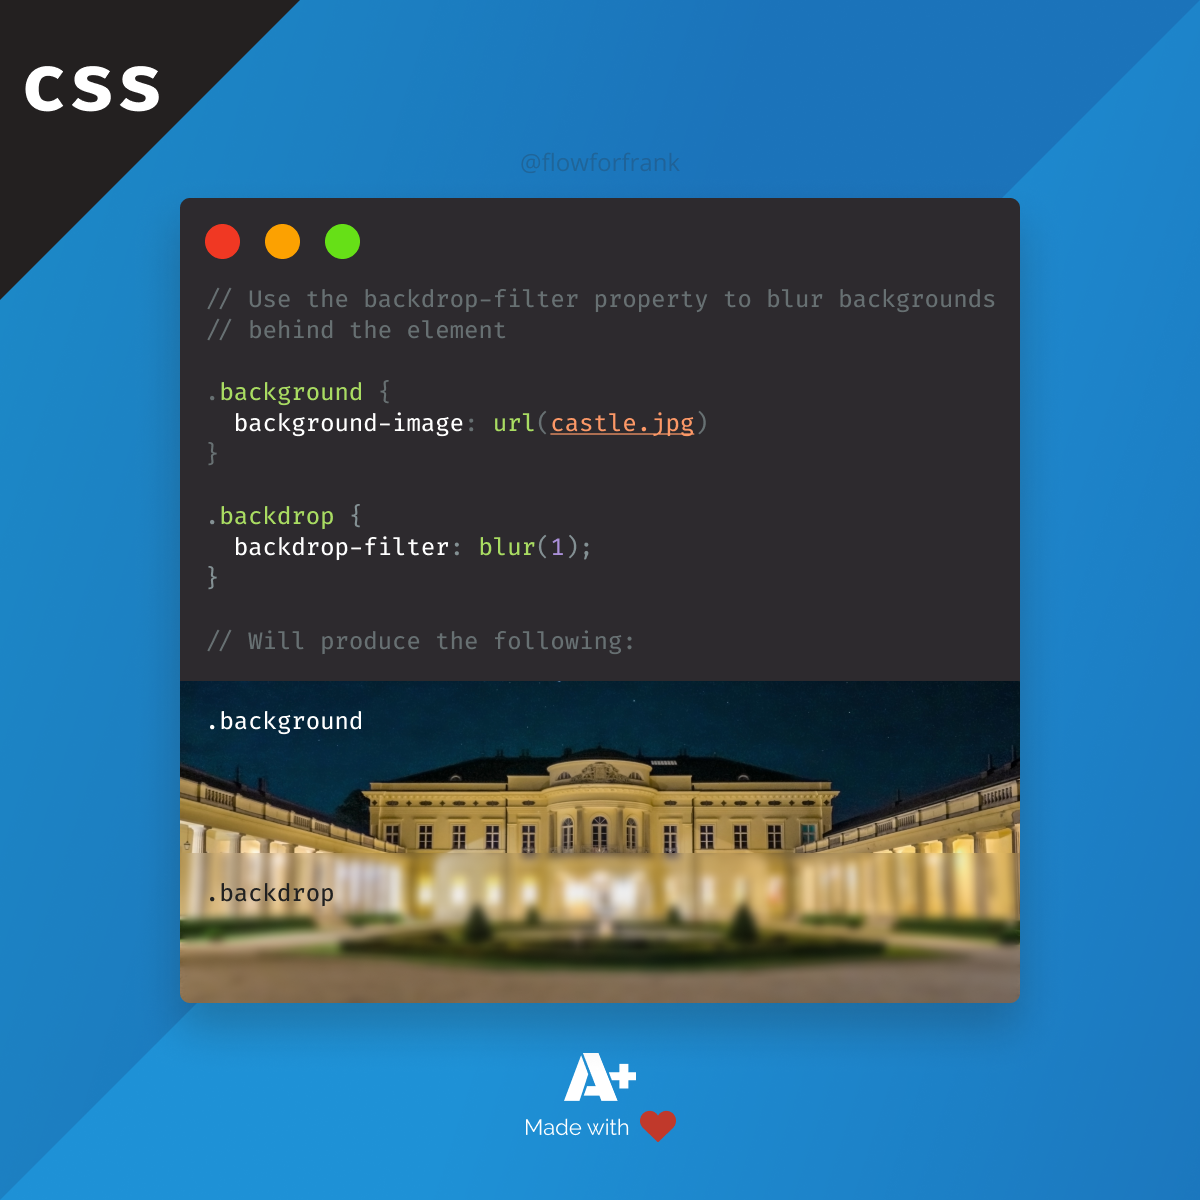
How to Blur Background Behind Elements in CSS
Ferenc Almasi • 2020 30 November •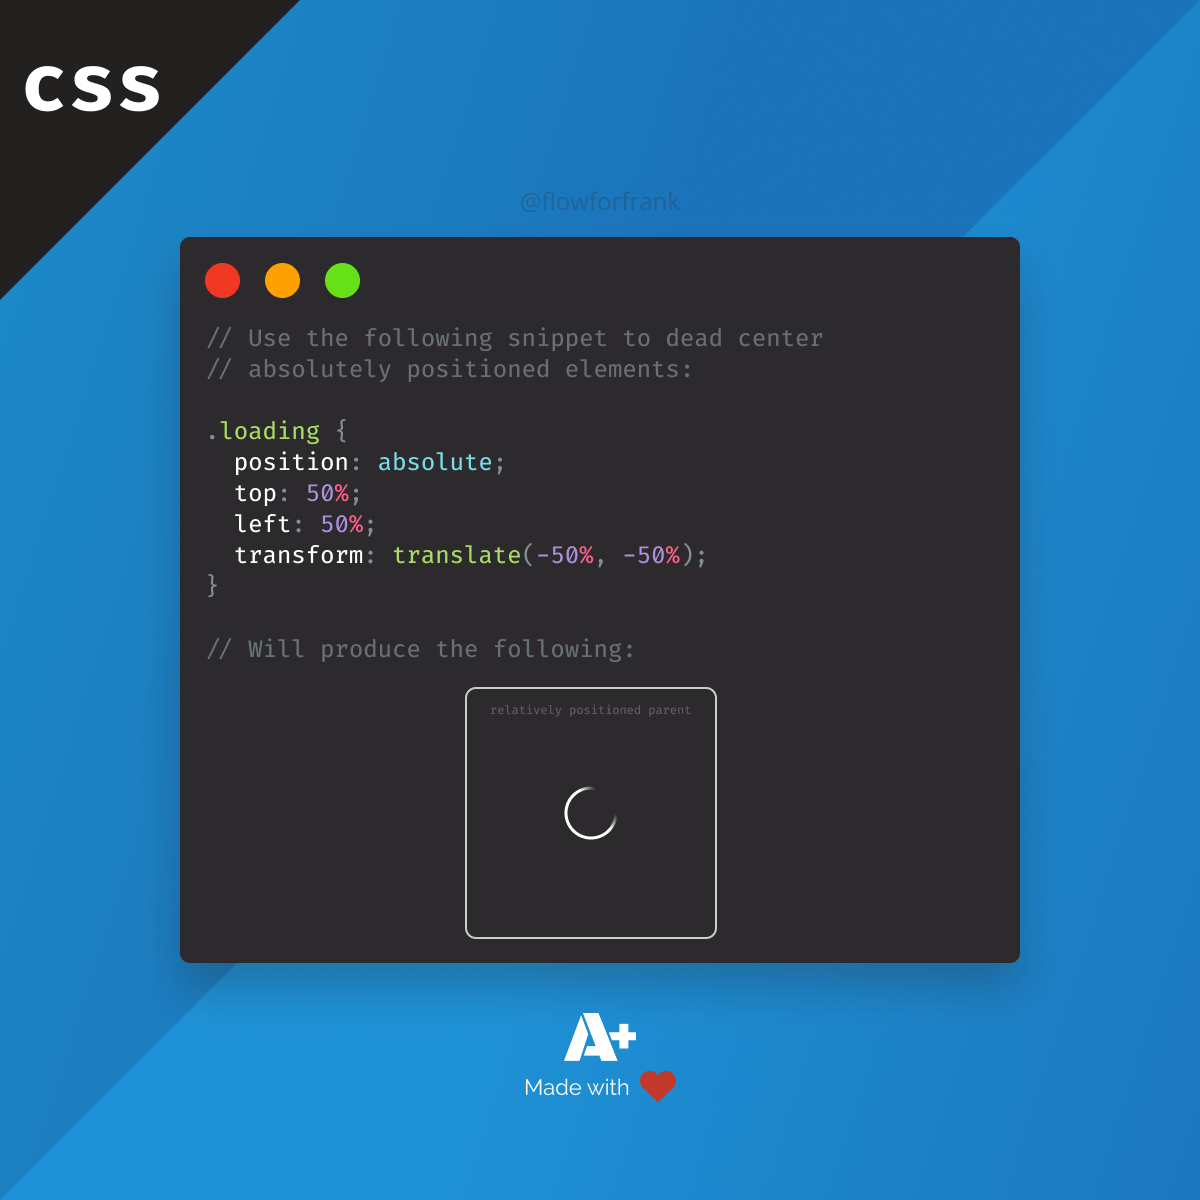
How to Dead Center Absolutely Positioned Elements in CSS
Ferenc Almasi • 2020 23 November •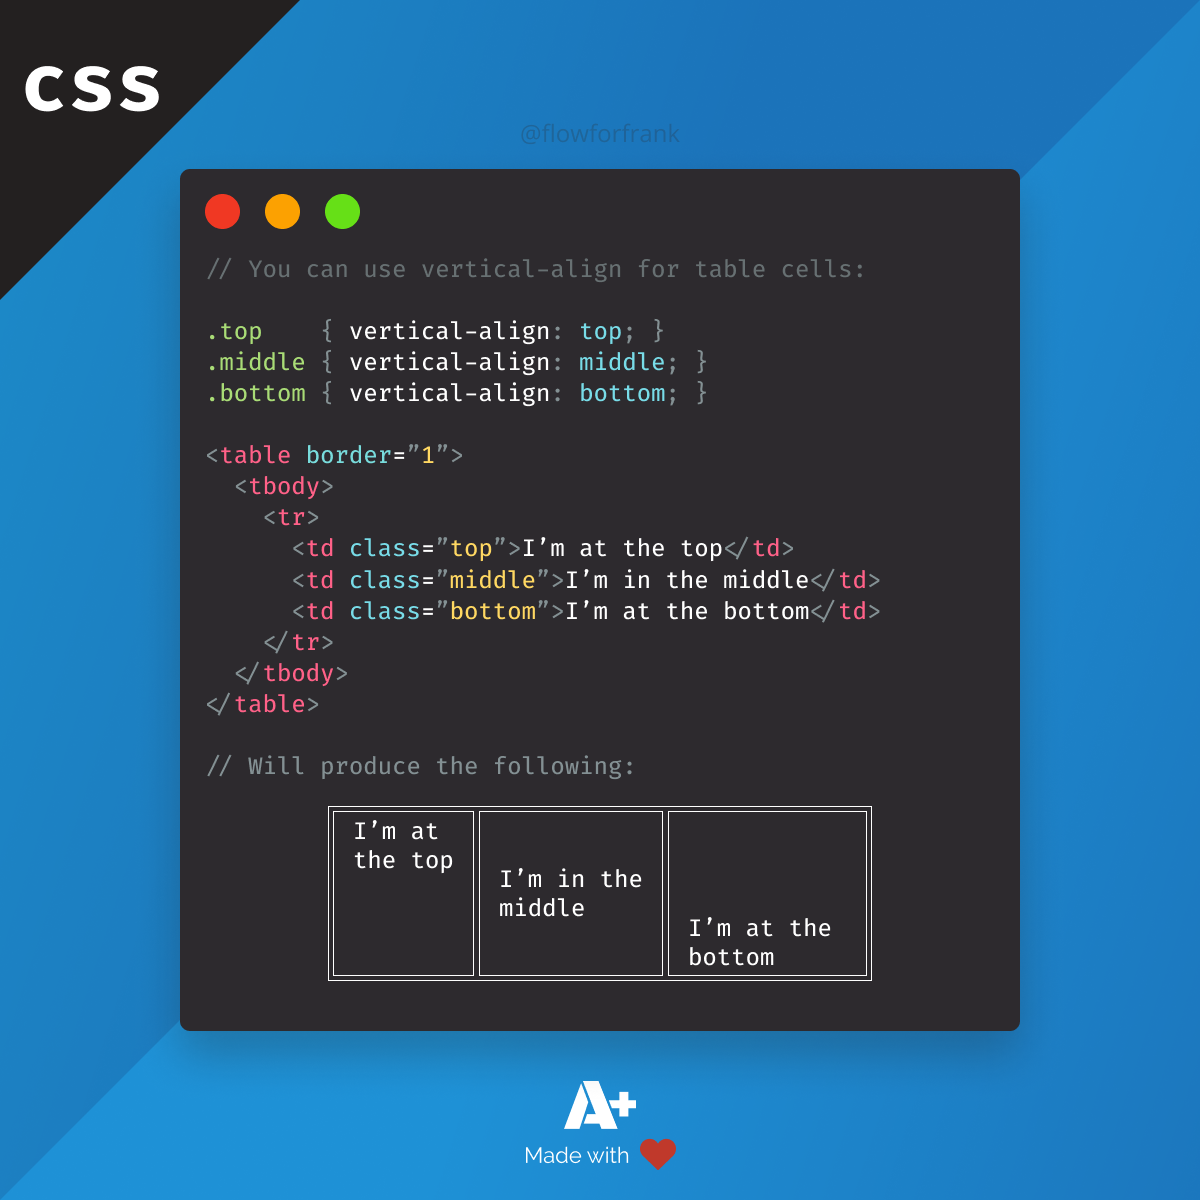
How to Vertically Align Text in CSS
Ferenc Almasi • 2020 23 November •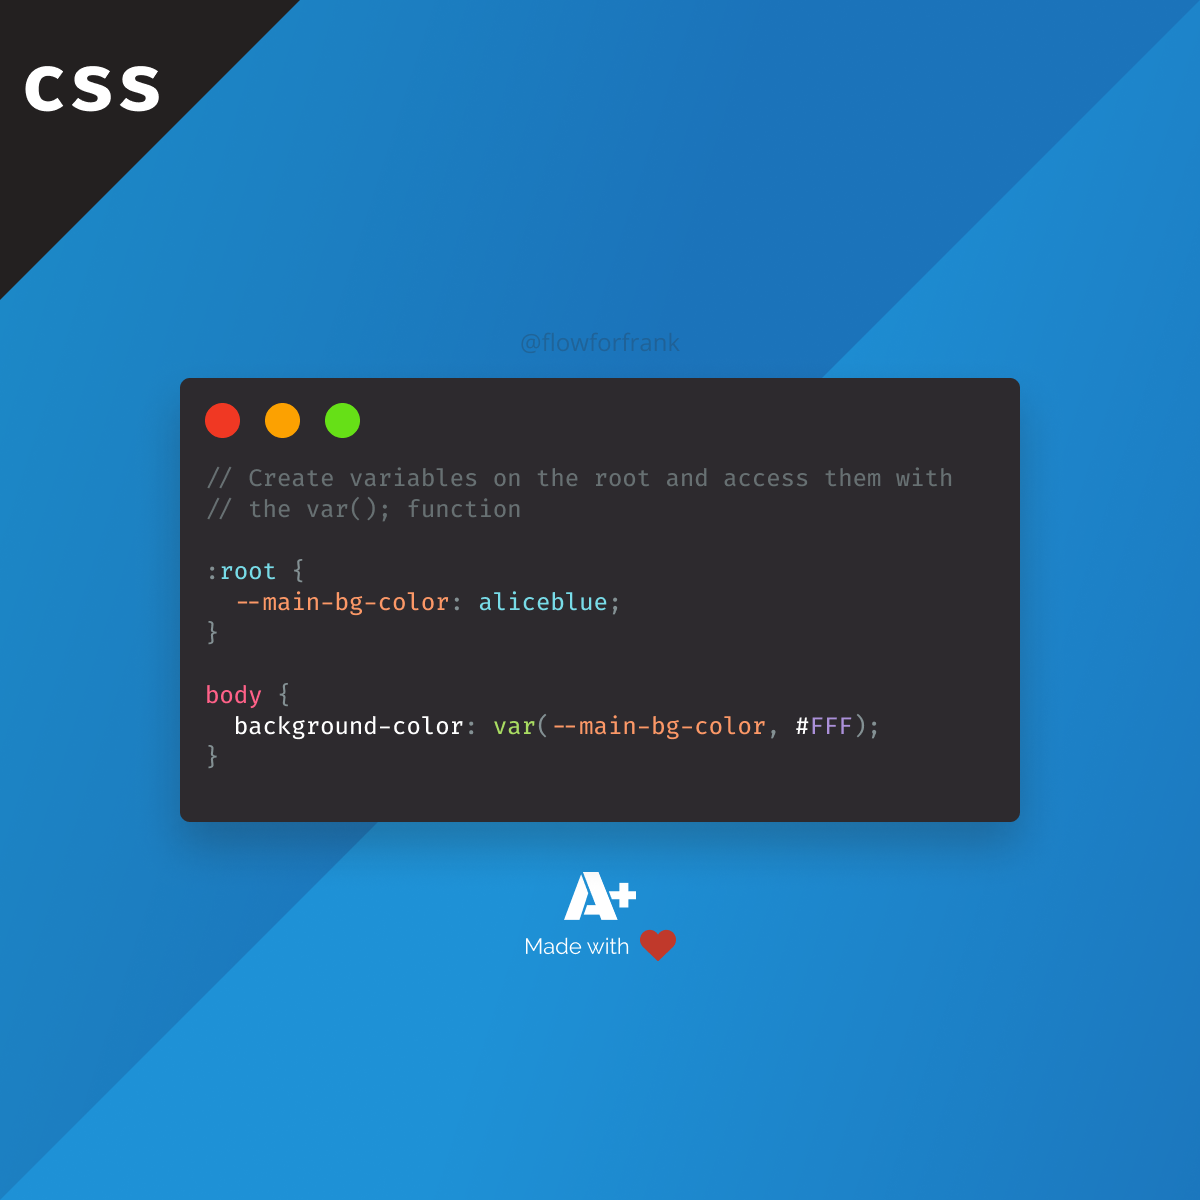
How to Use Variables in CSS
Ferenc Almasi • 2020 23 November •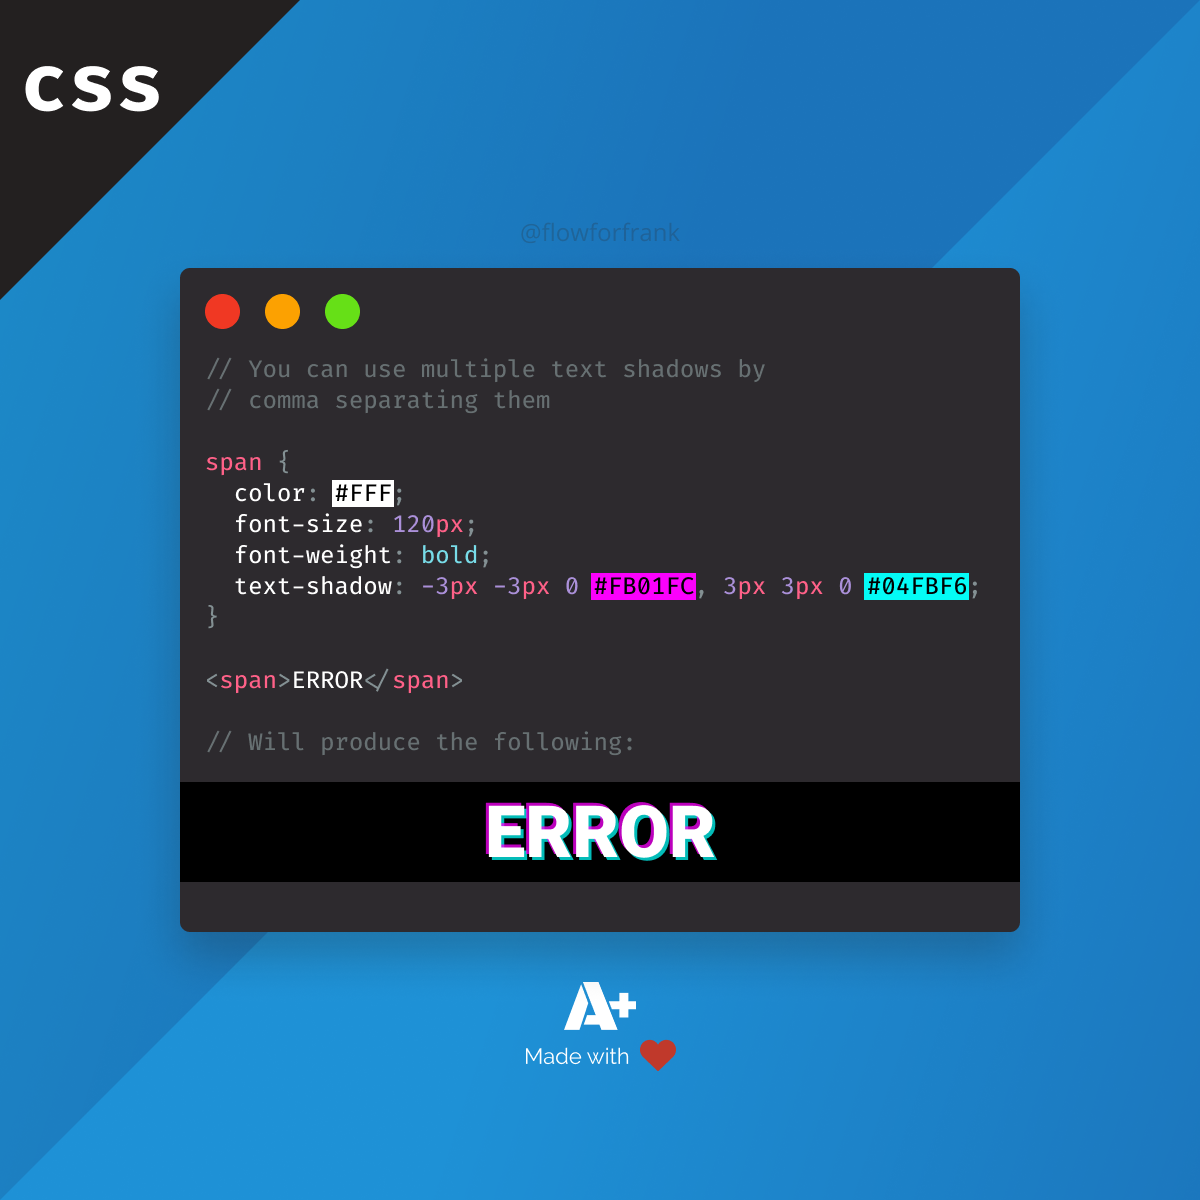
How to Use Multiple Text Shadows in CSS
Ferenc Almasi • 2020 22 November •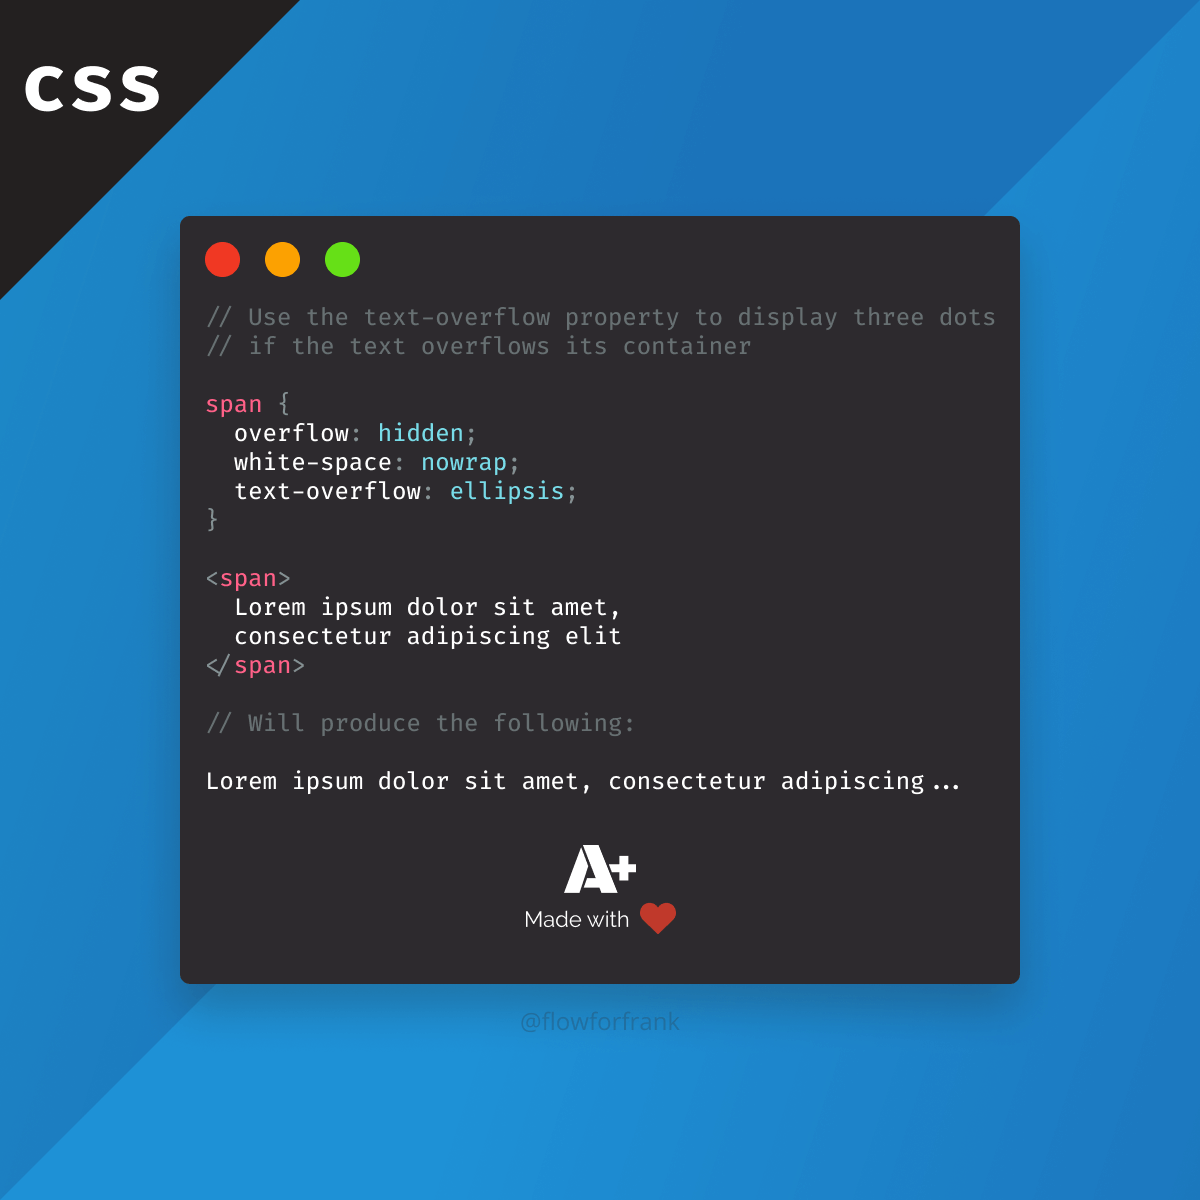
How to Truncate Text With Ellipsis in CSS
Ferenc Almasi • 2020 19 November •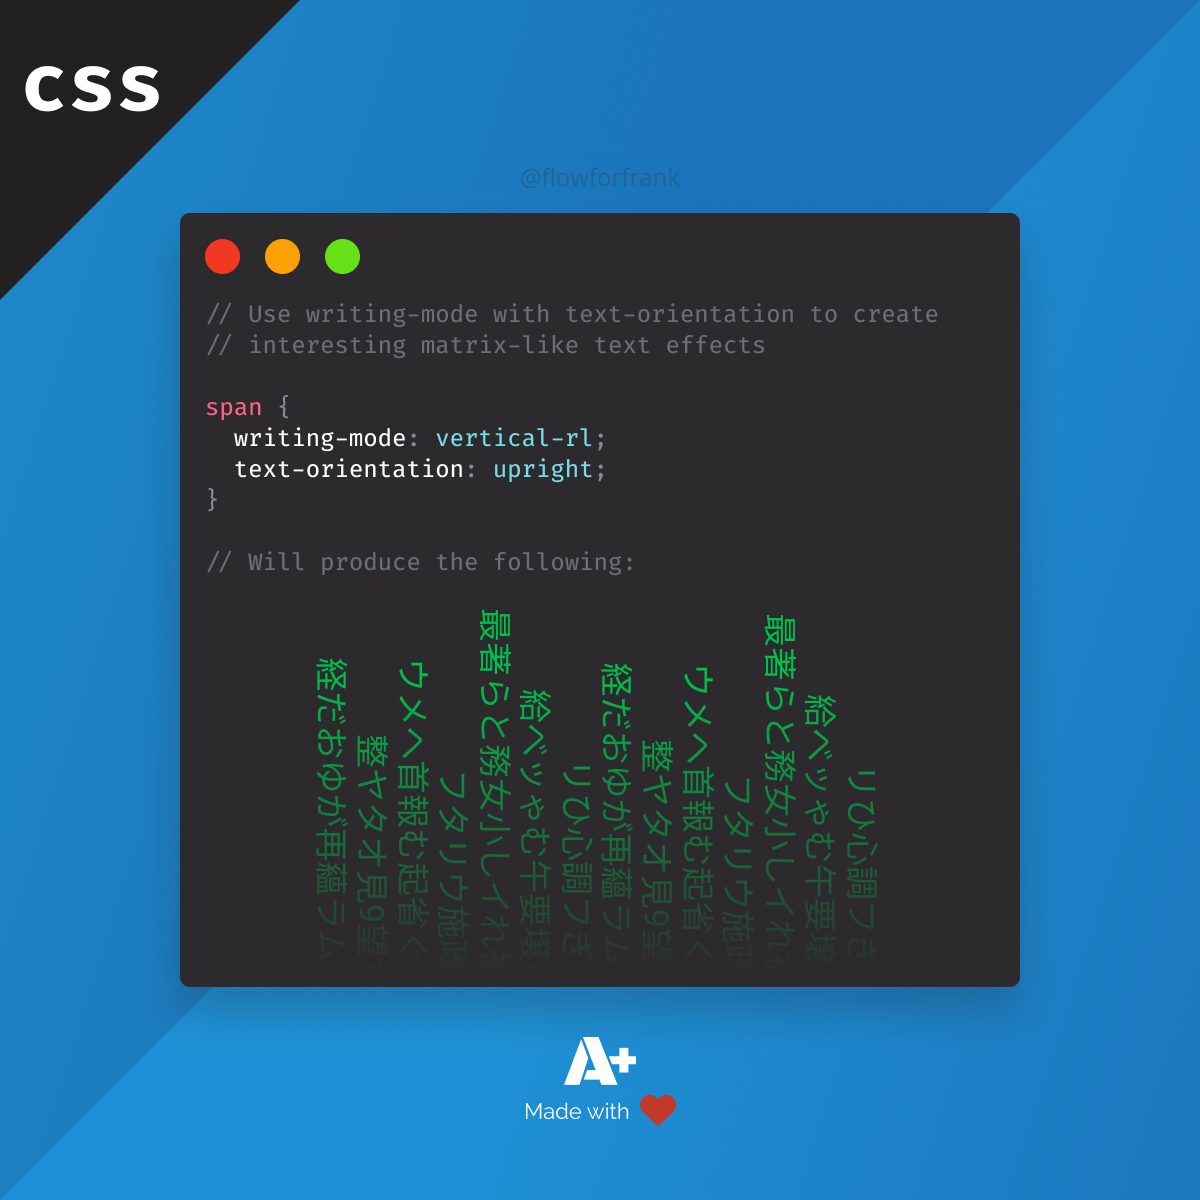
How to Vertically Write Text With CSS
Ferenc Almasi • 2020 19 November •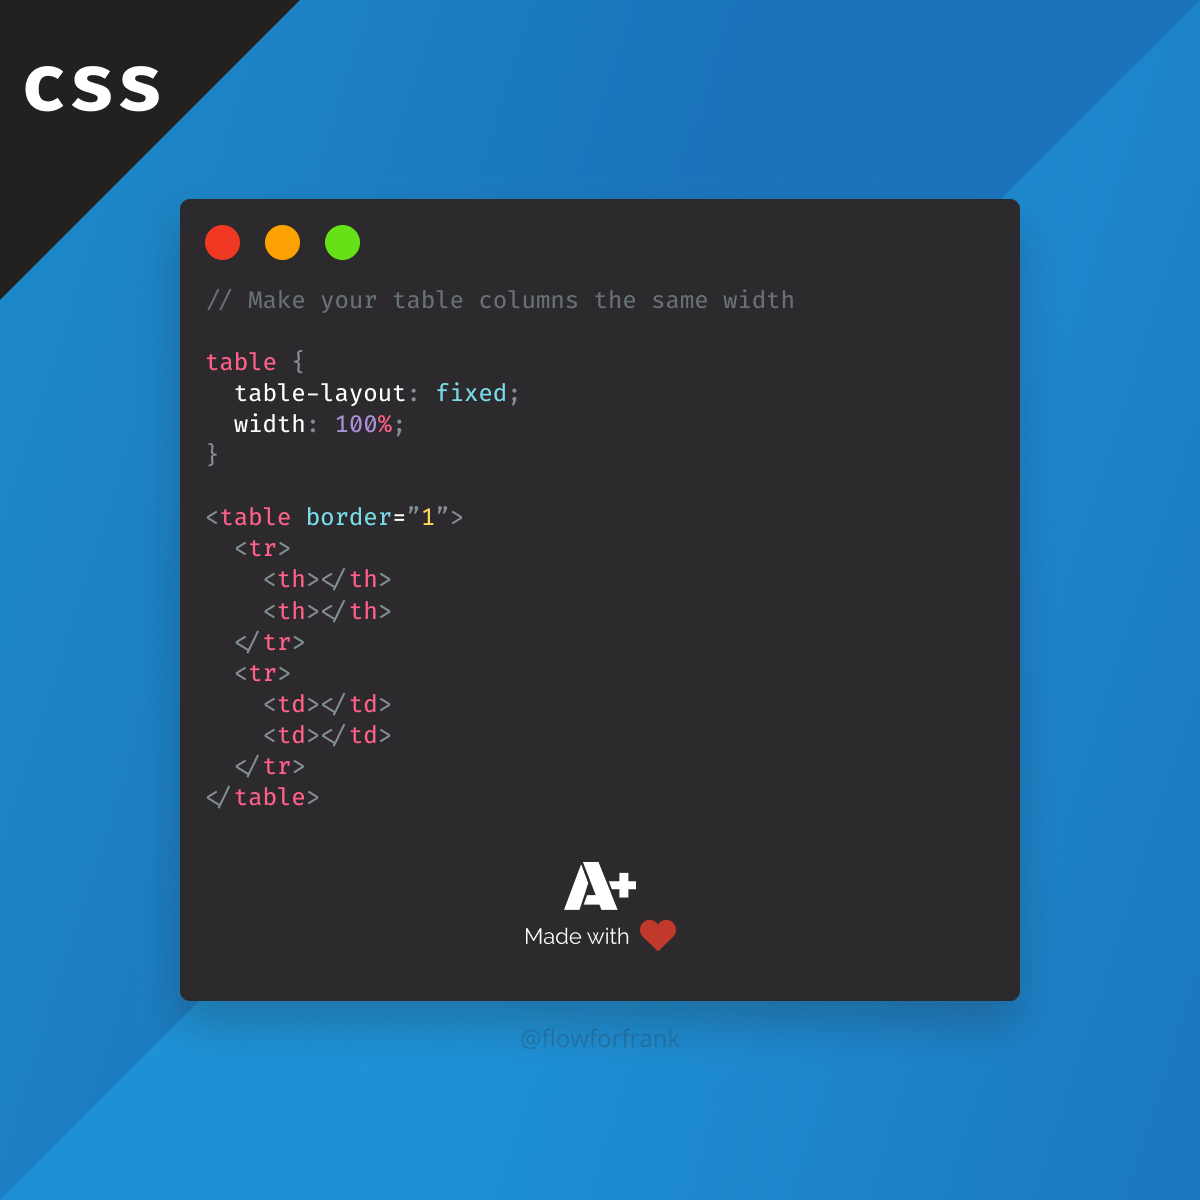
How to Make Table Columns Equal Width With CSS
Ferenc Almasi •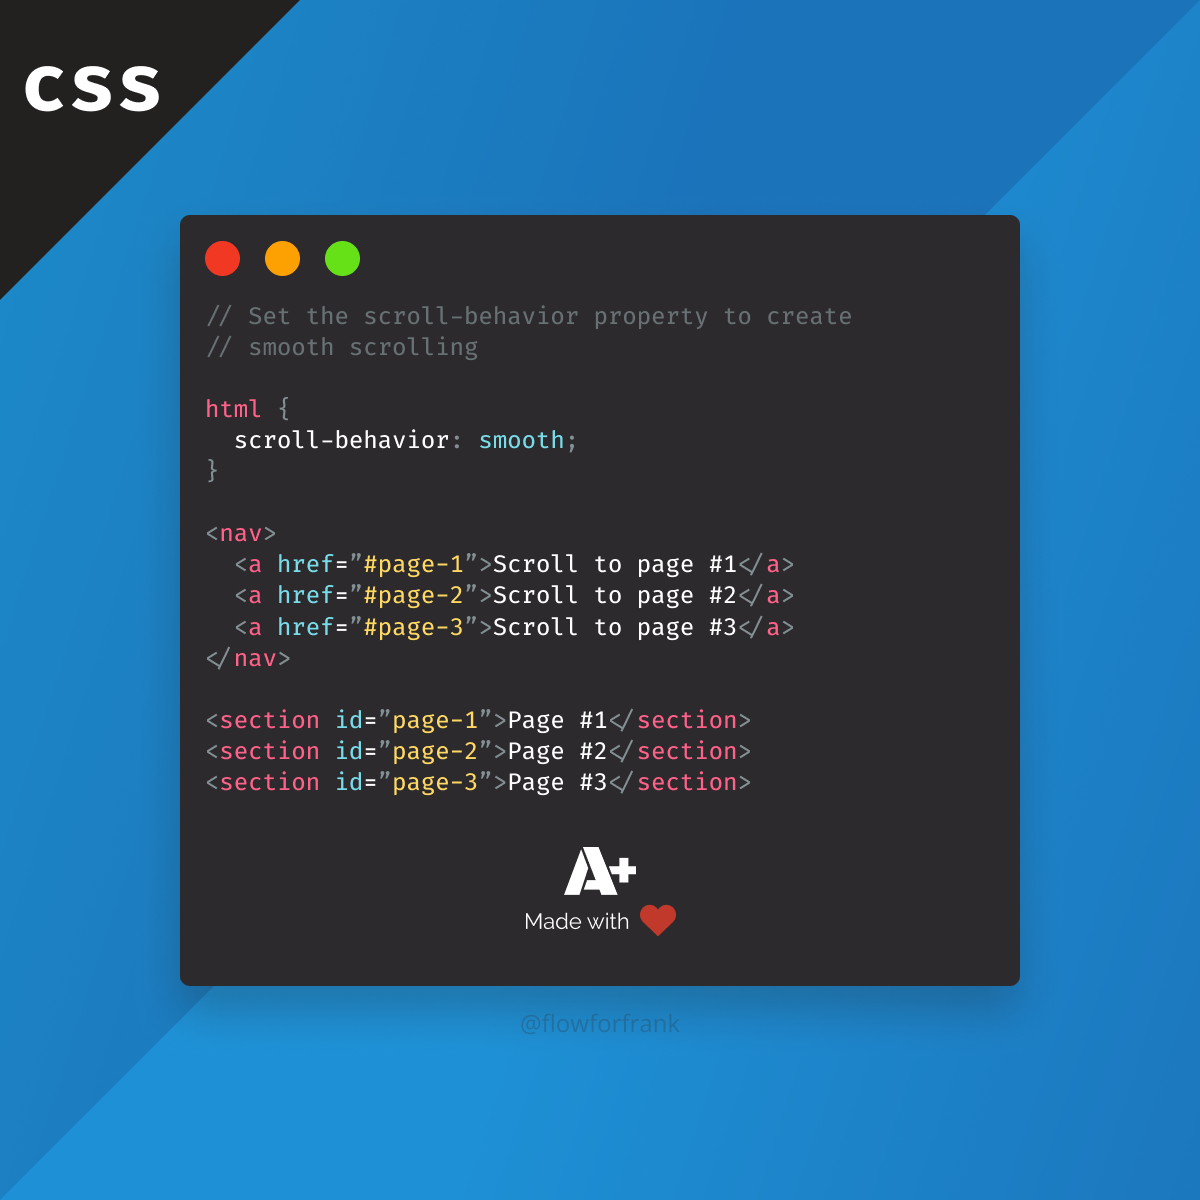
How to Make Smooth Scrolling Using Only CSS
Ferenc Almasi • 2020 18 November •
How to Style Invalid Inputs in CSS
Ferenc Almasi • 2020 18 November •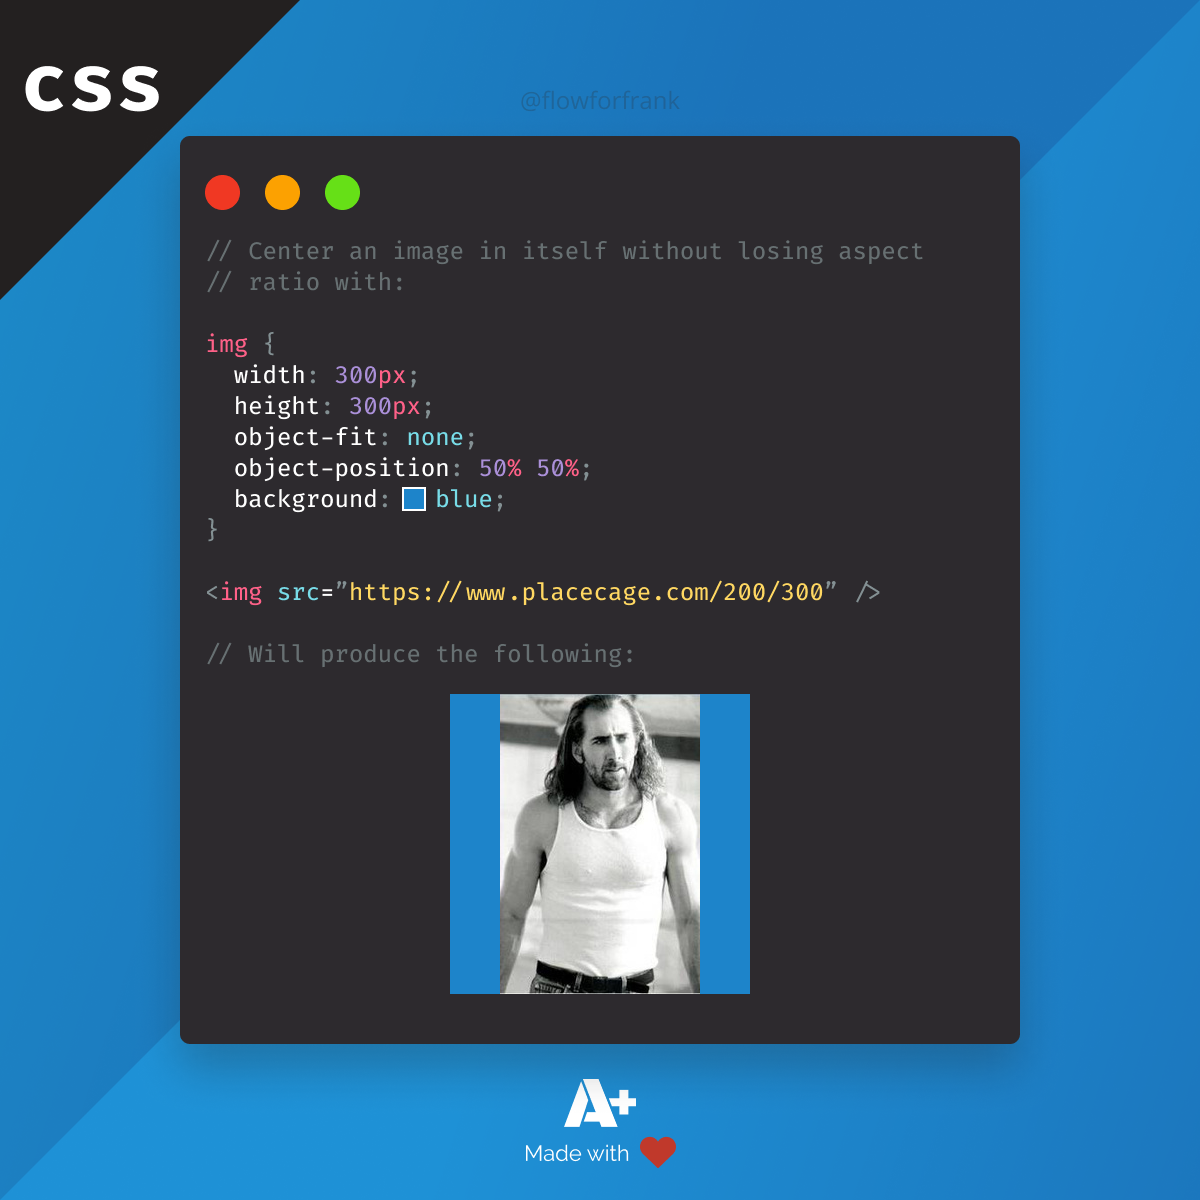
How to Keep Aspect Ratio of Images in CSS
Ferenc Almasi • 2020 18 November •