Setup The Simplest CI With Bitbucket Pipelines
Recently I wrote an article on the core differences between CI and CD and I thought it’s time to put theory into practice.
My choice of source control has been Atlassian’s Bitbucket for all of my projects ever since I can remember. It’s a great choice for those who are looking for a free version control service that comes with a clean UI and all the necessary functionality to keep track of your codebase.
Apart from the base functionality that every version control system has, Bitbucket comes with some extensions such as integrated CI/CD that lets us deploy changes right after a push.
The good thing is that no additional tools will be needed, only Bitbucket and good old JavaScript.

Configuring Bitbucket
After your repository is all set and done, all that’s left to do is to enable Pipelines for your repo through the settings. Scroll down to the PIPELINES section and click on Settings. You’ll see the following:

Check the toggle and you’ll get the option to configure the bitbucket-pipelines.yml file. This file will tell Bitbucket what commands to run after code is pushed to your repository. Clicking on the “Configure bitbucket-pipelines.yml” button will take you to the Pipelines menu:

There you can choose from a variety of language templates. The one we are interested in is JavaScript of course. We can use it as a base and modify it to our own taste.
Configuring the Configuration File
Modifying the sample template and adding some extra steps, we get the following:
image: node:10.15.3

pipelines:
    default:
        - step:
            name: Deploy
            caches:
                - node
            script:
                - npm install
                - npm run build
                - npm run test
- npm run deployBreaking it down from line to line, here’s what is happening:
- We specify our configuration file to use
node:10.15.3for the docker image. Here you can specify custom docker images. - Next, we define a step for the
defaultsection, this section contains definitions for all branches, meaning if we do a push, it will automatically trigger the pipeline. - We can define steps using the
stepkeyword. Here we specified a name for it, called “Deploy” and we tell it to cache node inside thecacheskeyword. - Lastly, under the
scriptskeyword, we specify which commands we want to run. We first install dependencies, build the project, run the tests and deploy our site.
To make sure it takes effect, place the config file into your project’s root folder and commit it to the repository.

Configuring the Deploy Script
In the very last step, we call npm run deploy, which is defined in our package.json, that runs a JavaScript file with the following command: node tools/deploy.js This file will handle the deployment of our assets:
const FtpDeploy = require('ftp-deploy');
const ftpDeploy = new FtpDeploy();

const config = {
    user: process.env.FTP_USERNAME,
    password: process.env.FTP_PASSWORD,
    host: process.env.FTP_HOST,
    localRoot: __dirname + '/../dist/',
    remoteRoot: process.env.FTP_REMOTE_PATH,
    include: ['*']
};

ftpDeploy.deploy(config, (error) => {
    if (error) {
        console.log(error);
    } else {
        console.log('deployed successfully');
    }
});As you can see, I’m using a package called ftp-deploy, you can install it with npm i ftp-deloy. We then import it on line:1 and create a configuration object for it on line:4.
The configuration object takes all the parameters required to create an FTP connection. In order to avoid storing credentials right in the code, we pass the values from environment variables. These variables are going to be picked up from Bitbucket. You can define them in Repository variables under the PIPELINES section.

Set the names to the environment variables used in the deploy script and their corresponding values. Checking the Secured checkbox will let you hide the value permanently.
Moving back to the config object, the localRoot property is used for telling ftpDeploy which folder to copy over. Use the __dirname variable to point to the directory of the deploy script. My project setup looks like the following:

Hence the reason I’m stepping up one folder with /../ in the example.
remoteRoot on the other hand, points to the directory on the FTP server. Last but not least, with include we can define which files to copy. Using an asterisk means we will copy everything from the dist folder.
We then call the deploy method on ftpDeploy and pass in our config object and a callback function. In case there is an error, we log it out. Otherwise, the deployment was successful.
Conclusion
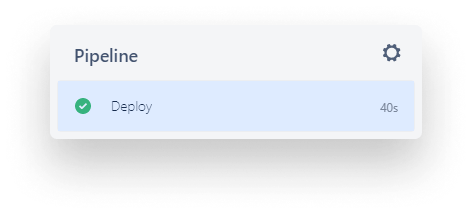
You can monitor your deployment under the Pipelines menu. You’ll notice a new build starts with the name we specified in bitbucket-pipelines.yml.
Pushing your changes to the remote repository should trigger a deploy automatically and if your deploy file is configured correctly — and of course your tests are passing — the pipeline will turn green and you should see your changes in production within a few seconds after doing a push locally. ✅

Rocket Launch Your Career
Speed up your learning progress with our mentorship program. Join as a mentee to unlock the full potential of Webtips and get a personalized learning experience by experts to master the following frontend technologies:
Courses


Recommended

Zero Configure your React-Typescript App With Parcel
Ferenc Almasi •Understanding The Critical Rendering Path in 5 Minutes