How to Make Frameless Window for Electron with Custom Controls
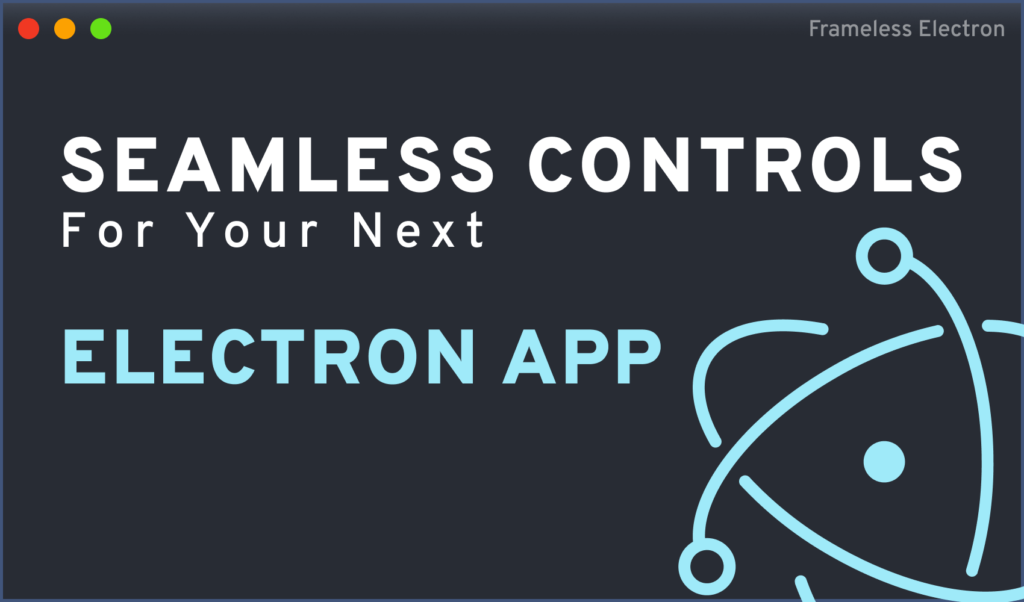
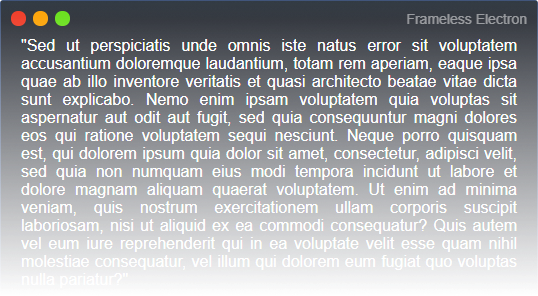
Ferenc Almasi •If you’ve ever wondered how to make custom controls for your Electron app, just like in the image above (Mac style on Windows), you’re in the right place. In this tutorial, we are going to take a look at how you can achieve the same, using some HTML and CSS, to create a more streamlined user interface for your app. Since this only requires the above two mentioned web technologies, and a little bit of JavaScript to add the necessary functionality, you can go crazy and implement all kinds of controls with this solution. Let’s start by setting up Electron.

Setting up Electron
If you already have a project where you want to integrate custom controls, feel free to skip this section, as it only discusses how to set up Electron. Otherwise, you can follow along.
First, run npm init -y to create a new npm project, then install electron with npm i electron. Once installed, add a start command into your package.json.
 "scripts": {
-    "test": "echo \"Error: no test specified\" && exit 1",
+    "start": "electron ."
},You are going to need a couple of files, namely an index.js at the root of your project and an index.html in your public folder. In your index.js, add the following to prepare Electron:
const { app, BrowserWindow, screen } = require('electron');
const createWindow = () => {
    const { width, height } = screen.getPrimaryDisplay().workAreaSize;

    const window = new BrowserWindow({
        width: width / 1.25,
        height: height / 1.25,
        frame: false,
        webPreferences: {
            nodeIntegration: true,
            enableRemoteModule: true
        }
    });

    window.loadFile('public/index.html');
};

app.whenReady().then(createWindow)
app.on('window-all-closed', () => app.quit());There are three things to note with the above code example. First, and most importantly, you want to set frame to false. This will remove the default controls from Electron, so we can implement our own.
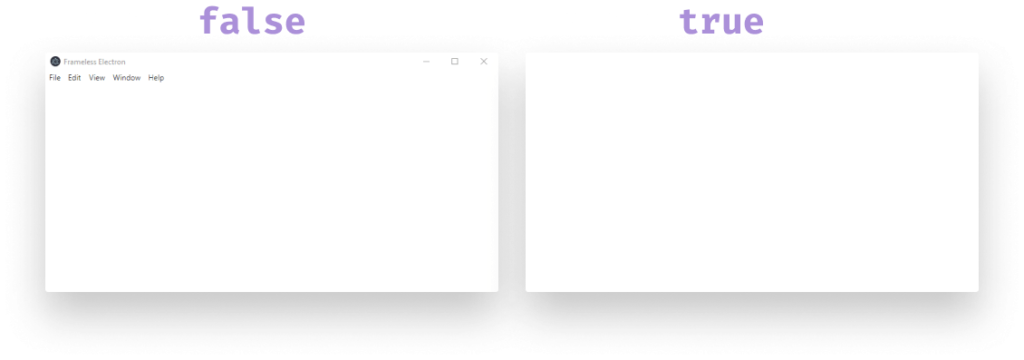
Secondly, you want to enable both nodeIntegration and enableRemoteModule, as we will need them to implement the functionality for the controls. Lastly, make sure you create the index.html file in the public folder. This is what is referenced in line:15. For now, we are good with an empty template.
<!DOCTYPE html>
<html lang="en">
    <head>
        <meta charset="UTF-8" />
        <meta name="viewport" content="width=device-width, initial-scale=1.0" />
        <title>Frameless Electron</title>
    </head>
    <body>
        <!-- We will implement custom controls here -->
    </body>
</html>Adding hot reload
If you try to do some changes, you will notice that you need to restart Electron to let them take effect. To battle this, we can use npm i electron-reloader. Then all you have to do is add the following line of code to the beginning of your index.js, just right after your imports:
const { app, BrowserWindow, screen } = require('electron');

try {
    require('electron-reloader')(module);
} catch (_) {}Making Controls Seamless
Now it’s time to create the controls. First, let’s start by adding the layout to our index.html:
<header id="titlebar">
    <div class="draggable">
        <div class="controls">
            <span class="button close"></span>
            <span class="button minimize"></span>
            <span class="button maximize"></span>
        </div>

        <span class="title">
            <script>document.write(document.title)</script>
        </span>
    </div>
</header>You might be asking, why do we need another div inside the header? It looks like it is only a wrapper, but it serves a purpose, and we will get to it in a minute. Create three buttons for the controls, and one for the title, as we’ve got rid of it by setting frame to false. You can get the title from the title tag using the above script tag. To add some dummy content, I’ve also added 3 paragraphs, using lipsum.com
Styling the controls
For styling the controls, reference a new CSS file in your index.html and create it:
<link rel="stylesheet" href="titlebar.css" />First, you will need to reset the margins on your body, and optionally, you can also add a solid border:
body {
    margin: 0;
    background: #282C34;
    color: #FFF;
    padding: 20px;
    font-family: sans-serif;
    text-align: justify;
    border: 1px solid #41557b;
}The rest of the styles are not important for the controls. Right now, you only have a body with a nice border, and nothing else. You can’t even move the window around. To fix this, add the following styles to the #titlebar:
#titlebar {
    position: fixed;
    top: 0;
    left: 0;
    width: 100%;
    padding: 2px;
    box-sizing: border-box;
    border: 1px solid #41557b;
    border-bottom: 0;
    background: #282C34;
    background: -moz-linear-gradient(top,  #323b44 0%, #282c34 50%);
    background: -webkit-linear-gradient(top,  #323b44 0%,#282c34 50%);
    background: linear-gradient(to bottom,  #323b44 0%,#282c34 50%);
    filter: progid:DXImageTransform.Microsoft.gradient( startColorstr='#323b44', endColorstr='#282c34',GradientType=0 );
}Make sure you set it to fixed, as this will make the controls stay on top at all times. You also want to set a small padding to it. Don’t forget to set box-sizing to border to let the 100% width take the border into account. For the background, I’m using a subtle gradient, and for the border, you want to make it the same you have for the body. Also, remove the border from the bottom, otherwise you will have a line between your title bar and the content.
To make the window draggable, extend your CSS with the following rules:
.draggable {
    padding: 8px;
    font-family: sans-serif;
    font-size: 14px;
    display: flex;
    justify-content: space-between;
    -webkit-app-region: drag;
}Make sure you set the display to flex, as we want the controls to be on the same row, as the title. By setting -wekit-app-region to drag, you’ve just told Electron you want this element to receive drag events. Now you can drag the window around. The reason we needed this wrapper element, is so that we can still resize the window by clicking around the title bar. Notice what happens if I make the #titlebar draggable itself.
I won’t be able to resize the window by clicking around the header. By setting a small padding, and making only the wrapper inside the #titlebar draggable, we keep this functionality. Next up, give some styles to the buttons.
.controls {
    -webkit-app-region: no-drag;
    user-select: none;
}

.button {
    display: inline-block;
    width: 15px;
    height: 15px;
    border-radius: 100%;
    cursor: pointer;
}

.button.close { background: #F03823; }
.button.minimize { background: #FCA101; margin: 0 3px; }
.button.maximize { background: #66E017; }

.button.close:hover { background: #CC2411; }
.button.minimize:hover { background: #D48802; }
.button.maximize:hover { background: #4EBD06; }Make sure you also set app-region to no-drag. We don’t want the window to be draggable by the icons. As a final touch, I reduced the opacity of the title to make it blend into the background a little bit more, and I’ve also added some margin to the body to avoid any overlap with the title bar
.body {
    margin-top: 38px /* Set to the height of the #titlebar */
}

.title {
    opacity: .5;
}
Making the custom controls function
All that’s left to do is to readd the functionality for the controls. In your index.html, add a reference for a new script and create it:
<script src="controls.js" defer=""></script>If you add it to your head element, make sure you set it to defer, otherwise, you won’t have access to DOM elements. The whole functionality fits into 13 lines of code:
const win = require('electron').remote.getCurrentWindow();
const closeButton = document.querySelector('.button.close');
const minimizeButton = document.querySelector('.button.minimize');
const maximizeButton = document.querySelector('.button.maximize');

let isMaximized = false;

closeButton.addEventListener('click', () => win.close());
minimizeButton.addEventListener('click', () => win.minimize());
maximizeButton.addEventListener('click', () => {
    isMaximized = !isMaximized;
    isMaximized ? win.unmaximize() : win.maximize();
});In order to work with the Electron window, you need to require the electron module and get the current window, using the getCurrentWindow method. Note that this does not equal the browser’s built-in window object. For the toggle functionality, you want to introduce a flag. Based on this, you can decide whether to maximize or restore the window to its original size.

Summary
And with that, you have just created custom controls for your frameless window in your Electron app. Want to give your window a custom shape? You can do so, by also making the window transparent, by setting the transparent value to true in your BrowserWindow. Then you can play around with CSS to give any shape to your window. Thank you for reading through, happy coding!

Rocket Launch Your Career
Speed up your learning progress with our mentorship program. Join as a mentee to unlock the full potential of Webtips and get a personalized learning experience by experts to master the following frontend technologies:
Courses


Recommended

How to Create Videos With React
How to Build an IMDB Clone Using Sapper