
How to Use the Fetch API in JavaScript
This lesson is a preview from our interactive course
When working with JavaScript, we will often come across the need to fetch some sort of data from a remote resource, such as a server. In this lesson, we are going to study the built-in Fetch API which was created for exactly this purpose: to help with fetching data in different ways.
The Fetch API is Promise-based, meaning it is an asynchronous operation. Whenever we request data from a server using it, it will return the value asynchronously, just as it takes some time to load any webpage in your browser. Let’s see how we can use it to create basic network requests.

Making Basic Requests
First, we are going to need an endpoint (a URL) which we want to fetch data from. For this purpose, we are going to use an online service called JSON placeholder where we can fetch mock JSON data for testing purposes. Mock data means that this data is fake and is only created for testing purposes. But what is JSON?
JSON
Whenever we are working with external resources, we will often come across JSON files. JSON stands for JavaScript Object Notation, and it is a lightweight data-interchange format that can be used not only by JavaScript but by other programming languages too. It is language-independent.
The format in this data is self-describing and easy to understand. It highly resembles JavaScript — hence the name — the only difference to regular JavaScript objects, is that keys are always represented as strings with double quotes. For example:
{
    "name": "John",
    "age": 30,
    "married": true
}Notice that for JSON, we need to write keys as strings. You must also use double quotes for strings. The rest of the structure remains the same. The most common way to share data is using JSON files. Now that this is out of the way, let’s get back to the Fetch API, and take a look at the mock data that we are going to fetch:
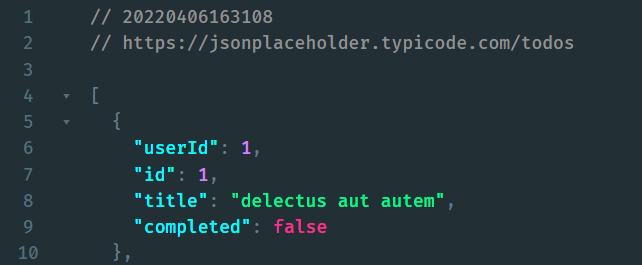
This endpoint returns a list of fake todos, each having some properties. So how exactly we can access this data through JavaScript? Take a look at the following example:
fetch('https://jsonplaceholder.typicode.com/todos')
    .then(response => response.json())
.then(data => console.log(data));First, we call the built-in fetch function, passing the endpoint as a parameter. Then — since it returns a Promise — we can call a then callback on this which will return the response, but then we need to call then a second time, as we need to convert the response into JSON using response.json. This will return the necessary data which we can log to the console. Of course, this can also be written using async/await in the following way:
(async () => {
    const url = 'https://jsonplaceholder.typicode.com/todos';
    const response = await fetch(url);
    const data = await response.json();

    console.log(data);
})();Now we get back the data in an array of objects, ready to be worked with in JavaScript.
Handling Responses
What happens if we have to deal with other types of data and not necessarily JSON? For example, let’s say we have to work with a text file. In this case, all we need to do is change response.json to response.text:
(async () => {
    const url = '/course/data/example.txt';
    const response = await fetch(url);
    const data = await response.text();

    console.log(data);
})();Right-click on the page, and select "Inpect", or hit F12 on your keyboard to bring up DevTools, then copy-paste the above code into the console to execute it.
Note the URL is a relative URL pointing to this domain, so if you try to execute it inside the interactive widget, it won't work.
Of course, not every type of file has a different method available on the response object. For other types, we may want to use response.blob:
(async () => {
    const url = '/course/data/webtips/js/1.png';
    const response = await fetch(url);
    const data = await response.blob();

    console.log(data);
})();Try to change the above example from blob to use text to see what is returned in case you are working with images, and you use the wrong format. Also if we try to do the same but with json, we will get an error:
Uncaught SyntaxError: Unexpected token � in JSON at position 0This means that the JSON we are trying to fetch is invalid. In most cases, not a JSON in the first place. So how can we handle these cases?

Handling Errors
To handle errors, we can use either a catch clause or a try-catch block, depending on whether we use async/await or not. Let’s see a catch clause first:
fetch('/course/data/webtips/js/1.png')
    .then(response => response.json())
    .then(data => console.log(data))
.catch(error => console.log(error));This will prevent errors from breaking our application. To achieve the same thing using async/await, we can wrap the request and response into a try-catch block:
(async () => {
    try {
        const url = '/course/data/webtips/js/1.png';
        const response = await fetch();
        const data = await response.json();

        console.log(data);
    } catch (error) {
        console.log(error);
    }
})();There can be also cases when the URL and the type of the response are right, but we encounter an error while fetching. For example, it returns a 404. 404 is an HTTP status code for not found. It happens whenever we request a page that cannot be found. By default, if everything goes well, the status code is 200 - OK. Let’s see what happens when we request an URL that doesn’t exist:
(async () => {
    try {
        const url = 'https://jsonplaceholder.typicode.com/invalid';
        const response = await fetch(url);
        const data = await response.json();

        console.log(data);
    } catch (error) {
        console.log(error);
    }
})();We get back a 404, with an error. This is not really descriptive and we don’t know what is really going on. Instead, what we can do, is introduce an extra if statement to check if the response came back OK:
(async () => {
    try {
        const url = 'https://jsonplaceholder.typicode.com/invalid';
        const response = await fetch(url);

        if (response.ok) {
            const data = await response.json();
            console.log(data);
        } else {
            console.log(response.status);
        }
    } catch (error) {
        console.log(error);
    }
})();As we can see, the reponse object has a property called ok which is true if everything worked out. However, if there is an error, this becomes false and then we land in the else branch, in which case, we can display different error messages based on reponse.status. In the above example, its value will be 404.

Rocket Launch Your Career
Speed up your learning progress with our mentorship program. Join as a mentee to unlock the full potential of Webtips and get a personalized learning experience by experts to master the following frontend technologies:
Courses


Recommended

How to Create a Configurable Tabs Component in React

How to Create a Responsive Timeline Component in React