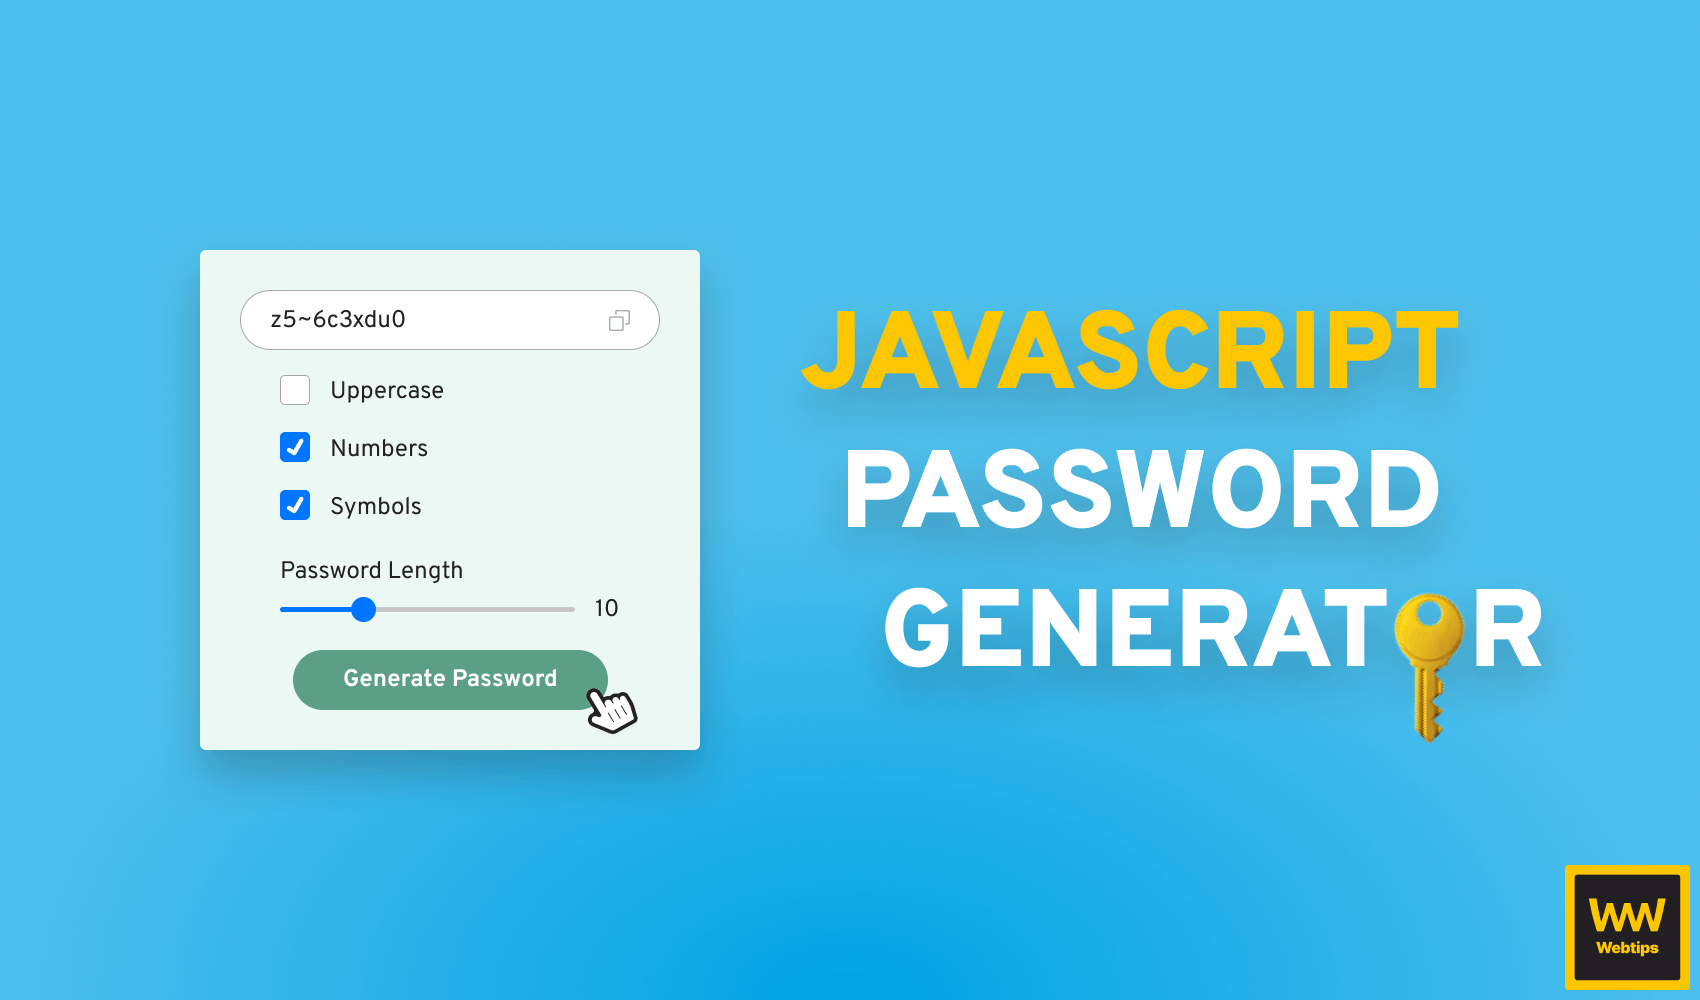
JavaScript Password Generator
In this tutorial, we are going to take a look at how to build a password generator entirely in vanilla JavaScript. We are going to take a look at implementing the following features ✨:
- We are going to be able to generate a random password from the letters of the English alphabet
- We are going to be able to use uppercase letters, numbers, and symbols if we wish
- We are going to be able to copy the generated passwords to the clipboard
- And we are also going to be able to set the length of the password
If you are only interested in the password generation part, click here to go to the GitHub repository.
To achieve this, we are going to need a design of course. For this project, we are going to use the following design from Dribbble:
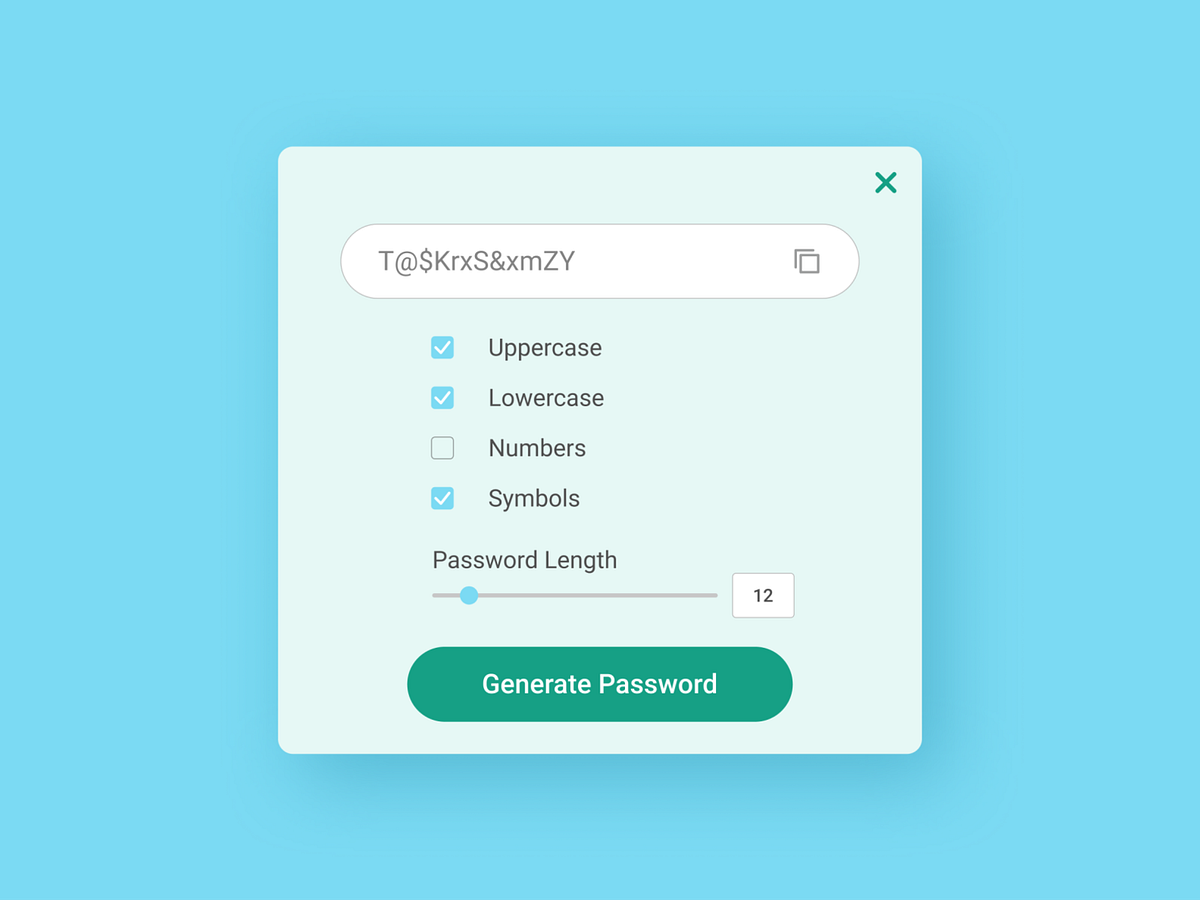
However, we are going to change a couple of things here and there. First, we will not need the lowercase checkbox, as those will be included by default. Secondly, we are also not going to need the close button as this will not be a popup but the entire application itself. And lastly, we will limit the length of the password. We will only allow passwords to be generated with at least 5 characters and no more than 20. You can of course easily configure this to your own needs. So let's jump into coding and set up the project.

Setting up the Project
We are going to need three different files. An index.html for the markup, an app.css for the styles, and an app.js for the JavaScript part. As this tutorial is mostly focused on JavaScript, I will skip walking through the CSS, but you can find the relevant styles in the GitHub repository.
Let's see first what markup we need, then we are going to dive into implementing the functionality in JavaScript:
<!DOCTYPE html>
<html lang="en">
    <head>
        <meta charset="UTF-8" />
        <meta http-equiv="X-UA-Compatible" content="IE=edge" />
        <meta name="viewport" content="width=device-width, initial-scale=1.0" />
        <link rel="stylesheet" href="./app.css" />
        <title>🔑 Password generator</title>
    </head>
    <body>
        <div id="app">
            <div class="generate-pass">
                <input type="text" />
                <span class="copy">
                    <svg xmlns="http://www.w3.org/2000/svg" xmlns:xlink="http://www.w3.org/1999/xlink" version="1.1" viewBox="0 0 460 460" style="enable-background:new 0 0 460 460;" xml:space="preserve" data-js-selector="copy">
                        <path d="M425.934,0H171.662c-18.122,0-32.864,14.743-32.864,32.864v77.134h30V32.864c0-1.579,1.285-2.864,2.864-2.864h254.272     c1.579,0,2.864,1.285,2.864,2.864v254.272c0,1.58-1.285,2.865-2.864,2.865h-74.729v30h74.729     c18.121,0,32.864-14.743,32.864-32.865V32.864C458.797,14.743,444.055,0,425.934,0z" />
                        <path d="M288.339,139.998H34.068c-18.122,0-32.865,14.743-32.865,32.865v254.272C1.204,445.257,15.946,460,34.068,460h254.272     c18.122,0,32.865-14.743,32.865-32.864V172.863C321.206,154.741,306.461,139.998,288.339,139.998z M288.341,430H34.068     c-1.58,0-2.865-1.285-2.865-2.864V172.863c0-1.58,1.285-2.865,2.865-2.865h254.272c1.58,0,2.865,1.285,2.865,2.865v254.273h0.001     C291.206,428.715,289.92,430,288.341,430z" />
                    </svg>
                </span>
            </div>
            <div class="inputs">
                <label for="uppercase" data-js-selector="checkbox">
                    <input type="checkbox" id="uppercase" />
                    Uppercase
                </label>
                <label for="numbers" data-js-selector="checkbox">
                    <input type="checkbox" id="numbers" />
                    Numbers
                </label>
                <label for="symbols" data-js-selector="checkbox">
                    <input type="checkbox" id="symbols" />
                    Symbols
                </label>
                <div class="input-group">
                    Password Length

                    <div class="slider-container">
                        <input type="range" min="5" max="20" value="5" class="slider" data-js-selector="slider" />
                        <span class="value">5</span>
                    </div>
                </div>
                <button data-js-selector="button">Generate Password</button>
            </div>
        </div>
        <script src="./app.js"></script>
    </body>
</html>Notice that we are using data-js-selector attributes. We are going to use these in JavaScript to get the relevant DOM elements for user events. Preferably, you want to avoid using classes for the selectors, as they could change and they are meant for styling. This way, it is clear that it's a selector for JavaScript specifically.
One important thing I would like to point out from the CSS side, is that make sure you add pointer-events: none to the checkboxes inside the labels to always register the click event on the label itself. Also make sure you place the script tag before the closing of your body tag so that by the time JavaScript is loaded, we already have access to DOM elements. Without any further ado, let's see the JavaScript part.
Setting up Configurables
First, we want to set up some boolean flags that we can later use to decide how we want to generate the password. This includes things like, whether we want to use certain characters or the length of the password. We can store this in a configuration object:
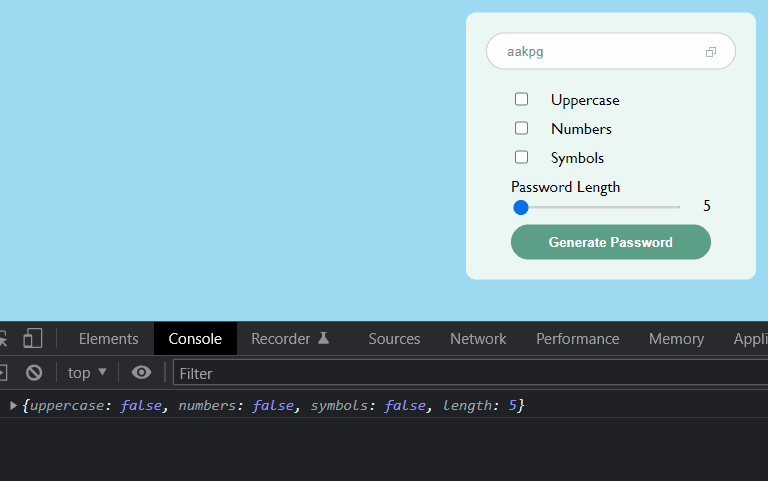
const flags = {
    uppercase: false,
    numbers: false,
    symbols: false,
    length: 5
}We basically have a flag for every input that can change the output of the final generated password. We can also do the same thing with selectors so that if we ever have to change them later, we only need to do it in one place:
const selectors = {
    copy: 'copy',
    checkbox: 'checkbox',
    slider: 'slider',
    button: 'button',
    sliderValue: document.querySelector('.value'),
    input: document.querySelector('input[type="text"]')
}Notice that we only use querySelector for two elements, the rest are using simple strings. This is because everything that is a string, we will assume it is referencing a data-js-selector attribute that is used for user interaction.

Adding Event Listeners
Since we want to share the same logic for multiple event listeners, we are going to add only one to the root of the app and delegate the event to the necessary elements. For this, we can use a switch statement, using the data-js-selector attribute:
document.querySelector('#app').addEventListener('click', event => {
    switch (event.target.dataset.jsSelector) {
        // Event listener for copy
        case selectors.copy:

        break;

        // Event listeners for checkboxes
        case selectors.checkbox:

        break;

        // Event listeners for slider
        case selectors.slider:

        break;

        // Event listener for generate button
        case selectors.button:

        break;
    }
})
We are going to implement the necessary event listeners in each of the cases. It switches between the data-js-selector attribute, and grabs the right one from the selectors object we have defined above. Let's first create the event listener for the checkboxes as this will only require one line of code:
case selectors.checkbox:
    flags[event.target.control.id] = !event.target.control.checked
break;All we are doing here is updating one of the flags based on whether a checkbox is checked. We can get the checkbox by referencing control.id (the id attribute of the checkbox). Notice that event.target is referencing the label. Every label can have a control that we can connect using the for attribute in HTML. And this will reference the input on which we get the id.
<label for="symbols" data-js-selector="checkbox">
    <input type="checkbox" id="symbols" />
    Symbols
</label>So for example, once we check "Symbols" to be used, this will translate to the following:
flags.symbols = trueIf we check the checkboxes now and log the values of the flags object to the console, we can see that whenever we tick a checkbox, its value will be updated accordingly. This will let us use them, later on, to decide how to generate the password.
Adding event listener for the slider
Next up, we have the slider. It will be a little different to checkboxes as we are not working with boolean values but with a number. Here we not only want to update the necessary flag but also want to update the UI, which shows the current length of the password. Based on this, we get the following:
case selectors.slider:
    const value = event.target.valueAsNumber

    selectors.sliderValue.innerText = value
    flags.length = value
break;We can get the value of the slider as a number using the valueAsNumber attribute on the target event, and then assign this to update both the state and the UI.
Copying password
We only have two things left to do. Generating the password itself, and then adding the copy functionality, which will let us copy the code to the clipboard with a click. Let's start with the latter as generating the code will take a bit more explanation. Copying content to the clipboard in JavaScript can be achieved in the following way:
case selectors.copy:
    selectors.input.select()

    document.execCommand('copy')
break;
So what exactly happens here? We call select on the input to select the content of the input field, and then run document.execCommand with "copy" to copy the selected value over to the clipboard. That's all we need to copy the text to the clipboard. Let's focus our attention now on generating the password.
Generating the Password
For this part, we can create a new function and outsource the logic there, which means we can actually get away with one line of code for the event listener:
case selectors.button:
    selectors.input.value = generatePassword()
break;
We set the value of the input field to the return value of the generatePassword function. So what does this function returns? It's a string representation of the generated password. To generate a password, we first need to know which characters are available for use. For this, we can create the following object:
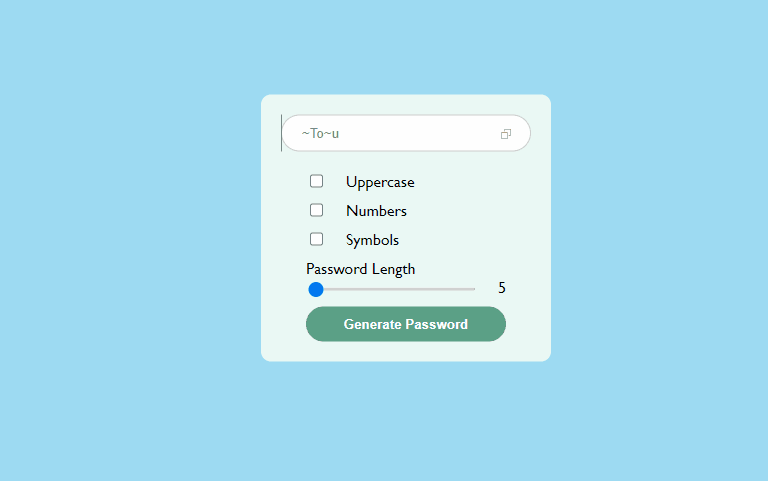
const generatePassword = () => {
    const defaultCharacters = 'abcdefghijklmnopqrstuvwxyz'
    const characters = {
        uppercase: defaultCharacters.toUpperCase(),
        numbers: '0123456789',
        symbols: '~!@-#$'
    }
}
By default, we are going to start with the letters of the English alphabet in lowercase. We can call toUpperCase on this string to also get the uppercase versions of the letters. Make sure you also define the rest of the possible characters as strings as well, as the idea is to randomly grab a value from this string. We can also define a list of random symbols to make these available.
So based on this list of characters, and based on the currently active flags, we want to generate a final version of the string so that we know which characters are available when we do the generation part. This means that if numbers are checked in, we should get the following string:
'abcdefghijklmnopqrstuvwxyz0123456789' -> note the numbers attached at the end of the string
And so on. So how do we generate the final string based on the flags? We can use an array, where we optionally add the characters based on the flag and then join the array together into a string:
const characterList = [
    defaultCharacters,
    ...flags.uppercase ? characters.uppercase : [],
    ...flags.numbers ? characters.numbers : [],
    ...flags.symbols ? characters.symbols : []
].join('')
This includes the default character list by default (lowercase letters of the English alphabet), and optionally, we can add the rest of the characters if their flags are set to true. For this, we can use the spread operator with a ternary combined, to either add it or add an empty array. Because of the way spread works, if one of the flags is false, the empty array will be spread too, meaning nothing will be added. Then we can join this together into a single string using join.
The last thing to do is to actually return a password from the function. For this, we are going to fill an array with the length of the password, and we randomly choose a character from the character list. For this, we can use the following formula:
return Array.from({ length: flags.length }, () => Math.floor(Math.random() * characterList.length))
    .map(number => characterList[number])
    .join('')
First, we need to create an array. We can do this using Array.from. It accepts a config as the first parameter where we can set the length of the array. We want the length to match the length of the password, so we can pass flags.length here.
The second parameter is a callback function that defines what should be the value of each element inside the array. Here we are grabbing a random index from the characterList using Math.random. Don't forget that we need to floor this number to get a whole number. At the end of this, we will have an array with a list of random numbers:
// Array has the length of the password, numbers are picked from the length of the character list
[0, 23, 11, 52, 34] -> This means the password would be 5 characters long
Now that we have a list of random indexes, we can pick the appropriate character from the character list using a map, and then join everything together into a single string. This means we will get the generated password, and with that, the following:
Summary
And now you have just created your very first password generator in vanilla JavaScript! 🎉 If you would like to get the source code for this app in one piece, you can clone it from its GitHub repository. If you are looking for more JavaScript project ideas, I recommend checking out the article below. Thank you for reading through! Keep on coding. 👨💻


Rocket Launch Your Career
Speed up your learning progress with our mentorship program. Join as a mentee to unlock the full potential of Webtips and get a personalized learning experience by experts to master the following frontend technologies:
Courses


Recommended
How to Build a Pagination Component in Vanilla JavaScript
How to Quickly Add Line Numbers to HTML Textarea