How to Use Express to Build a REST API
Did you know that in 2019, Express ranked number one in awareness, interest, and satisfaction, according to the State of JS, a yearly survey that had more than 20,000 respondents? It is mostly used to create robust APIs for the web, quickly and easily through its flexible API.
APIs are common means of communication between different software components. They provide a simple way to exchange data between two applications. In our case, this will be between the browser and a database. In this tutorial, we’re going to build a scalable REST API in Node using Express.
To keep things simple, we will go with the classical todo example. We will build an API to store, retrieve, modify, and delete todo items. Each operation will be handled by a different HTTP request method. Our very first job will be to set up Express.
Setting Up Express
To make this tutorial concise and digestible, I will replace the database functionality with LocalStorage. Of course, we don’t have this in node so we will have to polyfill it. This means we will have two dependencies: express and node-localstorage. npm init -y your project and add these to your dependencies.
{
    "name": "express-api",
    "version": "1.0.0",
    "private": true,
    "scripts": {
        "start": "node server.js"
    },
    "keywords": [],
    "author": "",
    "license": "ISC",
    "dependencies": {
        "express": "4.17.1",
        "node-localstorage": "2.1.5"
    }
}I also replaced the default script withnode server.js; this is the file where we will set up the Express server. Create the server.js file in your root directory and add the following lines to it:
const express = require('express'),
      app     = express(),
      port    = process.env.PORT || 8080;

app.listen(port);

console.log(`API server is listening on port:${port}`);We can start the webserver with app.listen passing in the port; either from the command line or defaulting to 8080. Not much is happening right now. If you open localhost:8080, you’ll see the server doesn’t return anything. So let’s change that and add some routes!

Creating Routes
For the routes, I’ve created a separate directory called routes and added an index.js. We’re going to have four different endpoints:
GETfor getting all or a single todo itemPOSTfor creating a new todo itemPUTfor updating an existing todo itemDELETEfor removing a specific todo item
This is how our routes/index.js will look like:
'use strict';

const routes = (app) => {
    const todo = require('../controllers/Todo');

    // Todo Route
    app.route('/todo/:id?/')
        .get(todo.get)
        .post(todo.create)
        .put(todo.update)
        .delete(todo.delete);
};

module.exports = routes;routes will be a function that gets the express app as a parameter. The app variable exposes a route method which takes in an endpoint as a parameter. We can specify route params by using colons. By also adding a question mark at the end, we can tell express that this is only an optional param.
On route, we can chain different HTTP request methods. For every method, we will execute a different function. The methods are coming from an object defined in the controller’s folder under Todo.js, so that will be our next step.
But first, to actually tell Express to use these routes, go back to your server.js file and extend it with the following:
const express = require('express'),
      routes  = require('./routes/index'),
      app     = express(),
      port    = process.env.PORT || 8080;

routes(app);

app.listen(port);

console.log(`API server is listening on port:${port}`);I’ve imported routes and passed the Express app to it. Now if you navigate to localhost:8080/todo it will call the todo.get method which we haven’t specified yet, so let’s do that right now.

Requests and Responses
If you haven’t already, create a controllers folder and add a Todo.js file. We’re going to export an object containing four methods for the four requests:
const LocalStorage = require('node-localstorage').LocalStorage;
const localStorage = new LocalStorage('./db');

module.exports = {

    get(request, response) {

    },

    create(request, response) {

    },

    update(request, response) {

    },

    delete(request, response) {

    }
};Each method will get access to a request and response object. We also need to import the LocalStorage package since we’re going to use that in place of a real database. It will automatically create a db folder for you in the root directory.
Let’s go in order and see how we can get back todos using the get method.
Get route
We want to either get all or a specific todo, based on whether the id has been provided in the URL or not. We also want to check whether we have a localStorage item set, so we don’t end up with an error. This leaves us with the following checks:
get(request, response) {
    if (localStorage.getItem('todos')) {
        if (!request.params.id) {
            // Return all todos
        } else {
            // Return single todo
        }
    } else {
        // No todos set on localStorage, fall back to empty response
    }
}To get URL parameters, we simply need to access the request.params object. The name of the property will be the one specified in app.route. (:id) To return a JSON response, we can call response.json with an object we want to return as a response:
get(request, response) {
    if (localStorage.getItem('todos')) {
        if (!request.params.id) {
            response.json({
                todos: JSON.parse(localStorage.getItem('todos'))
            });
        } else {
            const todo = JSON.parse(localStorage.getItem('todos')).filter(todo => todo.id === parseInt(request.params.id, 10));

            response.json({
                todo
            });
        }
    } else {
        response.json({
            todos: []
        });
    }
}If we don’t even have todos in localStorage, we can return an empty array. Otherwise, we can return the items stored in localStorage. Since we can only store strings, we need to call JSON.parse on the object. The same applies when we want to access a single todo. But this time, we also want to filter for a single item.
If you refresh the page, you’ll get back an empty todo list.

Post route
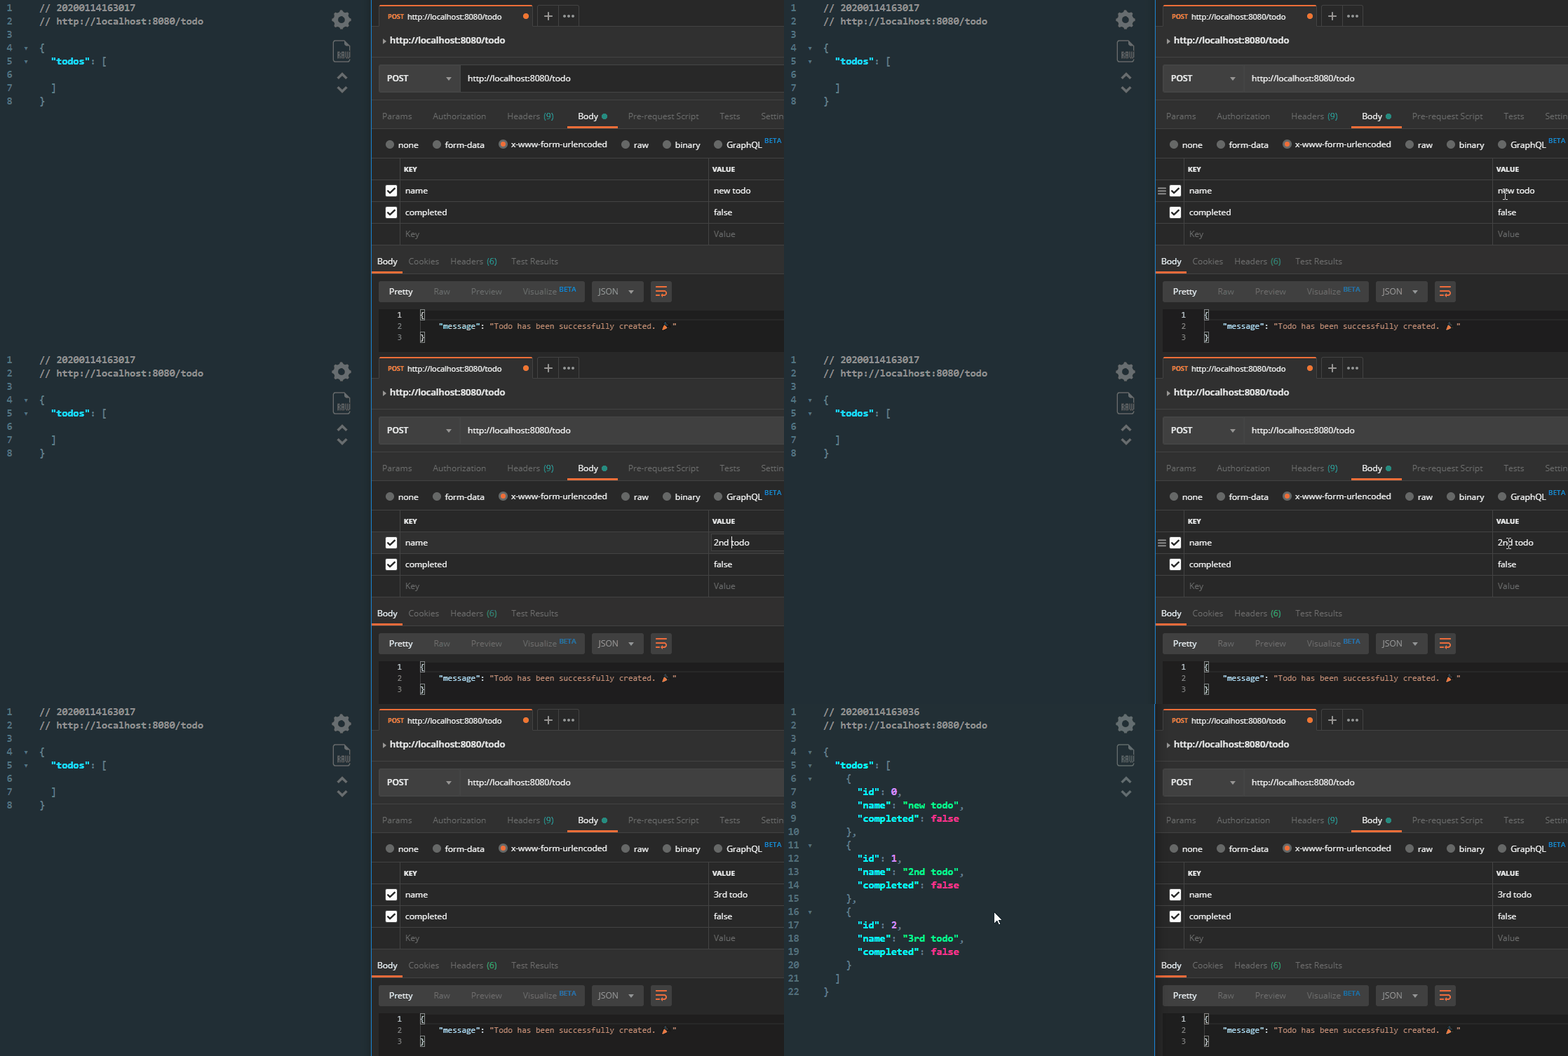
Let’s populate the array with some items. This time, we want to send the request data using a x-www-form-urlencoded content type. Since we can’t send a POST request right inside the browser without any frontend, we need to find another way. For this task, I’m using the popular Postman app. You can download and install it for free.
Open the app and create a new request. Set the method type to POST and the body to x-www-form-urlencoded. We only want to add a new todo if a name and a completed flag have been provided.

To get the values from the request inside Express, we can access request.body. If you, however, send a post request and try to log out request.body, you’ll notice that it is undefined. This is because express by default can’t handle URL encoded values. To make them accessible through JavaScript, we have to use a middleware. Add the following line to your server.js file, before you define the routes:
app.use(express.urlencoded({ extended: true }));Now if you send the POST request and you try to log out request.body again, you’ll get the values logged out to your console.

So we can start by checking whether we have the two values in the request and if not, we can send an error specifying the problem:
create(request, response) {
    if (request.body.name && request.body.completed) {
        // Add new todo
    } else {
        response.json({
            error: '⚠️ You must provide a name and a completed state.'
        });
    }
}The way we want to add a new item is we simply want to get the todos from localStorage if there’s any, parse the JSON and push a new object to the array. Then convert it back to JSON, and of course, send a response to let us know if we were successful.
if (request.body.name && request.body.completed) {
    const todos = JSON.parse(localStorage.getItem('todos')) || [];

    todos.push({
        id: todos.length,
        name: request.body.name,
        completed: request.body.completed === 'true'
    });

    localStorage.setItem('todos', JSON.stringify(todos));

    response.json({
        message: 'Todo has been successfully created. 🎉'
    });
}Note that since we might not have todos present in the localStorage, we need to fall back to an empty array. Also note that since we’re getting the requests as strings, we need to cast the completed flag to a boolean.
Put route
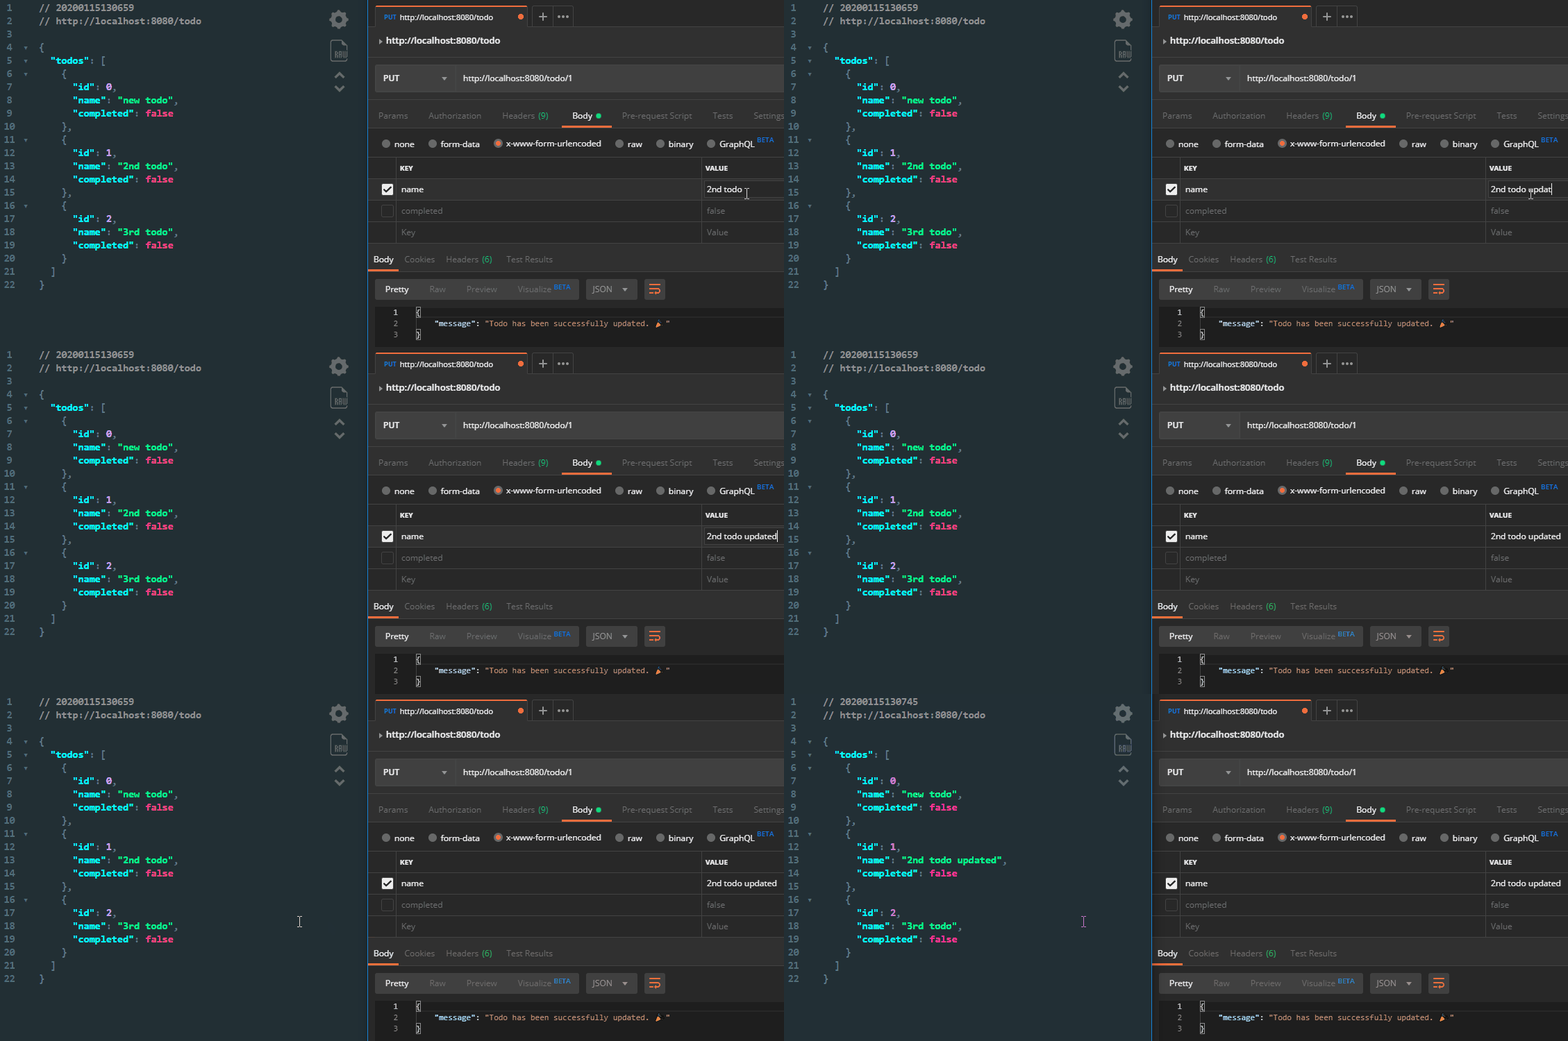
Once we have enough items on our todo list, we can try to update them. Again, we need to check for the presence of an id and either a name or a completed flag.
update(request, response) {
    if (request.params.id && (request.body.name || request.body.completed)) {
        // Update todo
    } else {
        response.json({
            error: '⚠️ You must provide an id and a property to update.'
        });
    }
}We want to follow a similar logic we did for the create method: Parse the localStorage data, update the item in the array where the id matches the one passed as a request param, convert the data back to JSON and send a success response:
if (request.params.id && (request.body.name || request.body.completed)) {
    const todos = JSON.parse(localStorage.getItem('todos'));

    todos.forEach(todo => {
        if (parseInt(request.params.id, 10) === todo.id) {
            todo.name = request.body.name || todo.name;

            if (request.body.completed) {
                todo.completed = request.body.completed === 'true';
            }
        }
    });

    localStorage.setItem('todos', JSON.stringify(todos));

    response.json({
        message: 'Todo has been successfully updated. 🎉'
    });
}Remember that we want to cast the completed flag into a boolean. And the reason why we can’t do logical OR just like we did for todo.name is because in case we want completed to be set to false, it would always fall back to the default todo.completed value.
Delete route
Probably the shortest and simplest method of all will be the delete. All we have to do is filter out the item where the id matches the one passed into the endpoint:
delete(request, response) {
    if (request.params.id) {
        const todos = JSON.parse(localStorage.getItem('todos')).filter(todo => todo.id !== parseInt(request.params.id, 10));

        localStorage.setItem('todos', JSON.stringify(todos));

        response.json({
            message: 'Todo has been successfully removed. 🗑️'
        });
    } else {
        response.json({
            error: '⚠️ You must provide an id.'
        });
    }
}And reassign its stringified version back to todos inside localStorage.

Conclusion
Now you have a working API in place to handle todo items. I’ll leave the UI part up for you. The great way about this approach is that every operation is separated into a different method. This way your API is more easily scalable. It also helps reducing time looking for bugs. If you are experiencing a problem with one of the requests, you can quickly pinpoint where and what went wrong. You’ll know that the problem lies in one single function.
If you were wondering about the look and feel of the JSON response I was getting throughout the tutorial, I’m using the JSON Viewer Chrome extension, which you can get at the provided link. If you would like to mess around with the final project, you can reach it at the express-api Github repo.
Thank you for reading through. Whether if you have any experience building APIs and working with Express or not, share your thoughts in the comments below and let us know what is your approach.
☕ Get yourself an Expresso Sticker ☕
Continue the tutorial, by learning how to also secure your freshly created API with JSON Web Tokens:


Rocket Launch Your Career
Speed up your learning progress with our mentorship program. Join as a mentee to unlock the full potential of Webtips and get a personalized learning experience by experts to master the following frontend technologies:


