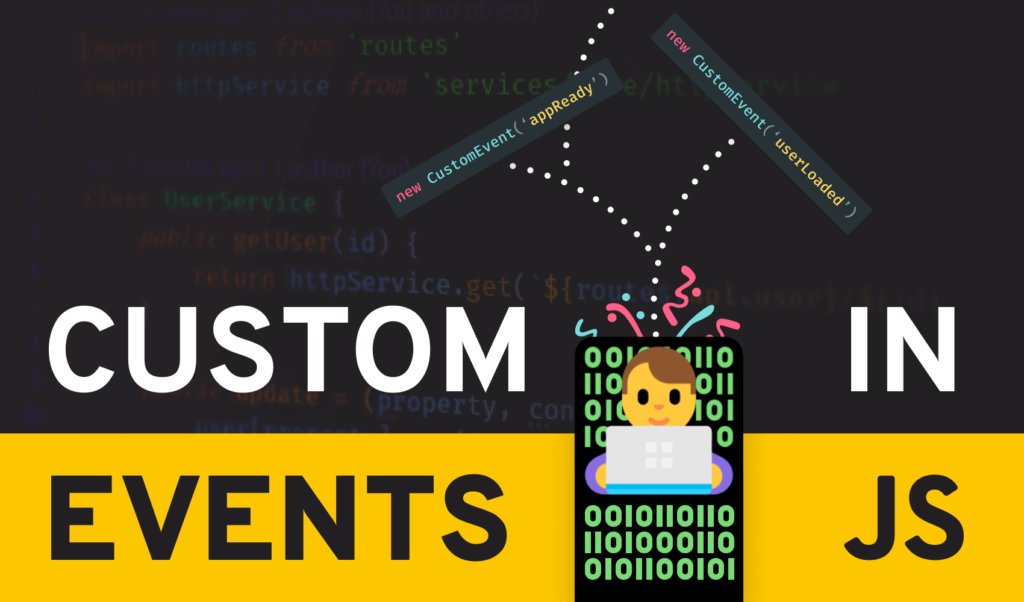
Custom Event Listeners in JavaScript
Most of the time (apart from simple todo applications), when you are writing a modern web application, you have to separate code into different modules to keep things manageable. This makes it easy to separate the different behaviors of your application, as well as make it more easily scalable not to mention readability.
But what happens when you have to achieve communication between two separate components? That’s where custom event publishing and custom event listeners come into place. It provides a similar behavior to the PubSub design pattern.


What Are Events?
So what exactly are events? As you may already know, JavaScript is event-driven which means that the flow of the application is usually determined by events, such as various user interactions (clicks, keyboard input, scrolling, etc.).
There are tons of events you can attach to. Mouse alone has 15 different events you can listen to.
How do they work?
Events can be handled in two different ways. They are called event bubbling and capturing.
By default, events are using bubbling. When you attach an event to an element using addEventListener, the event is first captured in the innermost element and then propagates up to the root of the document.
const ul = document.getElementById('ul');

// By default, addEventListener uses event bubbling
ul.addEventListener('click', () => console.log('👨'));The exact opposite happens during the capturing phase. The event is first captured in the outermost element and propagates to inner elements.
These two different propagation models can help us decide which element should receive the event first, given that the same event is registered for both a child and parent element.
// To use event capturing for capturing events
// on parents first, pass true as the 3rd parameter
// to addEventListener

const ul = document.getElementById('parent');
const li = document.getElementById('child');

ul.addEventListener('click', () => console.log('👨'), true);
li.addEventListener('click', () => console.log('👶'), true);

// Instead of seeing 👶, 👨 in the console
// You'll see 👨, 👶 as the direction is changed with `true`To experiment with the two propagation models, take a look at this Codepen example:
Overall, there are almost 200 different standard events you can listen to. Yet, there could be times when you need a custom event thrown by your application. This is where custom events can be super useful.
Dispatching Custom Events
To start, let’s see how you can create custom events. All you have to do is call the Event constructor with the name of the event you want to dispatch:
// Pass the name of the event you want to dispatch as the first parameter
new Event('userLoaded');
new Event('customEvent');
new Event('🎉');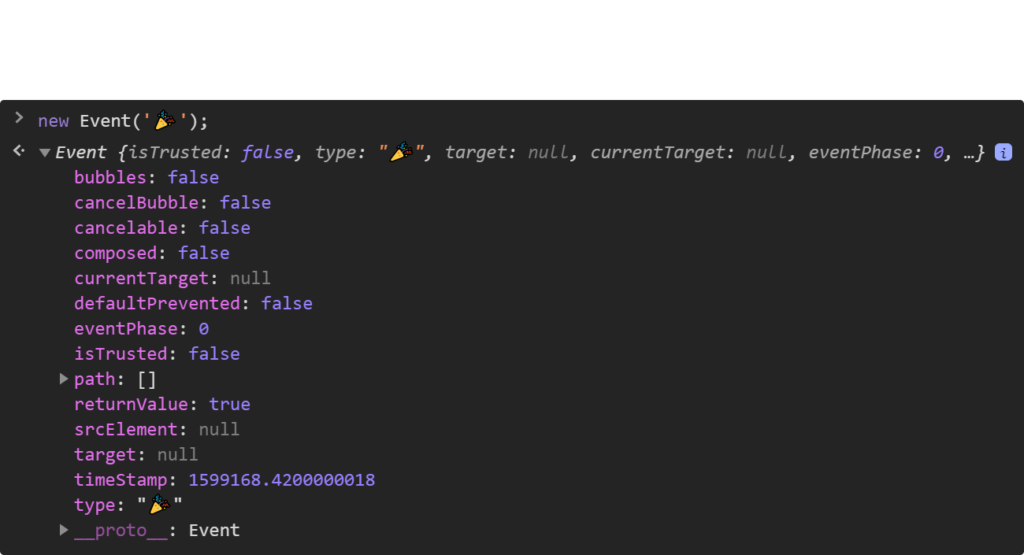
So how do you dispatch it? You need to call dispatchEvent on a DOM node.
document.getElementById('app').dispatchEvent(new Event('appReady'));
Listening to Custom Events
We’ve successfully dispatched the event. Now it’s time to listen to it. You can listen for custom events, just like you would with standard events: using addEventListener.
const app = document.getElementById('app');

app.addEventListener('appReady', () => console.log('The app is ready 🎉'));

// Later in the application, calling dispatchEvent
// will cause the attached eventlisteners to be executed
app.dispatchEvent(new Event('appReady'));Note that you can only listen to custom events fired from the same DOM element. This means that if you dispatch an event on a button in module-b.js and you listen for it on another button in module-a.js, you won’t be able to execute the callback function. Instead, to make events global, rewrite the above example in the following way:
// If you want to dispatch events globally, call dispatchEvent on the document
document.addEventListener('appReady', () => console.log('The app is ready 🎉'));
document.dispatchEvent(new Event('appReady'));By attaching the event listener on the document and listening for it on the document as well, you can essentially publish and catch custom events globally, anywhere in your application.
Adding custom data
Let’s say now you also want to transfer some data between components. This can be also done using the CustomEvent constructor.
// This will log out "The app is ready by 1597336905371 🎉"
document.addEventListener('appReady', e => {
    console.log(`The app is ready by ${e.detail} 🎉`);
});

// Pass an object as a second parameter with a `detail` key
document.dispatchEvent(new CustomEvent('appReady', {
    detail: +new Date()
}));You can also change the event propagation model by passing bubbles as another property to the payload.
// Pass `bubbles` if you want to change the event propagation model
document.dispatchEvent(new CustomEvent('appReady', {
    bubbles: true,
    detail: +new Date()
}));Best Practices
When it comes to dispatching custom events, there’s a couple of things you should keep in mind. As you’ve noticed, you can basically create any type of event with the name of your choice. While this makes things super flexible, it also paves the way for inconsistency. Imagine the following situation:
// You have multiple events which are expecting important params
document.addEventListener('appReady', e => console.log(`The 1st app is ready by ${e.detail} 🎉`));
document.addEventListener('appReady', e => console.log(`The 2nd app is ready by ${e.detail} 🎉`));

// Later in your app, you do the dispatching
document.dispatchEvent(new CustomEvent('appReady', {
    detail: +new Date()
}));

// The two console.logs gets printed to the console
// The 1st app is ready by 1597337145718 🎉
// The 2nd app is ready by 1597337145719 🎉Everything works fine. As you can see, you can attach multiple event listeners with different behaviors to the same event. But what happens if you use the same event name to dispatch an event with another payload?
// Later down in your app, a colleague of yours — because let's be honest, it's never our fault — dispatches the same event with another payload
document.dispatchEvent(new CustomEvent('appReady', {
    detail: 'This payload doesn\'t contain any timestamp 🤕'
}));

// The 1st app is ready by This payload doesn\'t contain any timestamp 🤕
// The 2nd app is ready by This payload doesn\'t contain any timestamp 🤕As you can see, we are expecting a timestamp in the event listeners but the dispatch sends us a string. This can cause unexpected behaviors. One common way to battle this is keeping all known custom events in one place, and only allowing the use of predefined events:
const EVENTS = {
    appReady: 'appReady',
    userLoaded: 'userLoaded',
    userSubscribed: 'userSubscribed'
};

// Only dispatch known predefined events.
document.dispatchEvent(new CustomEvent(EVENTS.appReady, { ... });Another common practice is to namespace events by dots or colons to avoid conflict:
// The two events below are entirely different
// But the naming signals it clear that they belong to the same event
document.dispatchEvent(new CustomEvent('appReady.boot', { ... });
document.dispatchEvent(new CustomEvent('appReady:boot', { ... });Summary
In summary, creating and dispatching custom events is fairly simple with the Event and CustomEvent interfaces. If you would like to learn more about how they work, I recommend looking through the documentation on MDN.
Did you already know about Event and CustomEvent? Let us know what are your best practices when using them in the comments! Thank you for reading through, happy coding!

Rocket Launch Your Career
Speed up your learning progress with our mentorship program. Join as a mentee to unlock the full potential of Webtips and get a personalized learning experience by experts to master the following frontend technologies:
Courses


Recommended
MERN vs. MEAN Stack — What Are The Differences?

So, What is JAMStack All About?