Getting Into Three.js
Three.js is a 3D JavaScript library that enables us to build beautiful 3D worlds right inside the browser. If you only know JavaScript but wanted your imagination to come to life on a canvas, now it’s the time.
With it, you don’t have to worry about physics and mathematical computations as every important thing is exposed through a simplified API.
If you visit the official website of three.js, you can see a great variety of examples of what is truly possible with the library.

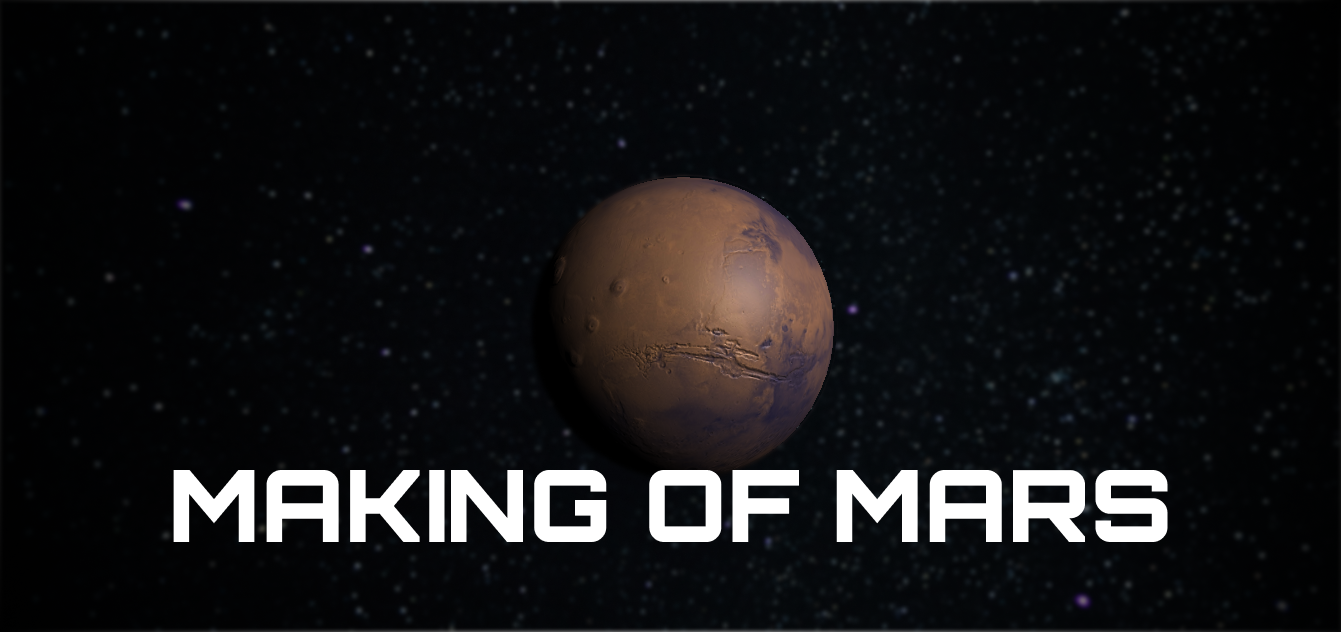
With the help of three.js, we will dive into the basics of 3D, and at the end of the tutorial, you will achieve something like this:


Setting Up Three.js
Before we can start creating the world, we need a canvas to display anything. Add the following index file to your project root:
<!DOCTYPE html>
<html lang="en">
    <head>
        <meta charset="UTF-8" />
        <meta name="viewport" content="width=device-width, initial-scale=1.0" />
        <meta http-equiv="X-UA-Compatible" content="ie=edge" />
        <title>Three.js - Mars</title>
        <style>
            body {
                margin: 0;
                overflow: hidden;
            }

            canvas {
                width: 100%;
                height: 100%;
            }
        </style>
    </head>
    <body>
        <script src="https://threejs.org/build/three.js"></script>
        <script src="mars.js"></script>
    </body>
</html>
I pulled in the library from the official threejs.org site. Everything we implement will go into mars.js, so you can create an empty file next to index.html at this stage.
You might have also noticed that there is no canvas element in the document. We don’t need to specify one as we will create it inside our script. I also added a minor styling just to make the canvas fullscreen.
Now to display anything on the canvas, we need three things: a scene, a camera, and a renderer. To create all three of them, add the following lines to your empty mars.js file:
const scene = new THREE.Scene();
const camera = new THREE.PerspectiveCamera(75, window.innerWidth / window.innerHeight, 0.1, 1000);
const renderer = new THREE.WebGLRenderer();First, we have the scene.
Scene
The scene is just a space where you can place all kind of objects like geometries, lights or cameras. Inside the scene, you can tell three.js where to display these objects. Next up we have the camera.
Camera
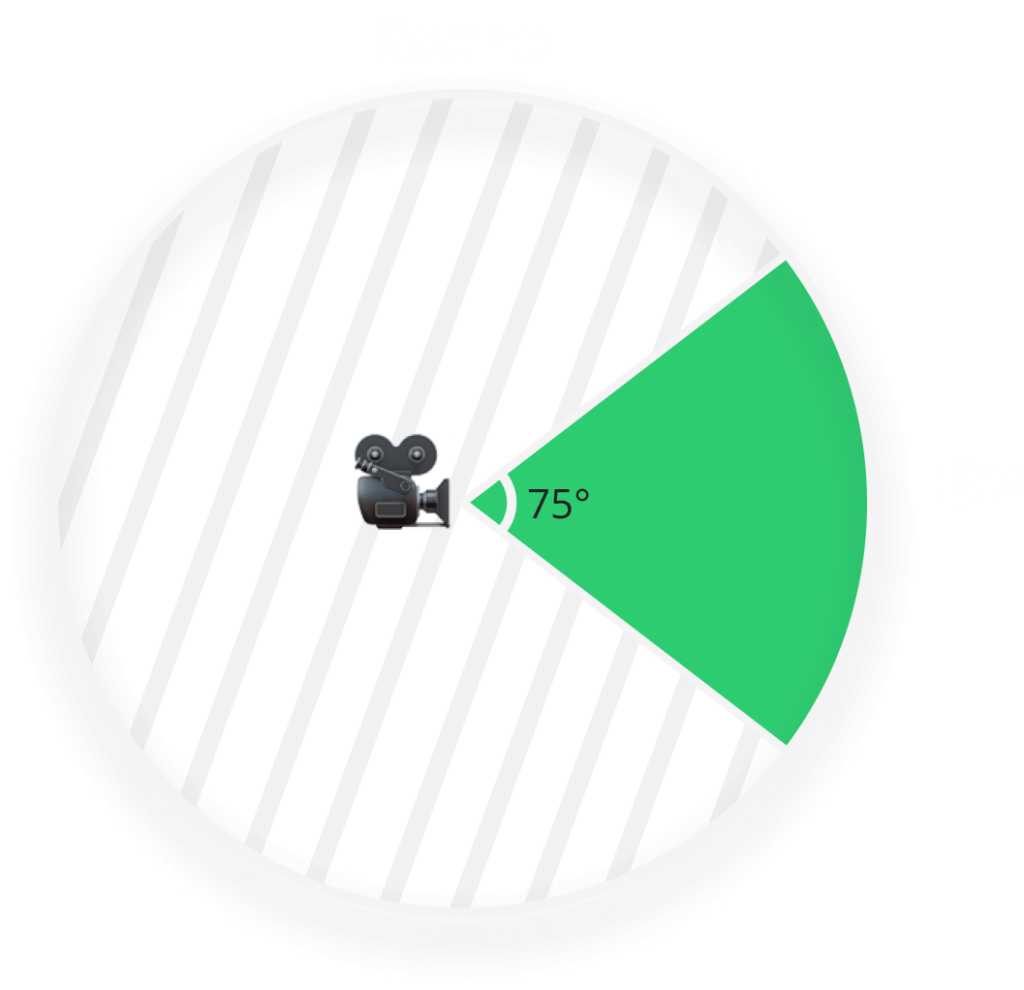
In this example, we are using the PerspectiveCamera of three.js which takes in four parameters:
The first parameter is the field of view or FOV for short. It is the visible portion of the scene that is seen by our camera, expressed in degrees.
The second parameter is the aspect ratio. You almost always want it to be set to the width of the canvas divided by its height. Otherwise, you’ll get a distorted image.

Lastly, we define the near and far clipping planes. This means that everything closer to the camera than the first number won’t be rendered. The same applies to the second number. Everything further from the camera than the specified value won’t be rendered.
Renderer
And then we have the renderer. We will use it to render everything into the scene. Three.js comes with a few built-in renderer. Usually, you would go with WebGL, others are often used for older browsers as fallbacks.
To finally add the canvas to the document, extend mars.js with the following two lines:
renderer.setSize(window.innerWidth, window.innerHeight);
document.body.appendChild(renderer.domElement);Here we tell the renderer to use the available width and height for the canvas element and then we can append it to the body. If you open this in a browser, you’ll see a black empty canvas. Let’s add the planet now!
Adding Mars to the Scene
To create the planet, we need three things again:
- A geometry which defines the shape of the object
- A material —The look and feel of the geometry, such as color and texture
- A mesh which is a combination of a geometry and a material which can be later added to the scene
Let’s add the following to our script:
const geometry = new THREE.SphereGeometry(1, 32, 32);
const material = new THREE.MeshPhongMaterial();
const mesh = new THREE.Mesh(geometry, material);

scene.add(mesh);First, we create a sphere by calling SphereGeometry. The first argument in the function call is the radius, the second and the third are the width and height segments of the sphere. Notice how we get a more fine-grained sphere as I increase their values up to 32:

For material, we are using MeshPhongMaterial. All you need to know now is that this way the sphere is going to be affected by light. Unlike if we were to use a MeshBasicMaterial for example.
To create a mesh, we simply pass geometry and material to Three.Mesh and add it to our scene calling scene.add.
Right at this stage, if you refresh the browser, you’ll still see nothing. This is because we are missing three more things once more:
Rendering the scene
The most important one is that we did not tell three.js to render the scene. For this, we need a render loop:
const animate = () => {
    requestAnimationFrame(animate);
    renderer.render(scene, camera);
};

animate();We can use requestAnimationFrame which will result in 60fps for most screens. To render out everything we need to call renderer.render with our scene and our camera.
Zooming out
There are two more obstacles preventing us from seeing anything. First, we don’t have a light source, which means everything is pure black. Second, the position of our camera is inside the center of the sphere. So even if we were to have a light source, we would still see nothing. So first, let’s move the camera back a little bit:
camera.position.z = 3;
Let there be light
To finally see something, let’s extend mars.js with these three lines:
const light = new THREE.DirectionalLight(0xcccccc, 1);

light.position.set(5, 3, 5);
scene.add(light);We add a new DirectionalLight, setting its color to #ccc and its intensity to 100%. By default, its direction is set to 0, 1, 0, which means 1 on the y axis and 0 on the x and z axis. We want this to be set to 5, 3, 5 to achieve the same effect we usually see for planets in movies.


Adding Materials
To make the sphere look like Mars, we need to add some textures. I used two images to get the end result. One for the diffuse map and one for the bump map. Diffuse map is used for the color and texture of the planet while the bump map is used for creating the uneven surface, making the mountains stand out and indent the trenches and canals.
I will provide a GitHub link for the whole project at the end of the article with textures included, but you can also download the images from the following sources:
Create a new folder in your project structure called “textures” and put the images there. Then extend the script file with the following three lines:
material.map = new THREE.TextureLoader().load('textures/diffuse.jpg');
material.bumpMap = new THREE.TextureLoader().load('textures/bump.jpg');
material.bumpScale = 0.015;Note that in order to load local files, you need to run a webserver. I’ve been using the http-server package throughout this tutorial.
We set these for the MeshPhongMaterial we created earlier for the planet. I’ve found that using 0.015 for the bumpScale works best. Otherwise, the effect is too strong.

Lastly, let’s add the stars. For that, I’ve used this nice image from Jake Weirick on Unsplash. We can create another mesh for it, using MeshBasicMaterial:
const starsGeometry = new THREE.SphereGeometry(4, 32, 32);
const starsMaterial = new THREE.MeshBasicMaterial();
const starsMesh = new THREE.Mesh(starsGeometry, starsMaterial)

starsMaterial.map = new THREE.TextureLoader().load('textures/stars.jpg');
starsMaterial.side = THREE.BackSide;
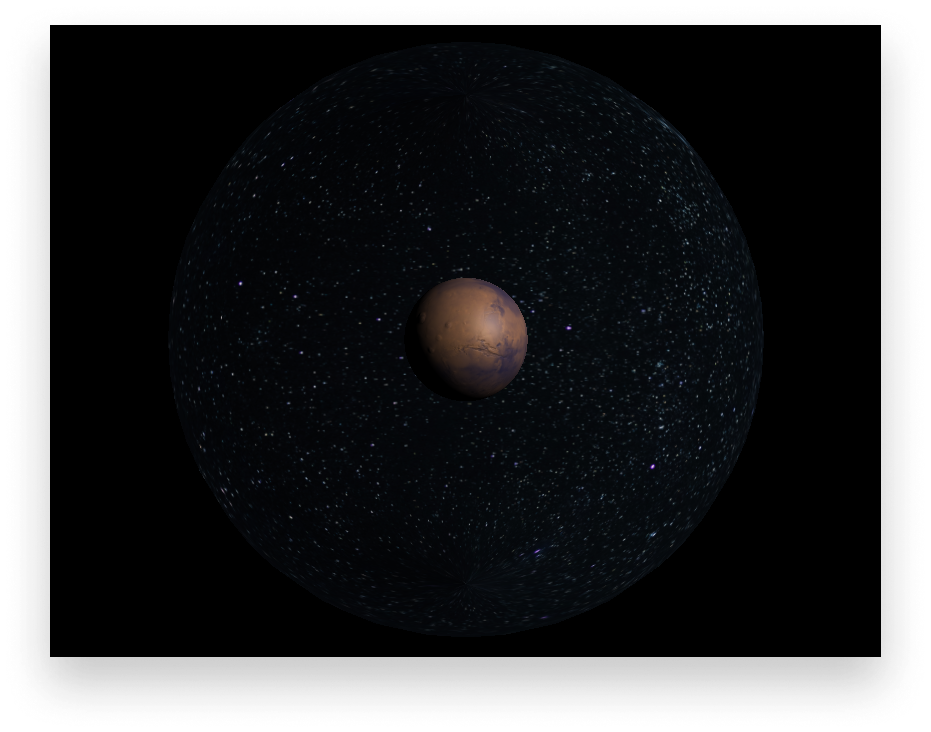
scene.add(starsMesh);To achieve the stars effect we use another sphere, but this time, with a larger radius set to 4. You also want only the backside of the sphere to be rendered. This is what we do by setting starsMaterial.side. If we zoom all the way out, you will see that essentially, we wrap the whole planet inside a bigger sphere. And it has the texture of the stars.
To wrap everything up, let’s add some animations.
Adding Interactivity
First, let’s add a small rotation to the planet. Extend the animate function with the following lines:
const animate = () => {
    requestAnimationFrame(animate);
    renderer.render(scene, camera);

    mesh.rotation.y -= 0.001;
};

animate();We also want to move the camera around the planet as the user moves around their cursor. For this, we can add the event listener below to the document:
document.addEventListener('mousemove', (e) => {
    camera.position.x = (e.x - (window.innerWidth / 2)) * 0.005;
    camera.lookAt(scene.position);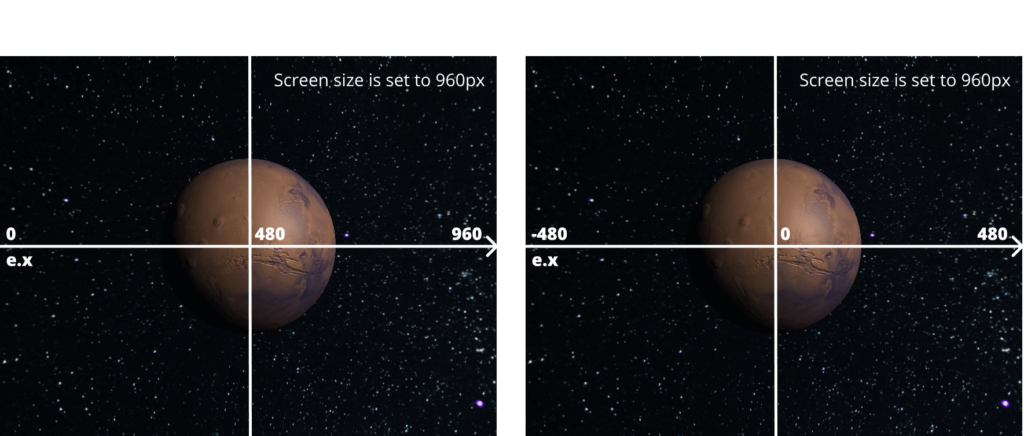
});The original x position of the camera is set to 0. When we move the mouse to the left side we want to decrease the value, and when we move the mouse to the right, we want to increase it.
The problem is that e.x which holds the horizontal position of the mouse, starts from 0 at the left edge of the screen and goes all the way up until it reaches the max-width. There’s no negative value. We want to begin with 0 in the middle of the screen. This is why we negate half of the screen’s width from e.x. To reduce the scale of the movement, I also multiplied the number by 0.005. This way, we only have a small amount of movement. And to keep the camera looking at our planet, we need to call camera.lookAt.
And now whenever the user moves their cursor around the planet, the camera changes with it:
If you would like to deepen your knowledge in Three.js, I highly suggest going through both the examples and the official documentation on threejs.org.
You’ll not only find throughout documentation about its API, but multiple step by step tutorials on how to get started, draw lines, create text and animations, load 3D models and so much more.
Hope you learned something new and useful. To get the source code of the final project, visit my Threejs repository on Github. 🪐 Thank you for taking the time to read this article, happy coding!

Rocket Launch Your Career
Speed up your learning progress with our mentorship program. Join as a mentee to unlock the full potential of Webtips and get a personalized learning experience by experts to master the following frontend technologies:
Courses


Recommended
Getting the Best Places in Town With the Google Maps API