2 Ways to Easily Expose Your Localhost to the World
If you are just starting out with a new project, spending time configuring deployments and cloud services just to show your progress to stakeholders is not always necessary.
Instead, you can use one of the following NPM packages to get your localhost exposed to the internet in a fraction of the time. These solutions work by proxying all requests to your locally running web server.
Using Localtunnel
Using Localtunnel is the fastest and simplest way to share your localhost with the world through the use of your terminal. It is also a completely free tool. To get started, install Localtunnel either to your project or globally to use it from any repository:
# Omit the `-g` flag if you don't want to install it globally
npm i -g localtunnel
After installing Localtunnel, use the lt command with the --port flag from your terminal to start Localtunnel serving your app on the specified port:
lt --port 8000This command will start Localtunnel serving your app that is running on port 8000. If you have your localhost running on a different port, for example, on 3000, you need to pass --port 3000 instead. This will expose your localhost on a random URL that you can share with others to see your work.
# Example URL for localtunnel
https://chubby-rocks-eat-92-249-187-35.loca.lt
If you try to open the URL, you will notice it leads to a 404 page. Once you stop running Localtunnel, it will stop serving your app. This URL also changes every time you rerun the process.
Subdomains
You also have the option to specify your own subdomain if you would like to keep sharing your work using the same URL. To set a custom subdomain, use the --subdomain flag:
-> lt --port 8000 --subdomain webtips
<- your url is: https://webtips.loca.ltNote that if the custom subdomain is already taken, you will be assigned a random URL.

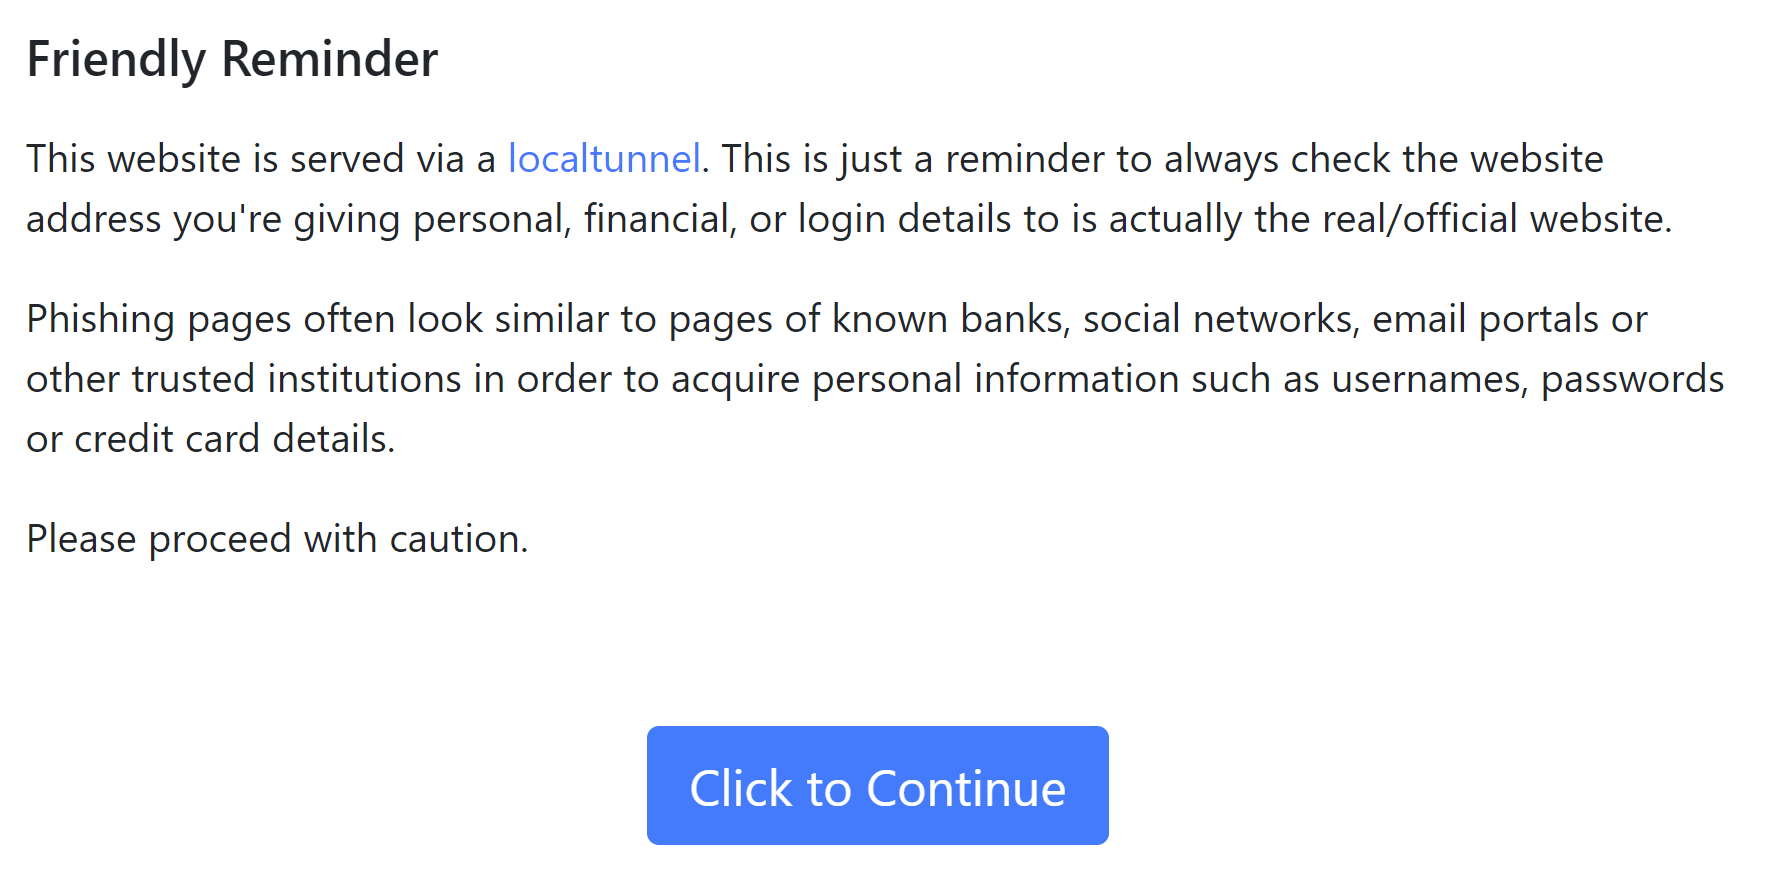
Once your app is live, you will be greeted with a reminder. This reminder page shows once per IP every 7 days. If you are running automated tests or crawls for your application, you can bypass the above reminder using one of the following options:
- Send a
Bypass-Tunnel-Reminderrequest header with any value. - Send a
User-Agentrequest header with a custom/non-standard browser value.
The Localtunnel API
Lastly, Localtunnel can also be used through an API with Node if you would like to integrate it into your application for things such as automated testing or feature branches. The following example creates a Localtunnel on port 3000:
const localtunnel = require('localtunnel')
const tunnel = await localtunnel({ port: 3000 })

// Here you can use `tunnel.url` to grab the public URL

// Run code when the tunnel closes
tunnel.on('close', () => { ... })Using Ngrok
Ngrok is another tool that can be used for sharing your localhost. Ngrok works similarly to Localtunnel, the only difference is that you need to have an account in order to start using it. To get started with Ngrok, install it from your terminal using the following command:
npm i -g ngrokNext, you need to authenticate Ngrok using your auth token that you can grab from the Ngrok dashboard once you've created an account. Using this auth token, run the following command inside your terminal to authenticate Ngrok:
ngrok authtoken <yourAuthToken>Next, you can run the following command in your terminal to expose your localhost running on port 3000 to the internet:
ngrok http 3000Similarly to Localtunnel, this will give you a random Ngrok subdomain that you can share with others. If you skip the authentication step, you will be greeted with the following error, where you can also use the link to open your dashboard to get access to the auth token.

Just like for Localtunnel, once you are authenticated, you will be greeted with a reminder for security reasons that the page you are about to visit is served through Ngrok. To bypass this reminder screen you can do one of the following:
- Send an
ngrok-skip-browser-warningrequest header with any value. - Send a custom/non-standard browser
User-Agentrequest header.
Ngrok also supports the use of custom subdomains, just like Localtunnel, however, it is only available in the paid plan. Lastly, it has a Node wrapper that you can use to programmatically connect via Ngrok:
const ngrok = require('ngrok')
const url = await ngrok.connect()
Comparison
So which one should you use? Both come with different feature sets. Localtunnel is a great free tool that can be used without any prior configuration, while Ngrok can also be used freely but comes with more features for a fee.
The following comparison table will help you decide which one of the two might be the best solution for your use case.
| Feature | Localtunnel | Ngrok |
|---|---|---|
| Has free plan | ✔️ | ✔️ |
| HTTPS support | ✔️ | ✔️ |
| Subdomain support | ✔️ | 💸 |
| Wildcard support | ❌ | 💸 |
| Node API | ✔️ | ✔️ |
Legend:
- ✔️- Feature available
- ❌- Feature unavailable
- 💸- Feature available only in paid plan

Rocket Launch Your Career
Speed up your learning progress with our mentorship program. Join as a mentee to unlock the full potential of Webtips and get a personalized learning experience by experts to master the following frontend technologies:


