Drawing With Robot.js
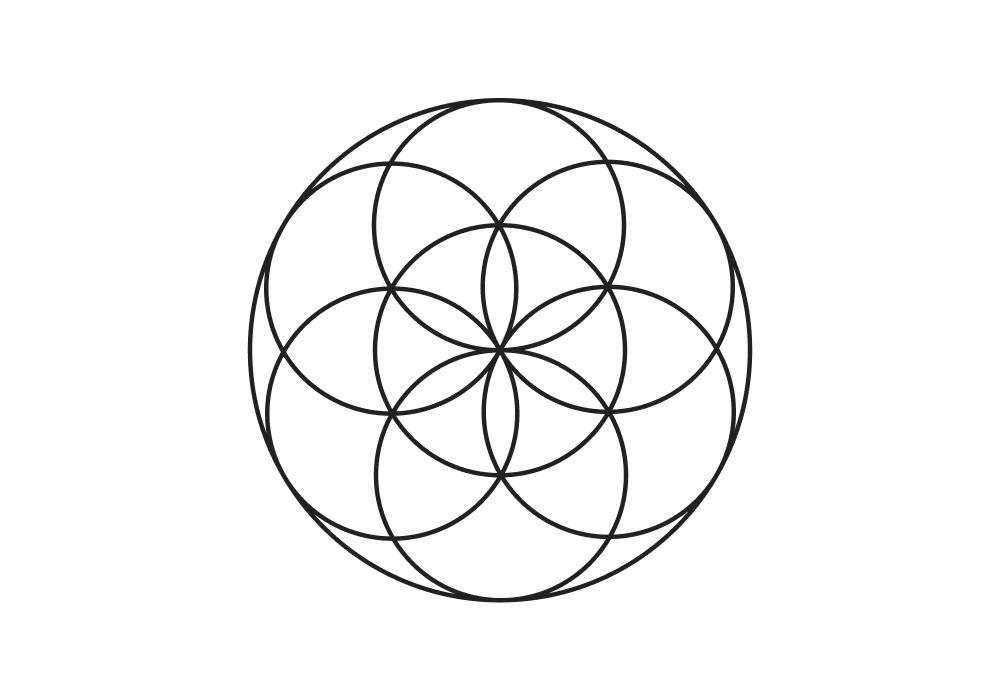
Lately, I’ve been experimenting with RobotJS, the desktop automation library which can be used for manipulating mouse and keyboard inputs. You can use it to automate tedious tasks that require repetitive user input in desktop applications that don’t have an API you can interact with. And what better way to demonstrate its power than to use it for drawing geometries. Namely the following:

Setting up the Project
First, we’re going to need a canvas. To avoid writing a drawing app just to try out RobotJS, I’m going to use Sketch Toy, but anything else should work just fine where you can use your mouse to draw.
Next, we will need to take care of the dependencies. Luckily, only RobotJS will be needed. Run npm i robotjs to get it installed.
{
    "name": "drawing-robot",
    "version": "1.0.0",
    "scripts": {
        "draw": "node draw.js"
    },
    "keywords": [],
    "author": "",
    "license": "ISC",
    "dependencies": {
        "robotjs": "0.6.0"
    }
}I have also added a draw script, so we can run the file with npm run draw.
Next, we will need to set up some variables. We want to draw into the middle of the canvas and to do that, we will need to get an anchor to the top left corner so we have a reference point.
This can be simply done by moving the cursor there and requesting the mouse position with RobotJS. Add the following two lines to draw.js:
const robot = require('robotjs');

console.log(robot.getMousePos());Then move your mouse to the top left corner of Sketch Toy and run the file. You’ll get back the x and y coordinates of the mouse. This will be our anchor point.
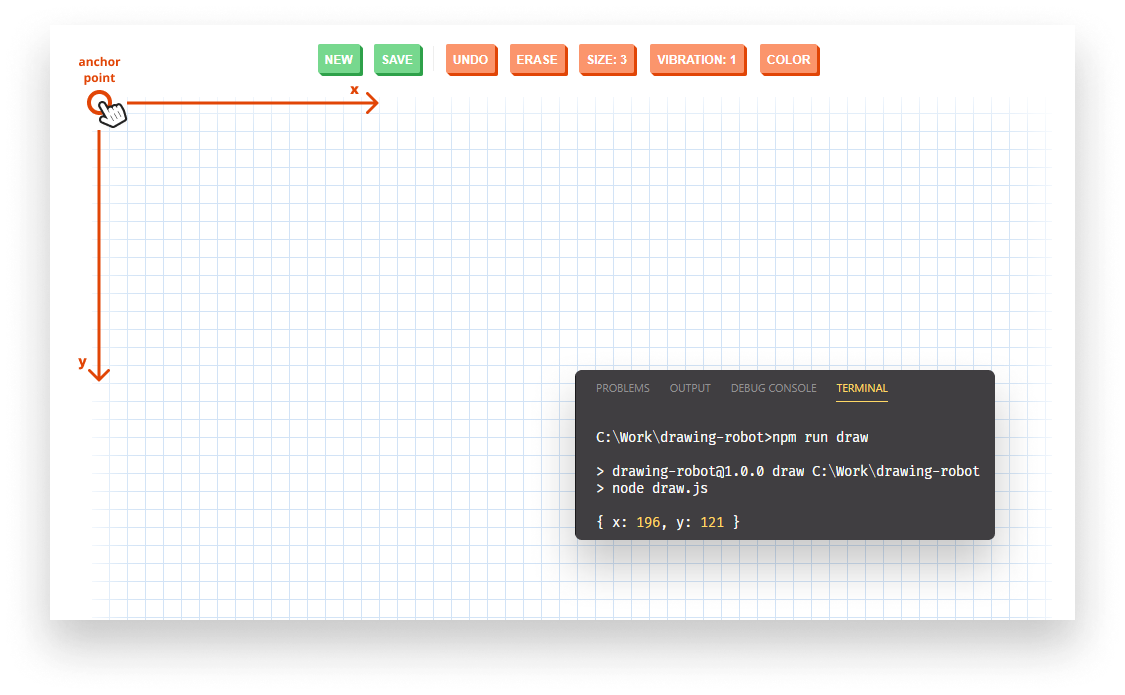
For me, its 196 for x and 121 for y. Yours will be different based on the resolution of your screen as well as how far you are scrolled down into the browser. We will also need the width and height of the canvas, this can be gathered pretty easily from DevTools:
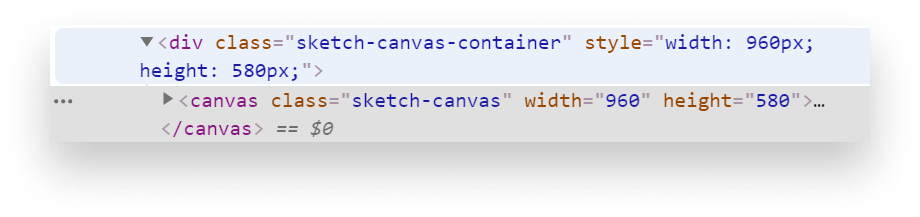
Add these values as variables into draw.js. Alongside with them, we can also define the radius for the outer and inner circle as well as the starting positions:
const outerRadius = 200;
const innerRadius = 100;

const canvas = { width: 960, height: 580 };
const anchor = { x: 196, y: 121 }

const startX = anchor.x + (canvas.width / 2);
const startY = anchor.y + (canvas.height / 2) - (outerRadius / 2);To get the middle, we start from the anchor and get half of the width and height. To start drawing in the middle, we will also need to subtract half of the radius from y.
With everything in place, we can start drawing the first circles.
Drawing the Seed of Life
Since we are going to draw multiple circles (exactly 8), I’ve outsourced the drawing code into a separate function. This will take the radius as an argument and will draw a circle starting at the mouse position:
const drawCircle = radius => {
    const mousePos = robot.getMousePos();

    for (let i = 0; i <= Math.PI * 2; i += 0.01) {
        // Convert polar coordinates to cartesian
        const x = mousePos.x + (radius * Math.cos(i));
        const y = mousePos.y + (radius * Math.sin(i));

        robot.dragMouse(x, y);
    }
};To keep the mouse button pressed down, all we need to do is call robot.dragMouse with the passed x and y positions. In order to call this function 8 times, I’ve created a circles array with the x, y position of the circles as well as their radius:
const circles = [
    { x: startX, y: startY, radius: outerRadius },
    { x: startX, y: startY, radius: innerRadius }
];Then we can loop through them using a forEach:
robot.setMouseDelay(2);

circles.forEach(circle => {
    robot.moveMouse(circle.x, circle.y);
    robot.mouseToggle('down');

    drawCircle(circle.radius);

    robot.mouseToggle('up');
});To speed things up, you can use setMouseDelay with the number of milliseconds passed. This means that 2 milliseconds will pass between each mouse event. By default, it is set to 10.
Then for each circle, we can move the mouse into position, and press down the left mouse button using mouseToggle. We also need to release it at the end to avoid drawing unnecessary lines between circles. If we run the function now, we will get the first two circles drawn onto the screen. 🎉
We need to do this 6 more times. Getting the top and bottom middle circles are going to be relatively easy. We keep the x position and we just have to +/- the radius for the y position:
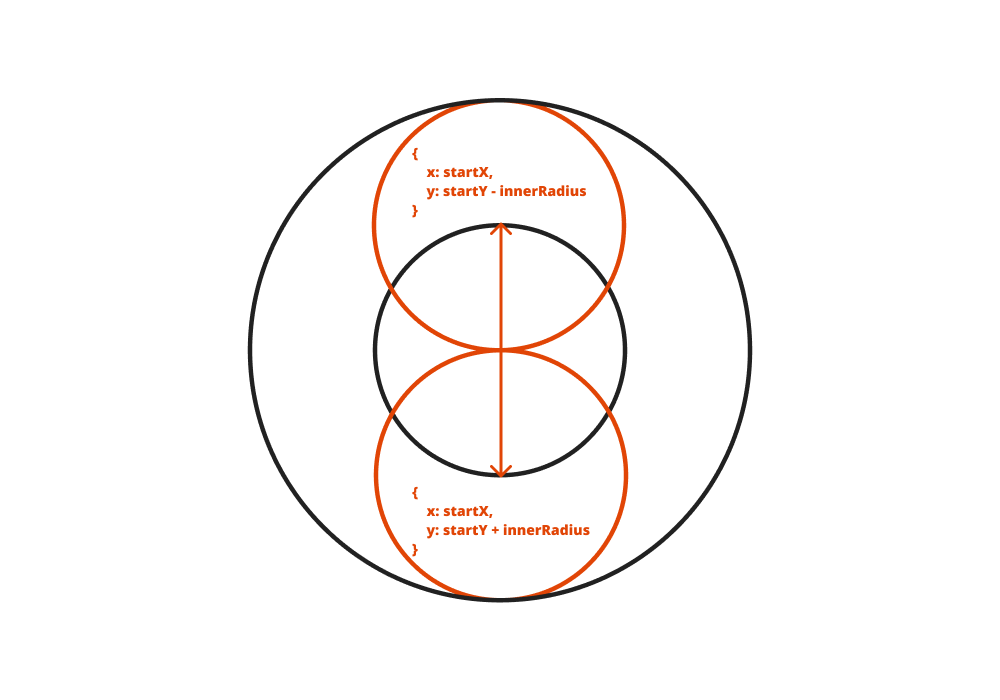
We can extend the circles array with the following two new lines:
 const circles = [
     { x: startX, y: startY, radius: outerRadius },
     { x: startX, y: startY, radius: innerRadius },
+    { x: startX, y: startY - innerRadius, radius: innerRadius },
+    { x: startX, y: startY + innerRadius, radius: innerRadius }
];The remaining four will be drawn on each intersection of the three circles.
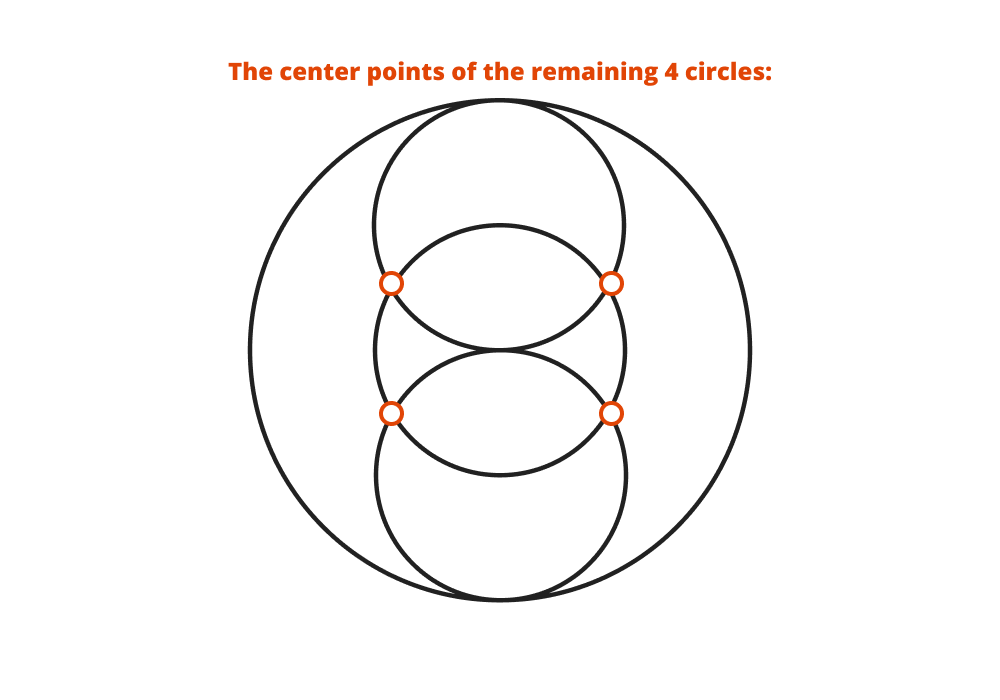

Getting the Intersection
To get the intersection of two circles, I’ve turned to stackoverflow where I found a neat function for retrieving the intersections. I’ve pulled this function into draw.js and renamed the arguments so it expects two circle object:
const getIntersection = (circle1, circle2) => { ... }To avoid calling the function more than it’s needed, we need to store the result in a variable. This also means that it’s best to store each circle object in separate variables as well:
let intersection;

const outerCircle  = { x: startX, y: startY, radius: outerRadius };
const innerCircle  = { x: startX, y: startY, radius: innerRadius };
const topCircle    = { x: startX, y: startY - innerRadius, radius: innerRadius };
const bottomCircle = { x: startX, y: startY + innerRadius, radius: innerRadius };

intersection = getIntersection(innerCircle, topCircle);

const topLeftCircle =  { x: intersection[0], y: intersection[2], radius: innerRadius };
const topRightCircle = { x: intersection[1], y: intersection[2], radius: innerRadius };We start with the four circles we had initially, then we get the intersecting points of the middle and top one. We can use the returned values as our new x and y position. The same needs to be done for the bottom two:
intersection = getIntersection(innerCircle, bottomCircle);

const bottomLeftCircle =  { x: intersection[0], y: intersection[2], radius: innerRadius };
const bottomRightCircle = { x: intersection[1], y: intersection[2], radius: innerRadius };With every variable in place, we can rewrite our circles array in the following way:
const circles = [
    outerCircle,
    innerCircle,
    topCircle,
    bottomCircle,
    topLeftCircle,
    topRightCircle,
    bottomLeftCircle,
    bottomRightCircle
];And finally, after running the script one more time, here is the end result:
Summary
This pretty much sums up mouse movements in RobotJS. The official documentation is well written, I highly recommend diving into it if you would like to find out more. I have the whole project hosted on GitHub if you would like to tweak around with the final result. You can reach it at the link above.
Now your next task is to extend this example and draw the flower of life. Thank you for reading through, happy drawing!

Rocket Launch Your Career
Speed up your learning progress with our mentorship program. Join as a mentee to unlock the full potential of Webtips and get a personalized learning experience by experts to master the following frontend technologies:
Courses


Recommended

How to Create Skeleton Loaders in CSS